
Planting peas indoors might sound like a whimsical dream, especially if you’re yearning for that fresh-from-the-garden taste before the last frost bids farewell. But guess what? It’s totally achievable, and I’m here to show you how! For centuries, gardeners have sought ways to extend the growing season, and bringing the garden indoors is a time-honored tradition. Think of it as a little rebellion against the calendar, a way to nurture life and flavor even when the world outside is still slumbering.
Why should you bother with planting peas indoors? Well, for starters, imagine the joy of harvesting sweet, tender pea shoots weeks before your neighbors even think about sowing seeds outdoors. Beyond the early harvest, indoor planting gives you a head start, protecting your delicate seedlings from unpredictable weather and hungry pests. Plus, let’s be honest, there’s something incredibly therapeutic about tending to a little patch of green indoors, especially during those long winter months. In this article, I’ll share my favorite DIY tricks and hacks to ensure your indoor pea-growing adventure is a resounding success. Get ready to unleash your inner gardener and enjoy the delicious rewards!
Planting Peas Indoors: A Step-by-Step Guide to Early Spring Harvests
Hey there, fellow gardening enthusiasts! Eager to get a jump start on spring and enjoy fresh peas sooner? I’m right there with you! Planting peas indoors is a fantastic way to get a head start, especially if you live in a region with a short growing season. This guide will walk you through every step, from choosing the right seeds to transplanting your seedlings outdoors. Let’s get our hands dirty!
Choosing the Right Pea Variety
Not all pea varieties are created equal when it comes to indoor starting. You’ll want to choose bush varieties that are more compact and manageable indoors. Here are a few of my favorites:
* Little Marvel: A classic dwarf variety that produces sweet, flavorful peas.
* Sugar Ann: An early-maturing snap pea that’s perfect for snacking straight from the vine.
* Tom Thumb: An ultra-compact variety that’s ideal for small spaces.
Avoid vining varieties like ‘Sugar Snap’ or ‘Oregon Sugar Pod II’ unless you have a *really* tall trellis system set up indoors. They can get unruly quickly!
Gathering Your Supplies
Before we dive into planting, let’s make sure we have everything we need. Here’s a checklist:
* Pea seeds: Choose your preferred bush variety.
* Seed starting trays or pots: I prefer trays with individual cells for easy transplanting.
* Seed starting mix: This is crucial! Don’t use garden soil; it’s too heavy and can harbor diseases.
* Watering can or spray bottle: For gentle watering.
* Grow lights (optional but recommended): Peas need plenty of light, especially indoors.
* Small trowel or spoon: For handling the seed starting mix.
* Labels and a marker: To keep track of your pea varieties.
* Well-draining pots (for transplanting): Larger pots for when the seedlings outgrow the seed trays.
Planting Your Pea Seeds
Now for the fun part! Let’s get those pea seeds in the soil.
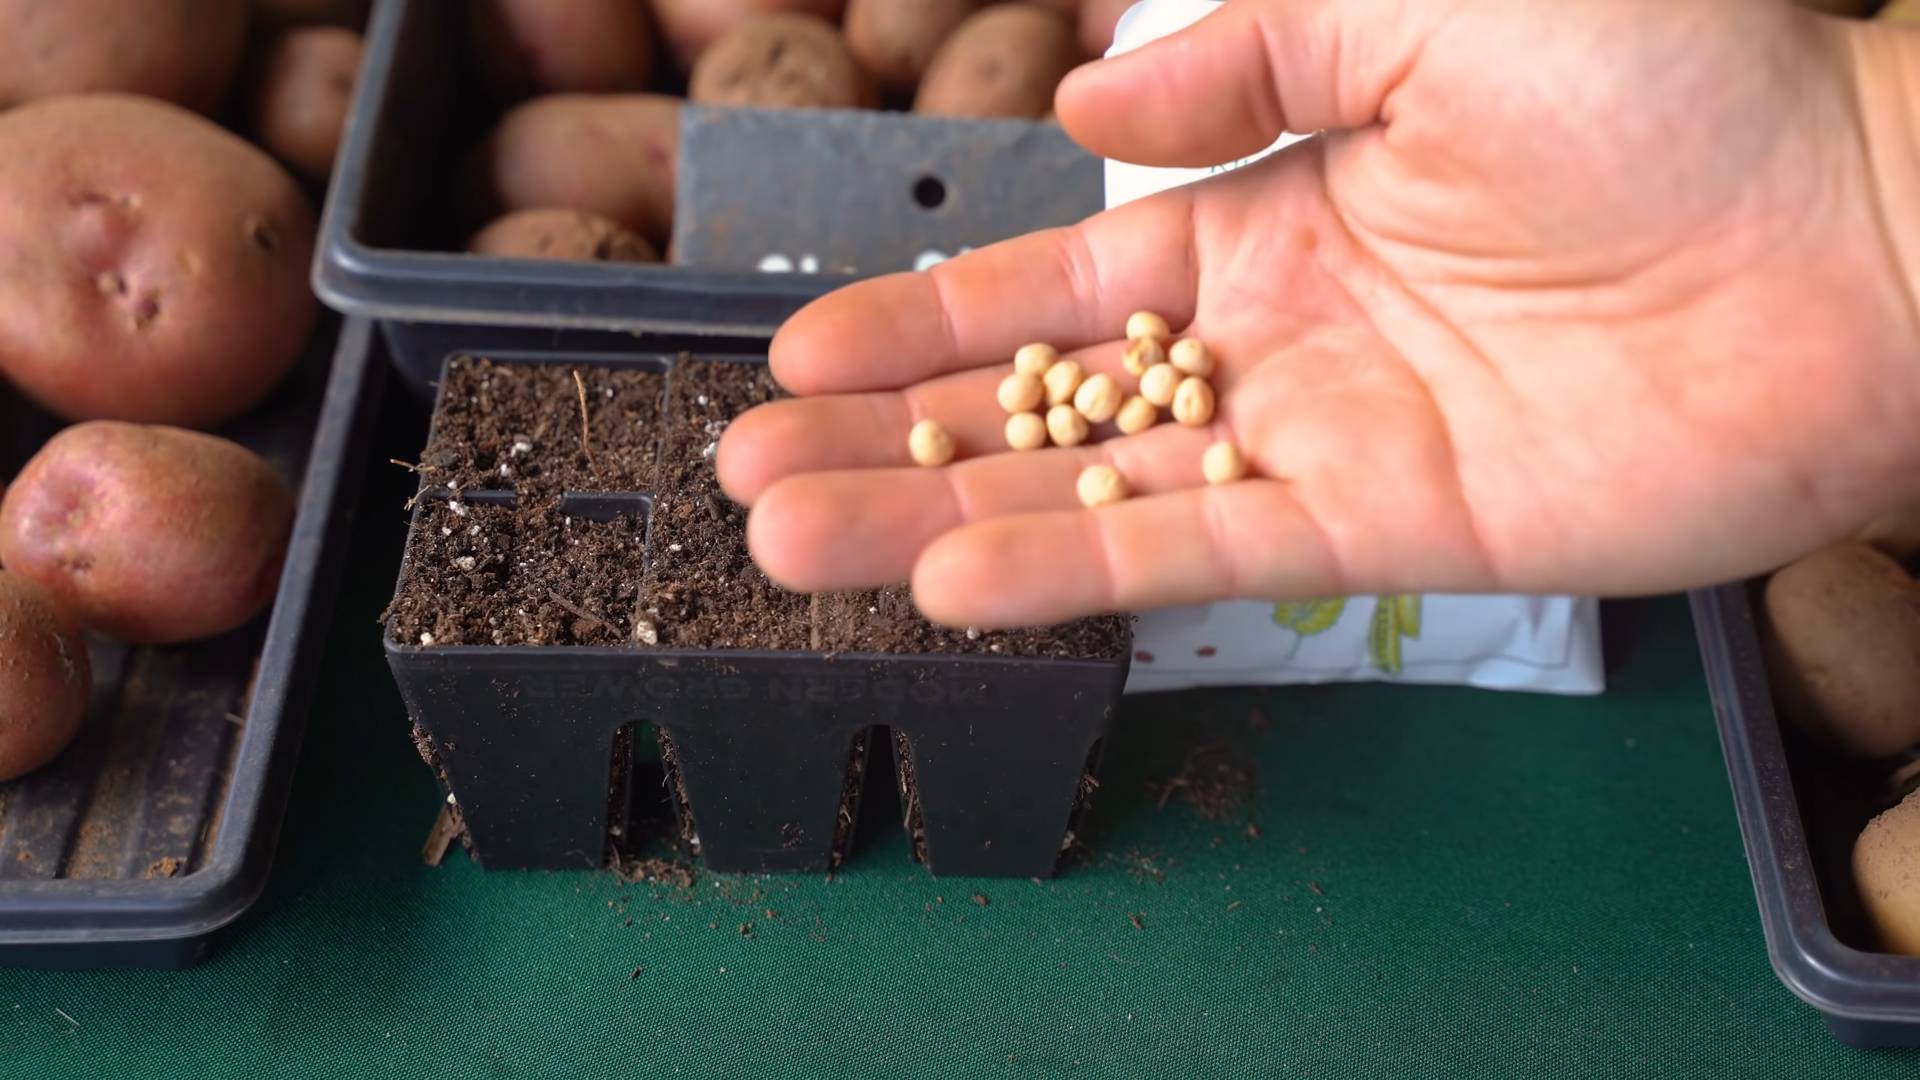
1. Prepare the Seed Starting Trays: Fill your seed starting trays or pots with seed starting mix. Gently tap the trays to settle the mix, but don’t pack it down too tightly. You want it to be light and airy.
2. Sow the Seeds: Make a small indentation in the center of each cell or pot, about 1 inch deep. I usually use my finger for this. Place 2-3 pea seeds in each indentation. This increases the chances of at least one seed germinating.
3. Cover the Seeds: Gently cover the seeds with seed starting mix. Lightly pat the surface to ensure good contact between the seeds and the soil.
4. Water Thoroughly: Water the trays or pots gently but thoroughly. You want the soil to be moist but not soggy. I prefer using a spray bottle to avoid disturbing the seeds.
5. Label Your Trays: Don’t forget to label your trays with the pea variety and the date you planted them. Trust me, you’ll thank yourself later!
6. Provide Warmth: Pea seeds germinate best in temperatures between 60-70°F (15-21°C). You can place the trays on a heat mat to speed up germination, but it’s not essential.
Caring for Your Pea Seedlings
Once your pea seeds have germinated (usually within 7-14 days), it’s time to focus on providing them with the care they need to thrive.
1. Provide Adequate Light: This is where grow lights come in handy. Peas need at least 6-8 hours of direct light per day. If you don’t have grow lights, place the trays in a sunny south-facing window. However, be aware that seedlings grown in windows often stretch towards the light, resulting in leggy growth. Rotate the trays regularly to ensure even light exposure.
2. Water Regularly: Keep the soil consistently moist, but not waterlogged. Water when the top inch of soil feels dry to the touch. Avoid overwatering, as this can lead to root rot.
3. Thin Seedlings (If Necessary): If more than one seed germinated in each cell or pot, thin them out to one strong seedling per cell. Use small scissors to snip off the weaker seedlings at the soil line. Don’t pull them out, as this can disturb the roots of the remaining seedling.
4. Fertilize Sparingly: Once the seedlings have developed their first true leaves (the leaves that appear after the initial seed leaves), you can start fertilizing them with a diluted liquid fertilizer. I use a balanced fertilizer diluted to half strength. Fertilize every 2-3 weeks.
5. Provide Support (If Needed): Even bush varieties can benefit from some support as they grow. You can insert small stakes or chopsticks into the pots to provide support for the stems.
Hardening Off Your Pea Seedlings
Before transplanting your pea seedlings outdoors, it’s crucial to “harden them off.” This process gradually acclimates them to the outdoor environment, reducing the risk of shock.
1. Start Gradually: Begin by placing the trays or pots outdoors in a sheltered location for just a few hours each day. Choose a day that is cloudy and mild.
2. Increase Exposure: Gradually increase the amount of time the seedlings spend outdoors each day, exposing them to more sunlight and wind.
3. Monitor the Weather: Protect the seedlings from frost, strong winds, and heavy rain. If the weather turns unfavorable, bring them back indoors.
4. Harden Off for a Week: The hardening off process should take about a week. By the end of the week, the seedlings should be able to tolerate full sun and outdoor conditions.
Transplanting Your Pea Seedlings Outdoors
Now that your pea seedlings are hardened off, it’s time to transplant them into your garden.
1. Choose the Right Location: Peas prefer a sunny location with well-drained soil. Amend the soil with compost or other organic matter to improve its fertility and drainage.
2. Prepare the Planting Area: Dig holes that are slightly larger than the root balls of the seedlings. Space the holes according to the recommendations for your chosen pea variety. Bush varieties typically need about 4-6 inches of spacing between plants.
3. Gently Remove the Seedlings: Carefully remove the seedlings from their trays or pots. Gently loosen the root ball if it’s tightly bound.
4. Plant the Seedlings: Place the seedlings in the holes and backfill with soil. Gently firm the soil around the base of the plants.
5. Water Thoroughly: Water the transplanted seedlings thoroughly.
6. Provide Support: Even bush varieties benefit from some support. You can use small stakes, a trellis, or even just some branches to help them stay upright.
7. Protect from Pests: Peas are susceptible to several pests, including aphids and slugs. Monitor your plants regularly and take action if you see any signs of infestation. I like to use organic pest control methods, such as insecticidal soap or diatomaceous earth.
Ongoing Care
Once your pea plants are established in the garden, continue to provide them with the care they need to thrive.
1. Water Regularly: Keep the soil consistently moist, especially during dry periods.
2. Fertilize as Needed: Peas are relatively light feeders, but you can fertilize them occasionally with a balanced fertilizer.
3. Weed Regularly: Keep the area around your pea plants free of weeds.
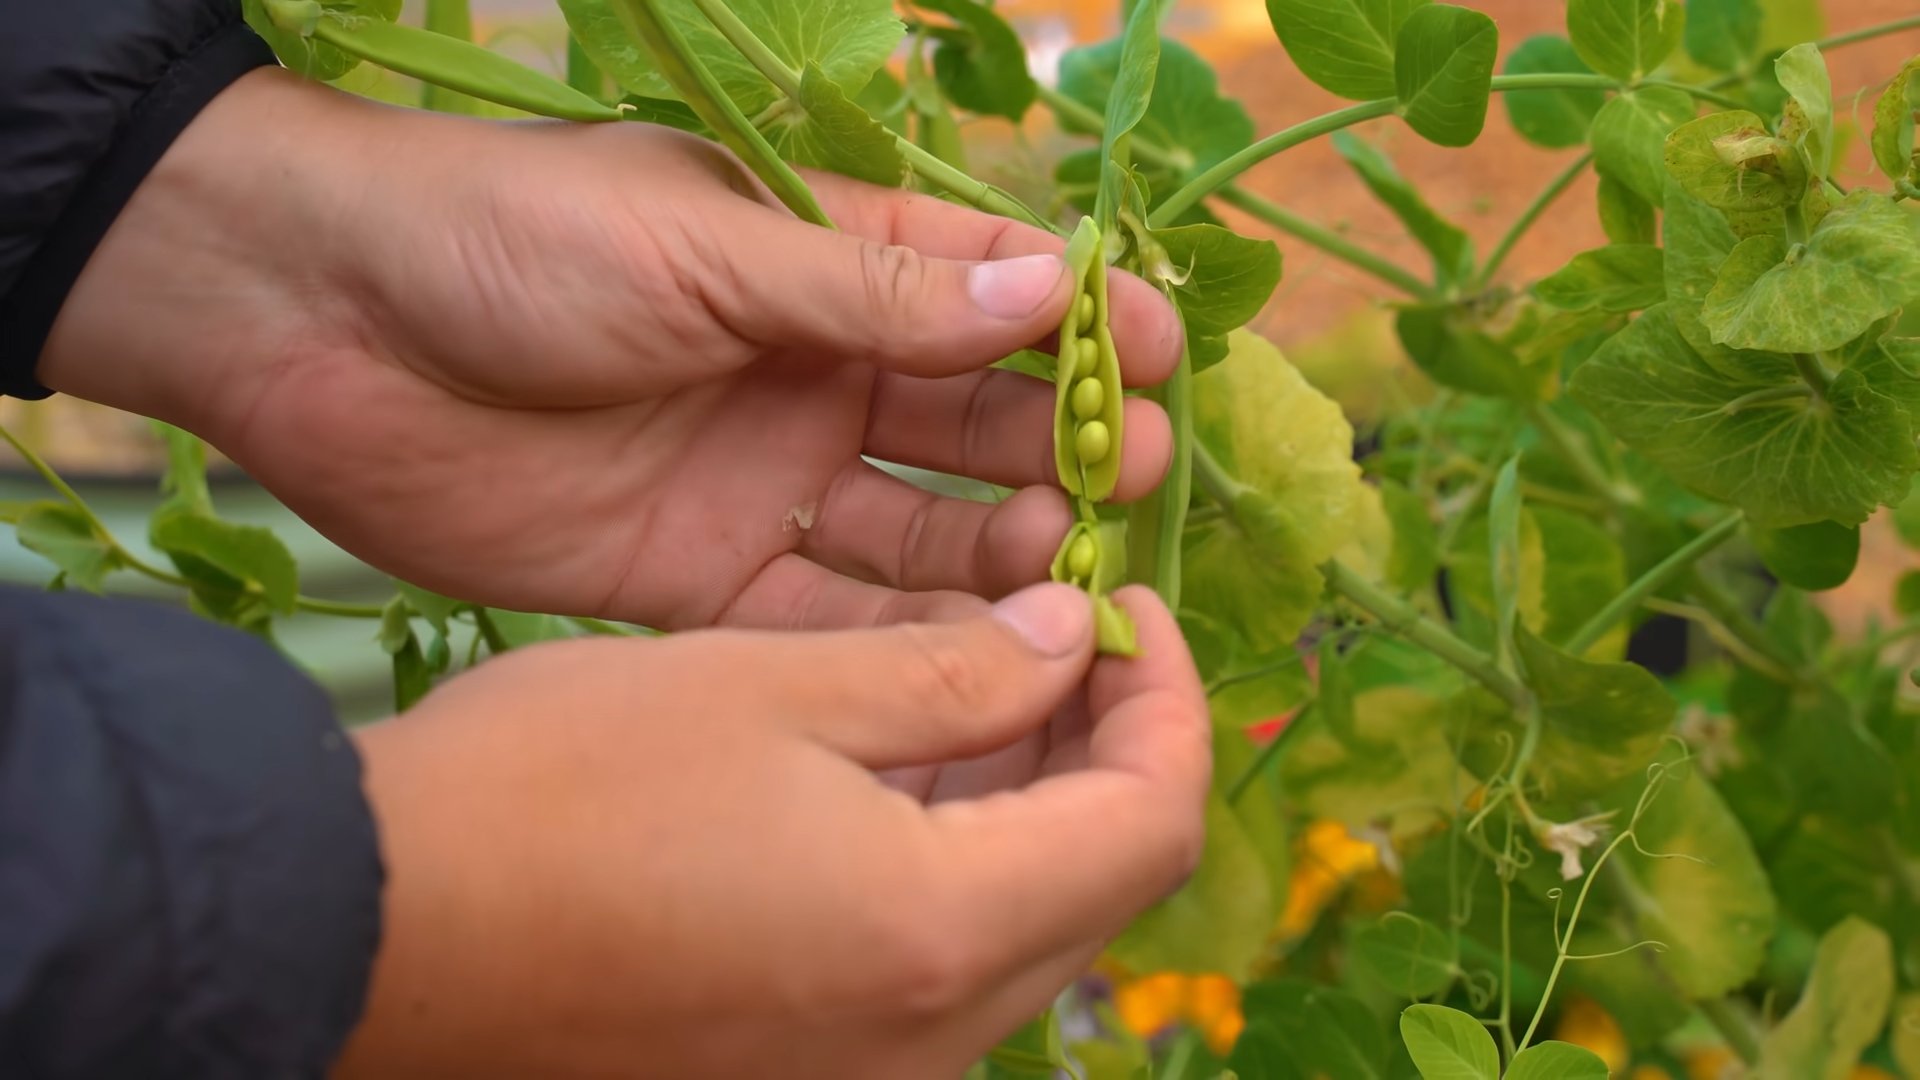
4. Harvest Regularly: Harvest your peas when the pods are plump and the peas inside are fully developed. Regular harvesting encourages the plants to produce more peas.
Troubleshooting
Even with the best care, you may encounter some problems when growing peas. Here are a few common issues and how to address them:
* Poor Germination: If your pea seeds aren’t germinating, it could be due to several factors, including cold soil, old seeds, or overwatering. Make sure the soil temperature is between 60-70°F (15-21°C), use fresh seeds, and avoid overwatering.
* Leggy Seedlings: Leggy seedlings are a sign that they’re not getting enough light. Provide them with more light, either by moving them to a sunnier location or by using grow lights.
* Yellowing Leaves: Yellowing leaves can be a sign of nutrient deficiency. Fertilize your plants with a balanced fertilizer.
* Pest Infestations: Monitor your plants regularly for pests and take action if you see any signs of infestation.
* Powdery Mildew: Powdery mildew is a fungal disease that can affect peas. To prevent powdery mildew, provide good air circulation and avoid overhead watering. If you see signs of powdery mildew, treat the plants with a fungicide.
Conclusion
So, there you have it! Planting peas indoors is not only achievable, but it’s also a rewarding experience that extends your growing season and provides you with fresh, delicious peas even when the weather outside is less than ideal. We’ve walked through the simple steps, from choosing the right pea variety to ensuring proper drainage and light. Now, it’s time to put that knowledge into action.
Why is this DIY trick a must-try? Because it offers a multitude of benefits. Firstly, it allows you to get a head start on the growing season, giving you a jump on your outdoor garden. Imagine harvesting sweet, tender peas weeks before your neighbors even think about planting them! Secondly, it provides a controlled environment, protecting your delicate seedlings from harsh weather conditions, pests, and diseases that can plague outdoor gardens. This translates to healthier, stronger plants and a more abundant harvest. Thirdly, it’s incredibly satisfying to nurture life from a tiny seed to a thriving plant, especially when you get to enjoy the fruits (or, in this case, the vegetables) of your labor.
But don’t stop there! Experiment with different pea varieties to discover your favorites. Try bush peas for compact growth or climbing peas for a vertical garden. Consider using different types of containers, from traditional pots to repurposed materials like plastic bottles or milk cartons. You can also explore companion planting by adding herbs like cilantro or dill to your pea containers, which can help deter pests and enhance the flavor of your peas.
Don’t be afraid to get creative and personalize your indoor pea-growing experience. The possibilities are endless!
We are confident that you’ll find planting peas indoors to be a fun, educational, and ultimately delicious endeavor. The satisfaction of harvesting your own homegrown peas, knowing that you nurtured them from seed to table, is truly unparalleled.
So, grab your seeds, gather your supplies, and get ready to embark on this exciting gardening adventure. We encourage you to try this DIY trick and share your experiences with us! Let us know what varieties you planted, what challenges you faced, and what successes you celebrated. Share your photos, tips, and tricks in the comments section below. We can’t wait to hear about your indoor pea-growing journey! Happy planting!
Frequently Asked Questions (FAQs)
What are the best pea varieties to plant indoors?
Choosing the right pea variety is crucial for successful indoor growing. Bush pea varieties, such as ‘Little Marvel,’ ‘Sugar Ann,’ and ‘Patio Pride,’ are generally the best choice for indoor containers because they are compact and don’t require extensive trellising. Dwarf varieties are also well-suited. Climbing pea varieties, like ‘Sugar Snap’ or ‘Oregon Sugar Pod,’ can also be grown indoors, but they will require a sturdy trellis or support system to climb. Consider the available space and lighting when selecting your pea variety.
How much light do indoor pea plants need?
Peas need plenty of light to thrive. Ideally, they require at least 6-8 hours of direct sunlight per day. If you don’t have a sunny windowsill, you can supplement with grow lights. Position the grow lights about 6-12 inches above the plants and keep them on for 12-16 hours per day. Insufficient light can lead to leggy, weak plants with poor yields. Rotate your pea plants regularly to ensure even light exposure on all sides.
What type of soil is best for planting peas indoors?
Peas prefer well-draining soil that is rich in organic matter. A good potting mix specifically formulated for vegetables is ideal. Avoid using garden soil, as it can be too heavy and may contain pests or diseases. You can also amend your potting mix with compost or aged manure to improve its fertility and drainage. Ensure the soil pH is between 6.0 and 7.0 for optimal pea growth.
How often should I water my indoor pea plants?
Water your pea plants regularly, keeping the soil consistently moist but not waterlogged. Check the soil moisture level daily by sticking your finger about an inch into the soil. If it feels dry, it’s time to water. Water deeply, allowing the excess water to drain out of the bottom of the container. Avoid overwatering, as this can lead to root rot. Adjust your watering frequency based on the temperature, humidity, and size of your plants.
Do I need to fertilize my indoor pea plants?
Peas are relatively light feeders, but they will benefit from occasional fertilization. Use a balanced liquid fertilizer diluted to half strength every 2-3 weeks. Avoid over-fertilizing, as this can lead to excessive foliage growth at the expense of pea production. You can also amend the soil with compost or aged manure at planting time to provide a slow-release source of nutrients.
How do I support climbing pea varieties indoors?
Climbing pea varieties require a trellis or support system to climb. You can use a variety of materials, such as bamboo stakes, netting, or even branches. Insert the trellis into the container at planting time, ensuring it is sturdy enough to support the weight of the mature plants. Train the pea tendrils to climb the trellis by gently guiding them around the supports.
How long does it take for peas to germinate indoors?
Pea seeds typically germinate within 7-14 days, depending on the temperature and moisture levels. To speed up germination, you can soak the seeds in water for 24 hours before planting. Keep the soil consistently moist but not waterlogged during the germination period. Once the seedlings emerge, provide them with plenty of light and adequate ventilation.
When can I harvest my indoor peas?
The harvest time for peas depends on the variety and growing conditions. Generally, you can start harvesting peas about 60-70 days after planting. Sugar snap peas are ready to harvest when the pods are plump and the peas inside are fully developed. Shelling peas are ready when the pods are firm and the peas are large and round. Snow peas are harvested when the pods are flat and tender. Harvest regularly to encourage continued production.
What are some common pests and diseases that affect indoor pea plants?
While indoor pea plants are generally less susceptible to pests and diseases than outdoor plants, they can still be affected. Common pests include aphids, spider mites, and whiteflies. These pests can be controlled with insecticidal soap or neem oil. Common diseases include powdery mildew and root rot. Powdery mildew can be prevented by providing good air circulation and avoiding overhead watering. Root rot can be prevented by ensuring proper drainage and avoiding overwatering.
Can I transplant my indoor pea plants outdoors?
Yes, you can transplant your indoor pea plants outdoors once the weather has warmed up and the risk of frost has passed. Harden off the plants by gradually exposing them to outdoor conditions for a week or two before transplanting. Choose a sunny location with well-draining soil. Water the plants thoroughly after transplanting and provide them with support if necessary.

Leave a Comment