
Grow Basil Kitchen: Imagine stepping into your kitchen, not just to cook, but to snip fresh, fragrant basil leaves straight from your own little garden. Sounds idyllic, right? Well, it’s more achievable than you might think! For centuries, basil has been cherished not only for its culinary prowess but also for its symbolic meaning – representing love, good wishes, and even protection in some cultures.
But let’s be honest, sometimes life gets in the way, and a sprawling outdoor garden just isn’t feasible. That’s where the magic of DIY comes in! I’m here to share some simple, effective tricks and hacks that will empower you to grow basil kitchen, regardless of your space or gardening experience.
Why do you need this? Because fresh basil elevates any dish, and having it readily available is a game-changer. Plus, nurturing a plant is incredibly rewarding, offering a touch of nature and tranquility amidst the hustle and bustle of daily life. So, ditch the wilted supermarket herbs and let’s embark on this exciting journey to cultivate your own thriving basil haven, right in your kitchen!
Grow Your Own Basil Bonanza: A Kitchen Herb Garden Guide
Hey there, fellow herb enthusiasts! Ever dreamt of having fresh, fragrant basil right at your fingertips? Well, ditch the grocery store packets and get ready to transform your kitchen into a mini basil paradise! I’m going to walk you through everything you need to know to successfully grow basil indoors, from seed to scrumptious pesto. Let’s get our hands dirty (metaphorically, for now!) and cultivate some green goodness.
Choosing Your Basil Variety
First things first, let’s talk basil types. Did you know there’s more than just the standard Genovese basil? Choosing the right variety can really enhance your culinary adventures. Here are a few popular options:
* **Genovese Basil:** The classic choice! Perfect for pesto, pasta sauces, and all your Italian favorites. It has large, vibrant green leaves and a strong, sweet flavor.
* **Thai Basil:** With its slightly anise-like flavor, Thai basil is a must-have for Asian cuisine. Its leaves are smaller and more pointed than Genovese basil, and the stems are often purple.
* **Lemon Basil:** As the name suggests, this basil variety boasts a delightful lemony aroma and flavor. It’s fantastic in salads, teas, and even desserts.
* **Purple Basil:** Not only does purple basil add a pop of color to your kitchen garden, but it also has a unique, slightly spicy flavor. Use it in salads, vinegars, or as a garnish.
* **Globe Basil:** This compact variety is perfect for small spaces. It has a milder flavor than Genovese basil and forms a neat, rounded shape.
I personally love having a mix of Genovese and Thai basil on hand, but feel free to experiment and find your favorites!
Gathering Your Supplies
Okay, now that we’ve picked our basil varieties, let’s gather our supplies. Here’s what you’ll need:
* **Basil Seeds:** Choose high-quality seeds from a reputable source.
* **Seed Starting Tray or Small Pots:** These will be your basil’s temporary homes.
* **Seed Starting Mix:** This is a light, airy soil mix specifically designed for seedlings.
* **Larger Pots (4-6 inches in diameter):** You’ll need these when your seedlings are ready to be transplanted.
* **Potting Soil:** A good quality potting soil is essential for healthy basil growth.
* **Grow Lights (Optional but Recommended):** Basil needs plenty of light, especially indoors. Grow lights can supplement natural light and ensure strong, healthy growth.
* **Watering Can or Spray Bottle:** For gentle watering.
* **Small Shovel or Spoon:** For transplanting.
* **Labels:** To keep track of your different basil varieties.
Starting Your Basil Seeds
Alright, let’s get those seeds germinating! This is where the magic begins.
1. **Prepare Your Seed Starting Tray or Pots:** Fill your seed starting tray or small pots with seed starting mix. Gently pat it down to remove any air pockets.
2. **Sow the Seeds:** Sprinkle a few basil seeds on top of the soil in each cell or pot. Don’t overcrowd them!
3. **Cover the Seeds:** Lightly cover the seeds with a thin layer of seed starting mix.
4. **Water Gently:** Use a spray bottle or watering can to gently moisten the soil. Avoid overwatering, as this can lead to fungal diseases.
5. **Create a Humid Environment:** Cover the seed starting tray or pots with a clear plastic lid or plastic wrap to create a humid environment. This will help the seeds germinate.
6. **Place in a Warm Location:** Place the seed starting tray or pots in a warm location, such as on top of a refrigerator or near a sunny window. The ideal temperature for basil seed germination is between 70-80°F (21-27°C).
7. **Monitor and Water:** Check the soil moisture daily and water as needed to keep it consistently moist but not soggy.
8. **Remove the Cover:** Once the seeds have germinated (usually within 5-10 days), remove the plastic lid or plastic wrap.
9. **Provide Light:** Place the seedlings under grow lights or in a sunny window. If using a window, rotate the seedlings regularly to prevent them from leaning towards the light.
Transplanting Your Basil Seedlings
Once your basil seedlings have developed a few sets of true leaves (the leaves that look like miniature basil leaves), it’s time to transplant them into larger pots.
1. **Prepare Your Larger Pots:** Fill your larger pots (4-6 inches in diameter) with potting soil.
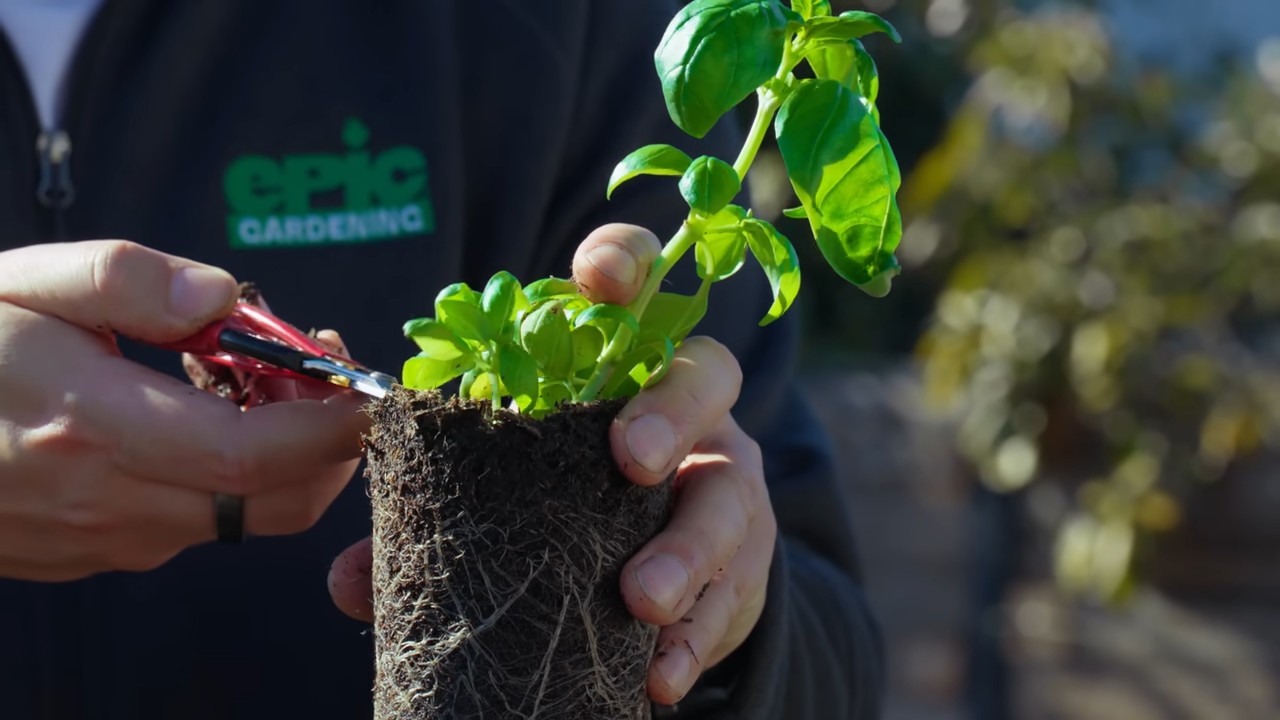
2. **Gently Remove the Seedlings:** Carefully remove the basil seedlings from the seed starting tray or pots. Be gentle to avoid damaging the roots. I like to use a small spoon to help lift them out.
3. **Plant the Seedlings:** Make a small hole in the center of the potting soil in each pot. Place the basil seedling in the hole and gently backfill with soil.
4. **Water Thoroughly:** Water the transplanted seedlings thoroughly.
5. **Provide Light:** Place the transplanted seedlings under grow lights or in a sunny window.
Caring for Your Basil Plants
Now that your basil plants are happily settled in their new homes, it’s time to provide them with the care they need to thrive.
* **Light:** Basil needs at least 6-8 hours of sunlight per day. If you don’t have a sunny window, use grow lights to supplement the natural light.
* **Watering:** Water your basil plants regularly, keeping the soil consistently moist but not soggy. Avoid overwatering, as this can lead to root rot. I usually water when the top inch of soil feels dry to the touch.
* **Fertilizing:** Feed your basil plants every 2-3 weeks with a balanced liquid fertilizer. Follow the instructions on the fertilizer label.
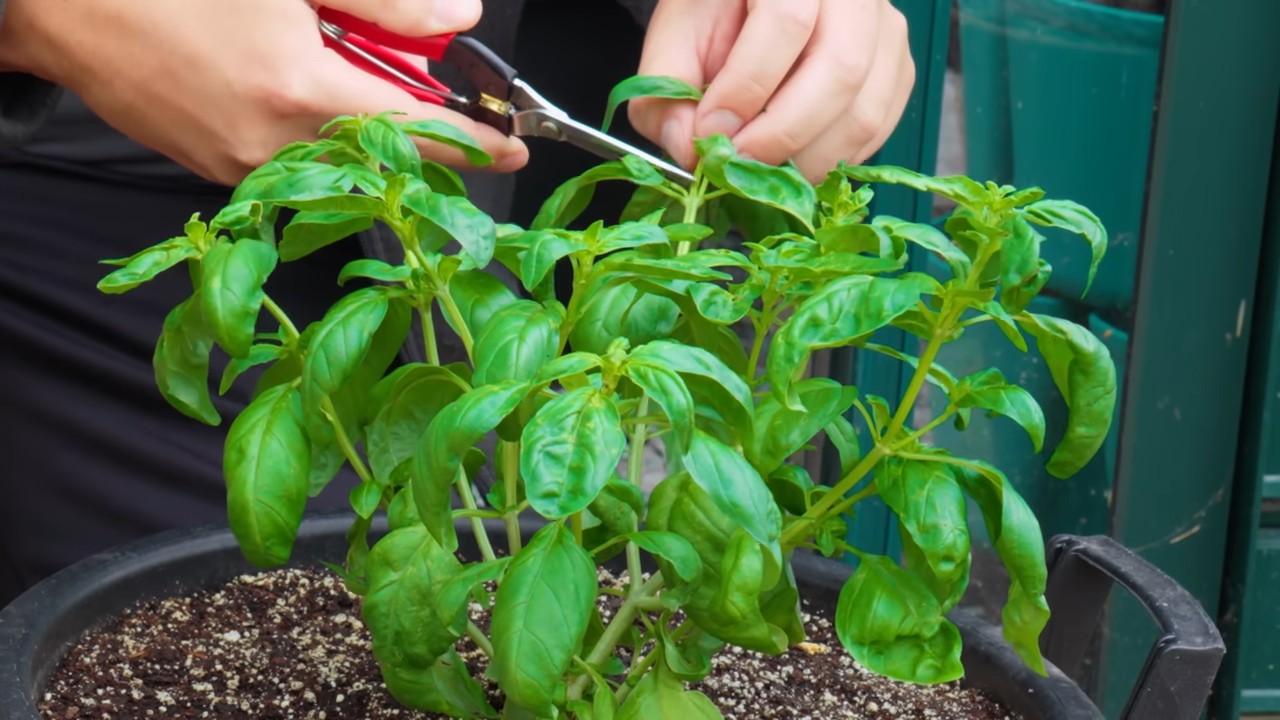
* **Pruning:** Pruning is essential for encouraging bushy growth and preventing your basil plants from flowering too early. Pinch off the top sets of leaves regularly, just above a node (where the leaves grow out from the stem). This will encourage the plant to produce more side shoots and more leaves.
* **Pinching off Flowers:** Basil plants will eventually produce flowers. While the flowers are edible, they will also cause the plant to stop producing leaves. To keep your basil plant producing leaves, pinch off the flower buds as soon as you see them.
* **Temperature:** Basil prefers warm temperatures, between 60-80°F (15-27°C). Avoid exposing your basil plants to cold drafts or extreme temperature fluctuations.
* **Pest Control:** Keep an eye out for pests such as aphids, spider mites, and whiteflies. If you notice any pests, treat them with an insecticidal soap or neem oil.
Harvesting Your Basil
The best part of growing your own basil is, of course, harvesting it!
* **When to Harvest:** You can start harvesting basil leaves as soon as the plant is large enough.
* **How to Harvest:** Use scissors or your fingers to pinch off the leaves. Harvest from the top of the plant, just above a node.
* **Storage:** Freshly harvested basil leaves can be stored in the refrigerator for a few days. To store them for longer, you can dry them or freeze them.
Troubleshooting Common Basil Problems
Even with the best care, you might encounter some problems while growing basil. Here are a few common issues and how to address them:
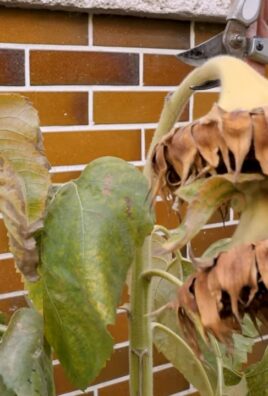
* **Yellowing Leaves:** Yellowing leaves can be caused by overwatering, underwatering, nutrient deficiencies, or pests. Check the soil moisture and adjust your watering accordingly. Fertilize your basil plants regularly. Inspect the leaves for pests.
* **Drooping Leaves:** Drooping leaves can be caused by underwatering, heat stress, or root rot. Water your basil plants thoroughly. Provide shade during the hottest part of the day. Avoid overwatering.
* **Leggy Growth:** Leggy growth (long, spindly stems with few leaves) is usually caused by insufficient light. Provide your basil plants with more light, either by moving them to a sunnier location or by using grow lights.
* **Moldy Soil:** Moldy soil is usually caused by overwatering. Allow the soil to dry out slightly between waterings. Improve drainage by adding perlite or vermiculite to the potting soil.
Enjoying Your Homegrown Basil
Now that you’ve successfully grown your own basil, it’s time to enjoy the fruits (or rather, leaves!) of your labor. Here are just a few ideas:
* **Pesto:** The classic! Use your fresh basil to make a delicious homemade pesto.
* **Pasta Sauces:** Add fresh basil to your favorite pasta sauces for a burst of flavor.
* **Salads:** Sprinkle fresh basil leaves on salads for a refreshing touch.
* **Pizza:** Top your homemade pizza with fresh basil leaves.
* **Teas:** Brew a soothing cup of basil tea.
* **Garnish:** Use fresh basil leaves as a garnish for soups,
Conclusion
So, there you have it! Growing your own basil in the kitchen isn’t just a fun project; it’s a game-changer for your culinary adventures. Imagine the sheer delight of snipping fresh, fragrant basil leaves right before adding them to your pasta sauce, pesto, or even a simple Caprese salad. No more wilted, store-bought herbs that lack that vibrant, aromatic punch. This DIY trick is a must-try because it puts the power of fresh, flavorful basil directly into your hands, literally.
Beyond the convenience and superior taste, growing basil indoors is incredibly rewarding. It connects you to the natural world, even in the heart of your home. Watching those tiny seeds sprout and flourish into lush, green plants is a deeply satisfying experience. Plus, it’s a sustainable way to enjoy fresh herbs, reducing your reliance on commercially grown produce and minimizing your environmental footprint.
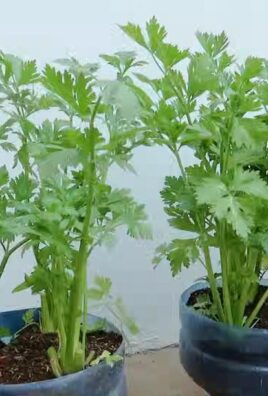
But the best part? You’re not limited to just one type of basil! Experiment with different varieties to discover your favorites. Try growing Genovese basil for classic Italian dishes, Thai basil for Asian-inspired cuisine, or lemon basil for a citrusy twist. You can even create a beautiful and fragrant herb garden right on your windowsill, featuring a variety of basil types alongside other culinary herbs like mint, parsley, and chives.
Consider using different containers to add visual appeal to your indoor basil garden. Repurposed mason jars, colorful ceramic pots, or even a tiered planter can create a stunning display. You can also experiment with different growing mediums, such as coco coir or perlite, to see what works best for your basil plants.
Don’t be afraid to get creative with your basil harvest, too. Beyond using it in your cooking, you can also make basil-infused oil, vinegar, or even simple syrup for cocktails. The possibilities are endless!
We wholeheartedly encourage you to try this DIY trick and experience the joy of growing your own basil in the kitchen. It’s easier than you think, and the rewards are immeasurable. Once you’ve tasted the difference between fresh, homegrown basil and the store-bought variety, you’ll never go back.
So, grab some seeds, find a sunny spot, and get ready to embark on a flavorful adventure. And most importantly, we want to hear about your experience! Share your tips, tricks, and photos of your thriving basil plants in the comments below. Let’s create a community of indoor herb gardeners and inspire others to discover the magic of growing their own food. Happy growing!
Frequently Asked Questions (FAQ)
What kind of basil is best for growing indoors?
The best basil varieties for indoor growing are those that tend to stay relatively compact and bushy. Genovese basil is a popular choice due to its classic flavor and manageable size. Other excellent options include Thai basil, lemon basil, and dwarf basil varieties like Spicy Globe. These varieties are well-suited to container gardening and can thrive in the controlled environment of your kitchen. Consider the flavor profile you prefer and the types of dishes you typically cook to choose the best basil variety for your needs.
How much sunlight does indoor basil need?
Basil thrives in bright, direct sunlight. Ideally, your indoor basil plants should receive at least 6-8 hours of sunlight per day. A south-facing window is usually the best option, but east- or west-facing windows can also work if they provide sufficient light. If you don’t have access to enough natural light, you can supplement with a grow light. Position the grow light a few inches above the plants and keep it on for 12-14 hours per day. Insufficient light can lead to leggy, weak growth and a less flavorful harvest.
What type of soil is best for growing basil in containers?
Basil prefers well-draining soil that is rich in organic matter. A good potting mix for basil should be light and airy, allowing for proper root aeration. You can purchase a pre-made potting mix specifically designed for herbs or vegetables, or you can create your own by combining equal parts of potting soil, perlite, and compost. Avoid using garden soil, as it can be too heavy and may not drain well, leading to root rot.
How often should I water my indoor basil plants?
Water your basil plants when the top inch of soil feels dry to the touch. Avoid overwatering, as this can lead to root rot. When you water, water thoroughly until water drains out of the bottom of the pot. Be sure to empty any excess water from the saucer to prevent the roots from sitting in water. The frequency of watering will depend on factors such as the size of the pot, the temperature and humidity of your home, and the amount of sunlight the plants receive.
How do I harvest basil leaves without harming the plant?
The best way to harvest basil leaves is to pinch or cut them off just above a leaf node (the point where leaves grow from the stem). This encourages the plant to branch out and produce more leaves. Avoid removing more than one-third of the plant’s leaves at any one time, as this can stress the plant. Regularly harvesting your basil will also help to prevent it from flowering, which can diminish the flavor of the leaves.
Why are my basil leaves turning yellow?
Yellowing basil leaves can be caused by several factors, including overwatering, underwatering, nutrient deficiencies, or pests. Check the soil moisture to ensure that you are not overwatering or underwatering. If the soil is consistently too wet, allow it to dry out slightly before watering again. If the soil is dry, water thoroughly. Yellowing leaves can also indicate a nutrient deficiency, particularly nitrogen. You can address this by feeding your basil plants with a balanced liquid fertilizer every few weeks. Inspect your plants for pests such as aphids or spider mites, and treat them accordingly.
How do I prevent my basil from flowering?
Basil plants tend to flower when they are stressed or when they reach maturity. Flowering can diminish the flavor of the leaves, so it’s important to prevent it. The best way to prevent basil from flowering is to regularly pinch off the flower buds as soon as they appear. This will encourage the plant to focus its energy on producing more leaves. Also, ensure that your basil plants are receiving adequate sunlight, water, and nutrients to keep them healthy and prevent stress.
Can I propagate basil from cuttings?
Yes, basil is very easy to propagate from cuttings. Simply take a cutting that is 4-6 inches long from a healthy basil plant. Remove the leaves from the bottom inch of the cutting and place it in a glass of water. Change the water every few days. Within a week or two, roots should begin to form. Once the roots are about an inch long, you can transplant the cutting into a pot filled with potting mix. Keep the soil moist until the new plant is established.
What are some common pests that affect basil plants?
Some common pests that can affect basil plants include aphids, spider mites, whiteflies, and slugs. Aphids are small, soft-bodied insects that suck sap from the leaves, causing them to become distorted and yellow. Spider mites are tiny pests that create webs on the leaves and can cause them to become speckled and bronze. Whiteflies are small, white, flying insects that also suck sap from the leaves. Slugs can feed on the leaves, leaving behind irregular holes. You can control these pests by using insecticidal soap, neem oil, or by hand-picking them off the plants.
How long will my indoor basil plant last?
With proper care, an indoor basil plant can last for several months. However, basil is an annual herb, meaning that it typically completes its life cycle in one growing season. As the plant ages, it may become less productive and the leaves may become less flavorful. To ensure a continuous supply of fresh basil, it’s best to start new plants from seed or cuttings every few weeks. This will allow you to have a constant rotation of healthy, productive basil plants.
Leave a Comment