
Malabar Spinach Summer Growing Routine: Are you dreaming of fresh, vibrant greens gracing your summer salads, but the scorching heat is giving you the gardening blues? Don’t worry, I’ve got you covered! Forget those wilted lettuce heads and embrace the resilient and delicious Malabar Spinach. This isn’t just another leafy green; it’s a powerhouse of nutrients and a climbing beauty that can transform your garden into a lush, edible oasis.
Historically, Malabar Spinach, also known as Basella alba, has been cultivated for centuries in tropical Asia and Africa, prized for its heat tolerance and nutritional value. It’s a staple in many cuisines, offering a mild, slightly peppery flavor that complements a variety of dishes. But beyond its culinary appeal, growing Malabar Spinach is incredibly rewarding, especially during those sweltering summer months when other plants are struggling.
Why do you need this DIY trick? Because mastering the Malabar Spinach Summer Growing Routine means enjoying a continuous harvest of fresh greens throughout the hottest season. I’m going to share my tried-and-true methods for ensuring your Malabar Spinach thrives, from selecting the perfect location to providing the right support and nutrients. Say goodbye to gardening frustration and hello to a bountiful summer harvest with this easy-to-follow guide!
DIY Malabar Spinach Abundance: A Summer Growing Guide
Hey fellow gardeners! I’m so excited to share my tried-and-true method for growing a ton of Malabar spinach (also known as Ceylon spinach or vine spinach) during the summer. This heat-loving leafy green is a fantastic alternative to regular spinach when the temperatures soar, and it’s incredibly easy to grow with a few simple tricks. Get ready to have a bountiful harvest!
Understanding Malabar Spinach
Before we dive into the nitty-gritty, let’s talk a little about what makes Malabar spinach so special. Unlike true spinach, Malabar spinach thrives in hot weather. It’s a vining plant, so it needs something to climb on, and it produces thick, succulent leaves that are delicious in salads, stir-fries, and soups. Plus, it’s packed with nutrients!
Materials You’ll Need
Here’s a list of everything you’ll need to get started:
* Malabar spinach seeds or seedlings (I prefer starting from seeds, but seedlings will give you a head start).
* Seed starting trays or small pots (if starting from seeds).
* Seed starting mix.
* Well-draining potting soil or garden soil amended with compost.
* A sunny location with at least 6 hours of sunlight per day.
* A trellis, fence, or other support structure for the vines to climb.
* Watering can or hose.
* Fertilizer (optional, but recommended for optimal growth). I like to use a balanced organic fertilizer.
* Gardening gloves.
* Pruning shears or scissors.
Starting from Seeds (My Preferred Method)
I find that starting Malabar spinach from seeds gives me the most control over the process and allows me to select the strongest seedlings. Here’s how I do it:
Seed Starting Phase
1. Soaking the Seeds: Malabar spinach seeds have a tough outer coating, so soaking them overnight in warm water helps to soften the shell and improve germination rates. I usually soak them for 12-24 hours.
2. Preparing the Seed Starting Trays: Fill your seed starting trays or small pots with seed starting mix. Make sure the mix is moist but not soggy.
3. Sowing the Seeds: Plant the seeds about ½ inch deep in the soil. I usually plant 2-3 seeds per cell or pot to increase my chances of success.
4. Watering Gently: Water the seeds gently to avoid disturbing them. I use a spray bottle to mist the soil.
5. Providing Warmth: Malabar spinach seeds need warmth to germinate. I place my seed starting trays on a heat mat or in a warm location in my house. The ideal temperature is around 70-80°F (21-27°C).
6. Maintaining Moisture: Keep the soil consistently moist but not waterlogged. Check the soil daily and water as needed.
7. Waiting for Germination: Germination can take anywhere from 7-21 days, so be patient! Once the seedlings emerge, move them to a sunny location or under grow lights.
8. Thinning Seedlings (If Necessary): If more than one seedling emerges in each cell or pot, thin them out by snipping off the weaker seedlings at the soil line. This will give the remaining seedling more room to grow.
Transplanting Seedlings
Once your seedlings have developed a few sets of true leaves (usually after 4-6 weeks), they’re ready to be transplanted into their permanent home in the garden.
1. Hardening Off the Seedlings: Before transplanting, it’s important to harden off the seedlings to acclimate them to outdoor conditions. This involves gradually exposing them to sunlight and cooler temperatures over a period of 7-10 days. Start by placing them outdoors for a few hours each day, gradually increasing the amount of time they spend outside.
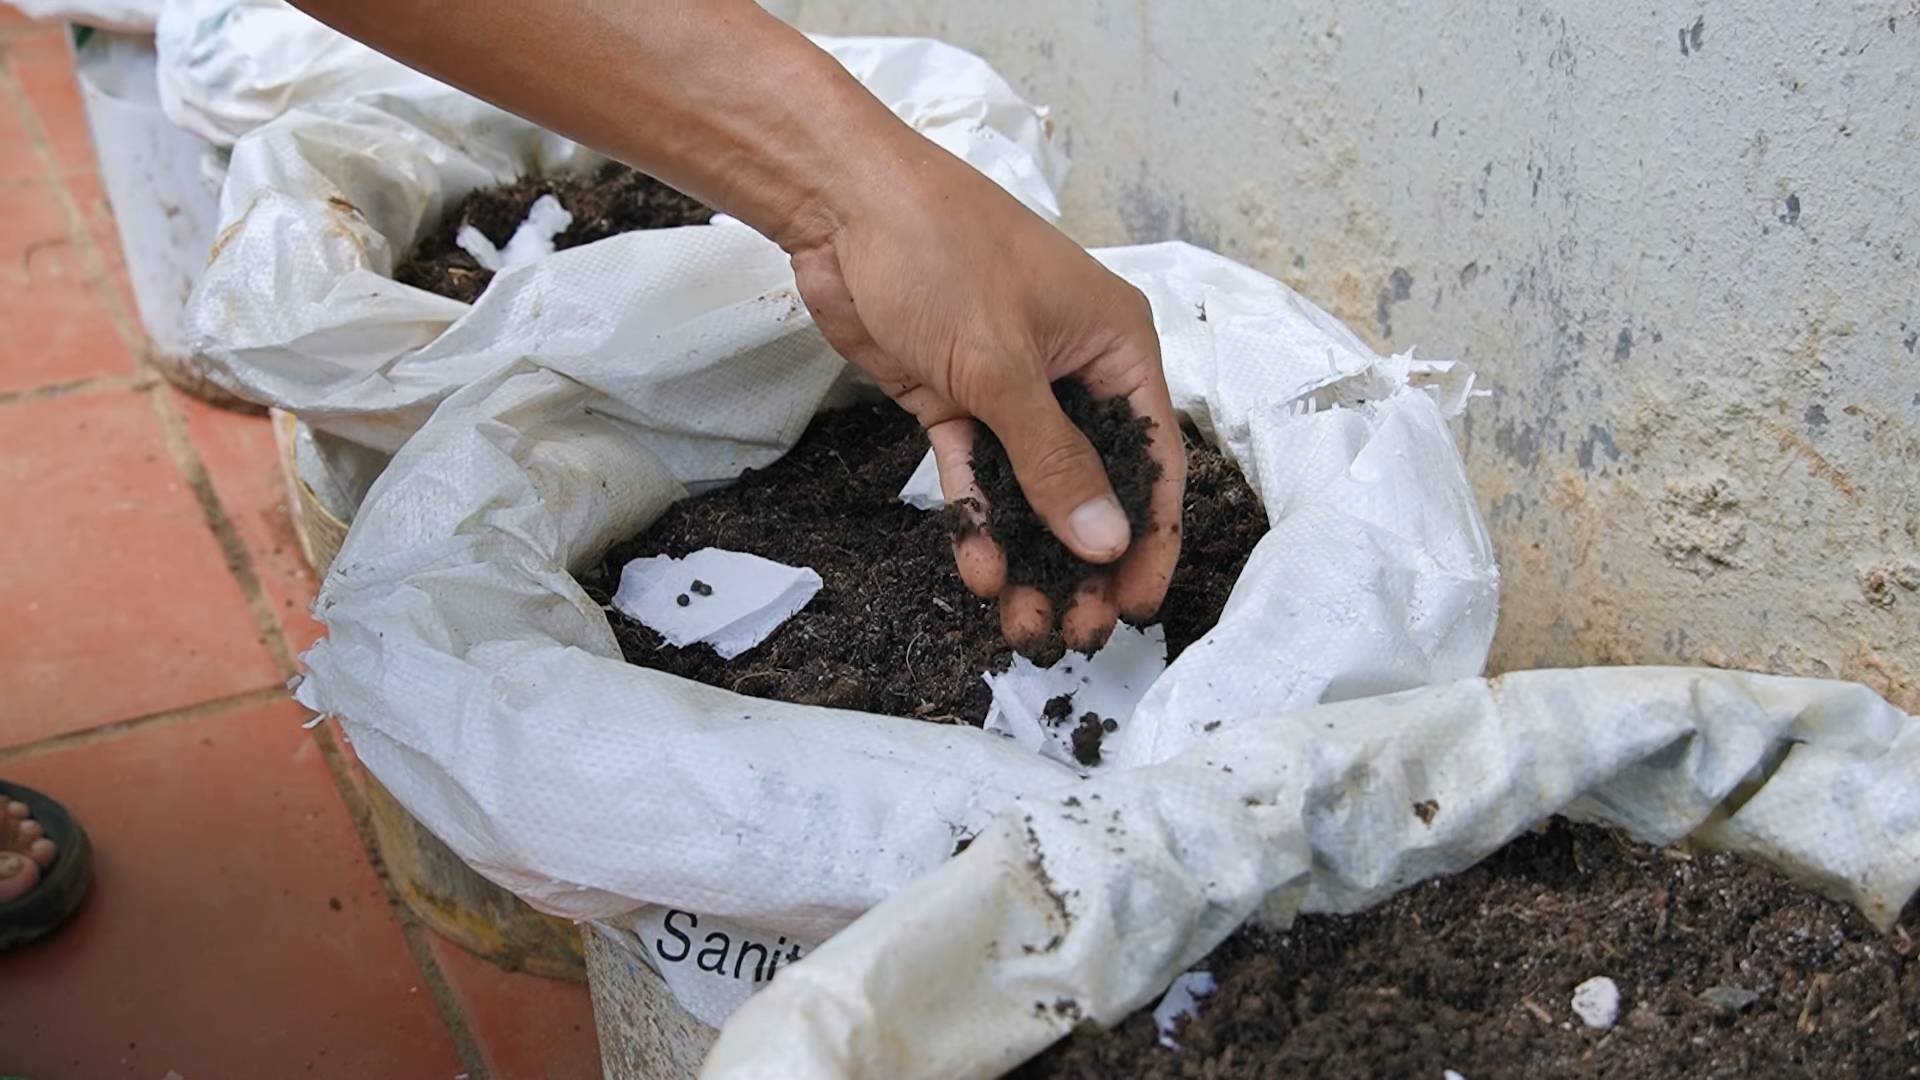
2. Preparing the Planting Site: Choose a sunny location in your garden with well-draining soil. Amend the soil with compost or other organic matter to improve its fertility and drainage.
3. Setting up the Trellis: Since Malabar spinach is a vining plant, it needs a trellis or other support structure to climb on. I’ve used everything from simple bamboo stakes to elaborate trellises. Make sure the trellis is sturdy enough to support the weight of the mature vines.
4. Digging the Planting Holes: Dig holes that are slightly larger than the root balls of the seedlings. Space the holes about 12-18 inches apart.
5. Transplanting the Seedlings: Gently remove the seedlings from their pots or trays and place them in the planting holes. Backfill the holes with soil and gently firm the soil around the base of the plants.
6. Watering Thoroughly: Water the seedlings thoroughly after transplanting to help them settle in.
Caring for Your Malabar Spinach
Once your Malabar spinach plants are established, they’re relatively low-maintenance. Here’s what you need to do to keep them happy and healthy:
1. Watering Regularly: Malabar spinach needs consistent moisture, especially during hot weather. Water deeply whenever the top inch of soil feels dry to the touch. I usually water my plants every 2-3 days, but you may need to water more frequently depending on your climate and soil type.
2. Fertilizing (Optional): While Malabar spinach can grow without fertilizer, it will produce more abundant foliage if you fertilize it regularly. I like to use a balanced organic fertilizer every 2-3 weeks. You can also use compost tea or fish emulsion.
3. Providing Support: As the vines grow, they will need to be trained to climb the trellis. Gently guide the vines onto the trellis and tie them in place with twine or plant clips if necessary.
4. Pruning: Pruning is important for encouraging bushier growth and preventing the vines from becoming too leggy. Pinch off the tips of the vines regularly to promote branching. You can also prune off any yellowing or damaged leaves.
5. Pest and Disease Control: Malabar spinach is generally resistant to pests and diseases, but it can occasionally be affected by aphids or spider mites. If you notice any pests, spray the plants with insecticidal soap or neem oil. Good air circulation can help prevent fungal diseases.
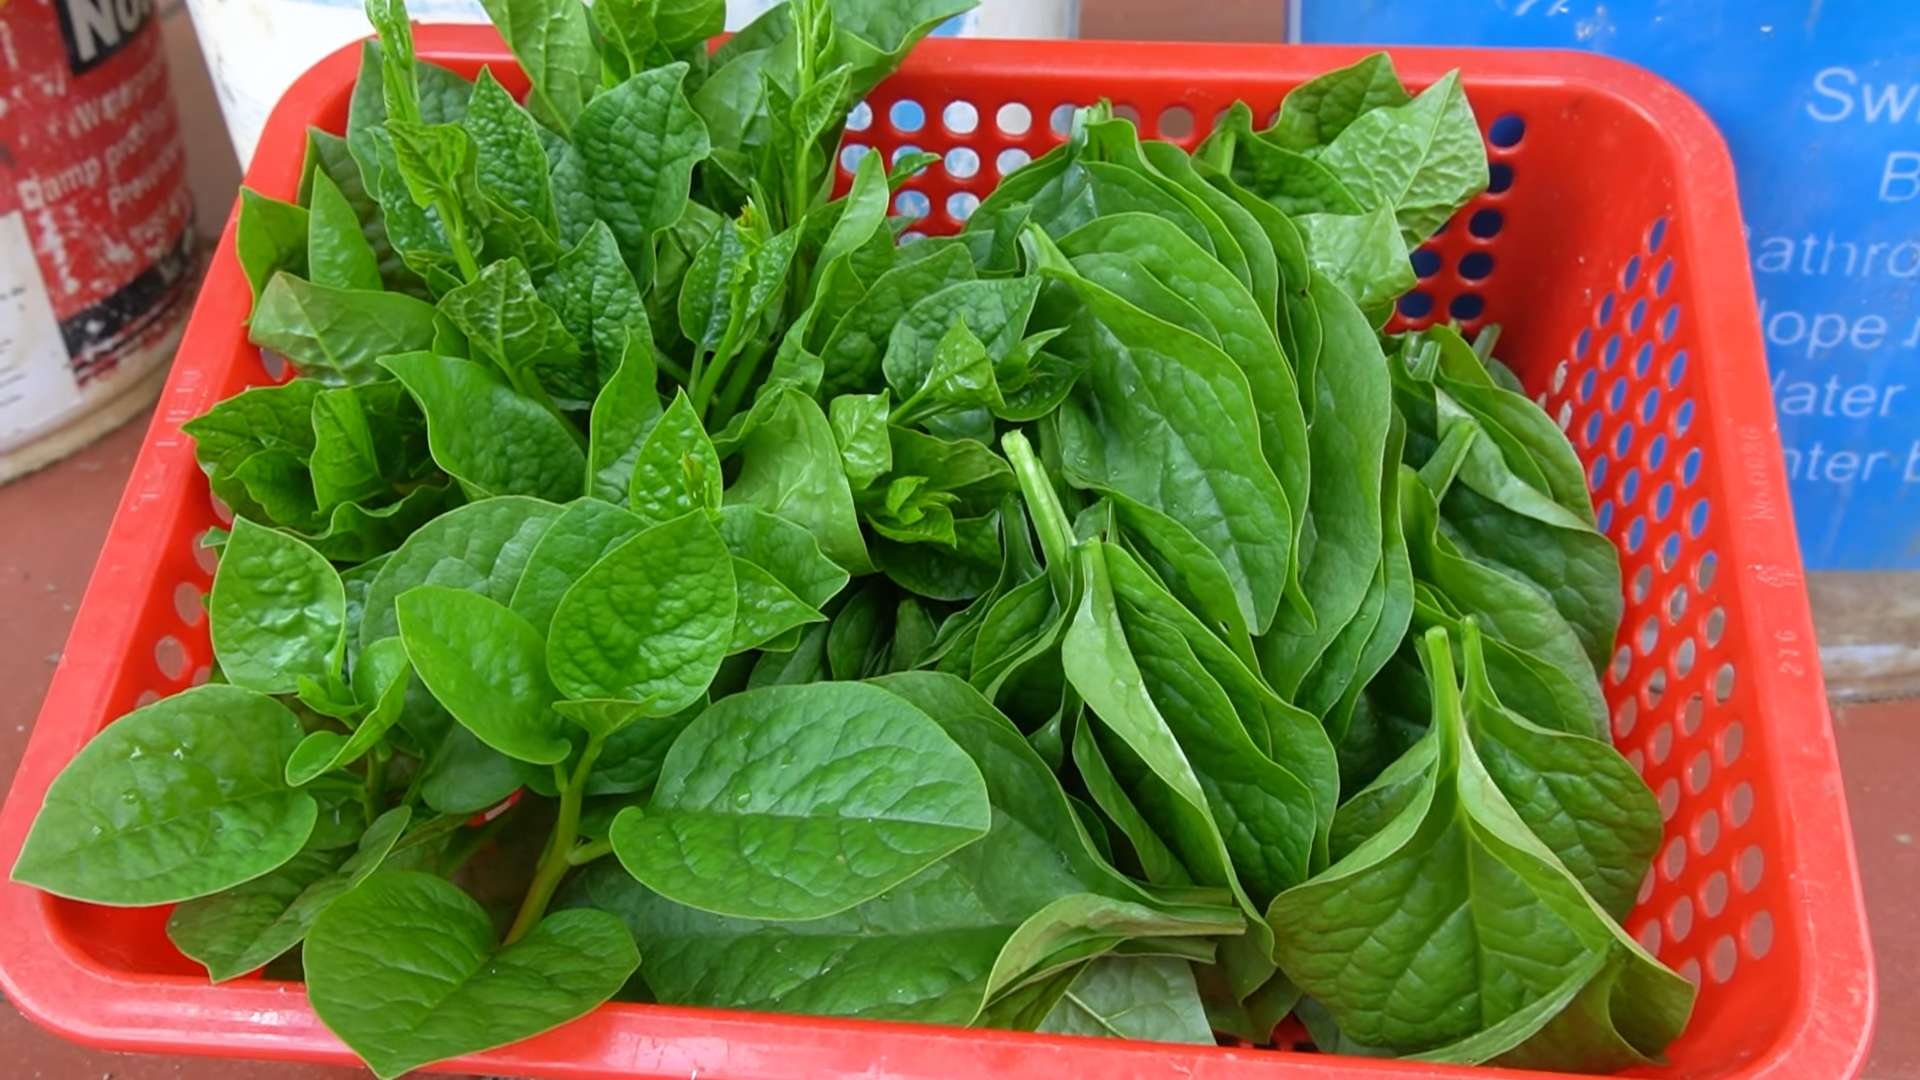
Harvesting Your Bounty
The best part of growing Malabar spinach is, of course, the harvest! You can start harvesting the leaves as soon as the plants are large enough, usually about 6-8 weeks after transplanting.
1. Harvesting Leaves: To harvest the leaves, simply snip them off with pruning shears or scissors. I usually harvest the larger, more mature leaves first.
2. Harvesting Shoots: You can also harvest the tender shoots of the vines. These are especially delicious in stir-fries.
3. Harvesting Regularly: The more you harvest, the more the plants will produce. I usually harvest my Malabar spinach plants every week or two.
4. Enjoying Your Harvest: Malabar spinach can be used in a variety of dishes. It’s delicious in salads, stir-fries, soups, and stews. You can also use it as a substitute for regular spinach in any recipe.
Troubleshooting
Even with the best care, you might encounter a few challenges along the way. Here are some common problems and how to solve them:
* Slow Germination: If your seeds are taking a long time to germinate, make sure they are getting enough warmth and moisture. You can also try scarifying the seeds by gently rubbing them with sandpaper before soaking them.
* Yellowing Leaves: Yellowing leaves can be a sign of nutrient deficiency or overwatering. Make sure you are fertilizing your plants regularly and that the soil is well-draining.
* Pest Infestations: If you notice pests on your plants, spray them with insecticidal soap or neem oil. You can also try attracting beneficial insects to your garden to help control pests.
* Slow Growth: Slow growth can be caused by a variety of factors, including lack of sunlight, poor soil, or insufficient watering. Make sure your plants are getting at least 6 hours of sunlight per day, that the soil is fertile and well-draining, and that you are watering them regularly.
Tips for Success
Here are a few extra tips to help you grow a bumper crop of Malabar spinach:
* Choose the Right Variety: There are several different varieties of Malabar spinach available, so choose one that is well-suited to your climate.
* Provide Adequate Support: Make sure your trellis or support structure is strong enough to support the weight of the mature vines.
* Water Deeply: Water deeply and less frequently, rather than shallowly and more often. This will encourage the roots to grow deeper and make the plants more drought-tolerant.
* Mulch Around the Plants: Mulching around the plants will help to retain moisture in the
Conclusion
So, there you have it! Mastering the Malabar Spinach Summer Growing Routine isn’t just about having a thriving vine; it’s about unlocking a world of fresh, nutritious greens right in your backyard. We’ve walked through the essential steps, from selecting the perfect sunny spot to providing the right support and hydration. But why is this DIY approach a must-try?
Firstly, growing your own Malabar spinach guarantees freshness and quality that you simply can’t replicate with store-bought options. You know exactly what goes into nurturing your plants – no hidden pesticides or questionable practices. Secondly, it’s incredibly rewarding! Watching those tiny seeds sprout and transform into a lush, edible vine is a deeply satisfying experience. It connects you to the natural world and provides a tangible sense of accomplishment. Finally, and perhaps most practically, it saves you money. Once established, a Malabar spinach plant can provide a continuous harvest throughout the summer, significantly reducing your grocery bill.
But the beauty of gardening lies in its adaptability. Feel free to experiment with variations to suit your specific needs and preferences. For instance, if you live in a particularly hot climate, consider providing some afternoon shade to prevent leaf scorch. You could also try growing Malabar spinach in containers if you have limited garden space. Just ensure the container is large enough to accommodate the plant’s vigorous growth. Another interesting variation is to experiment with different trellising methods. While a simple trellis works perfectly well, you could also try growing Malabar spinach up an existing fence or even creating a living wall.
Don’t be afraid to get creative with your fertilizer choices, too. While a balanced organic fertilizer is a great starting point, you can supplement with compost tea or worm castings for an extra boost of nutrients. Remember to monitor your plants closely and adjust your watering and fertilization schedule as needed.
Ultimately, the key to success with the Malabar Spinach Summer Growing Routine is observation and adaptation. Pay attention to your plants’ needs, and don’t be afraid to experiment until you find what works best for you.
We wholeheartedly encourage you to give this DIY trick a try. It’s easier than you might think, and the rewards are well worth the effort. Imagine the delicious salads, stir-fries, and soups you can create with your own homegrown Malabar spinach!
And most importantly, we want to hear about your experiences! Share your tips, tricks, and challenges in the comments below. Let’s build a community of Malabar spinach enthusiasts and learn from each other. Did you try a particular variation that worked wonders? Did you encounter any unexpected problems? Your insights could be invaluable to other gardeners. So, get your hands dirty, embrace the process, and let’s grow some amazing Malabar spinach together!
Frequently Asked Questions (FAQ)
1. What exactly is Malabar spinach, and how is it different from regular spinach?
Malabar spinach (Basella alba or Basella rubra) isn’t actually a true spinach. It’s a leafy green vine that thrives in warm weather, unlike traditional spinach which prefers cooler temperatures. It has a slightly different flavor profile, often described as mild and slightly peppery, with a hint of citrus. The leaves are thicker and more succulent than regular spinach, making them a great addition to stir-fries and soups. It’s also more heat-tolerant, making it an excellent choice for summer gardens where regular spinach would bolt (go to seed).
2. How much sunlight does Malabar spinach need?
Malabar spinach needs at least 6-8 hours of direct sunlight per day to thrive. While it can tolerate some partial shade, especially in extremely hot climates, insufficient sunlight will result in leggy growth and reduced leaf production. Choose a location in your garden that receives plenty of sunshine throughout the day. If you’re growing it in a container, make sure you can easily move it to a sunnier spot if needed.
3. What kind of soil is best for growing Malabar spinach?
Malabar spinach prefers well-draining soil that is rich in organic matter. Amend your garden soil with compost or well-rotted manure before planting to improve its fertility and drainage. A slightly acidic to neutral soil pH (around 6.0 to 7.0) is ideal. If you’re growing in containers, use a high-quality potting mix that contains compost or other organic amendments.
4. How often should I water my Malabar spinach plant?
Malabar spinach needs consistent moisture, especially during hot summer months. Water deeply whenever the top inch of soil feels dry to the touch. Avoid overwatering, as this can lead to root rot. Mulching around the base of the plant can help retain moisture and suppress weeds. Check the soil moisture regularly, especially during periods of drought or intense heat.
5. What kind of fertilizer should I use for Malabar spinach?
A balanced organic fertilizer is a good choice for Malabar spinach. Look for a fertilizer with an NPK ratio (nitrogen, phosphorus, potassium) that is relatively even, such as 10-10-10 or 5-5-5. You can also supplement with compost tea or worm castings to provide additional nutrients. Avoid using fertilizers that are too high in nitrogen, as this can promote excessive leaf growth at the expense of flower and fruit production.
6. How do I trellis Malabar spinach? What type of trellis is best?
Malabar spinach is a vining plant and needs a trellis or other support to climb. A simple trellis made of bamboo stakes or netting works well. You can also use an existing fence or even create a living wall. The type of trellis you choose will depend on your personal preferences and the space you have available. The key is to provide a sturdy structure that the plant can easily climb. Make sure the trellis is tall enough to accommodate the plant’s growth, which can reach several feet.
7. When and how should I harvest Malabar spinach?
You can start harvesting Malabar spinach leaves as soon as the plant is established and has produced enough foliage. Simply snip off the leaves as needed, leaving the growing tips intact. Regular harvesting will encourage the plant to produce more leaves. The younger leaves are more tender and have a milder flavor. You can harvest throughout the summer until the first frost.
8. Can I grow Malabar spinach in containers?
Yes, Malabar spinach can be successfully grown in containers. Choose a large container (at least 12 inches in diameter) to accommodate the plant’s vigorous growth. Use a high-quality potting mix and provide a trellis or other support for the plant to climb. Water regularly and fertilize as needed. Container-grown Malabar spinach may need more frequent watering than plants grown in the ground.
9. Are there any pests or diseases that affect Malabar spinach?
Malabar spinach is generally resistant to pests and diseases. However, it can be susceptible to aphids, spider mites, and leaf miners. Inspect your plants regularly for signs of infestation and take action promptly if you notice any problems. You can often control pests with insecticidal soap or neem oil. Good air circulation and proper watering practices can help prevent fungal diseases.
10. Can I save seeds from my Malabar spinach plant?
Yes, you can save seeds from your Malabar spinach plant. Allow some of the flowers to mature and form small, dark berries. Once the berries are dry and brittle, you can harvest them and extract the seeds. Store the seeds in a cool, dry place until you’re ready to plant them. Note that seeds saved from hybrid varieties may not produce plants that are true to type.
11. Is Malabar spinach safe to eat? Are there any precautions?
Malabar spinach is generally safe to eat for most people. However, like all leafy greens, it contains oxalates, which can interfere with calcium absorption in some individuals. If you have kidney problems or are prone to kidney stones, you may want to limit your consumption of Malabar spinach. Cooking the leaves can help reduce the oxalate content.
12. My Malabar spinach leaves are turning yellow. What could be the problem?
Yellowing leaves can indicate several potential problems. It could be due to overwatering, underwatering, nutrient deficiencies, or pest infestations. Check the soil moisture and adjust your watering schedule accordingly. Make sure your plant is getting enough sunlight and fertilize it with a balanced organic fertilizer. Inspect the leaves for signs of pests and take action if necessary.
13. Can I grow Malabar spinach indoors?
While it’s possible to grow Malabar spinach indoors, it can be challenging to provide the plant with enough light and space to thrive. If you want to try growing it indoors, choose a sunny location near a window and provide supplemental lighting if needed. You’ll also need to provide a trellis or other support for the plant to climb.
14. How long does it take for Malabar spinach to grow from seed to harvest?
It typically takes about 60-70 days for Malabar spinach to grow from seed to harvest. You can speed up the process by starting the seeds indoors a few weeks before the last frost. Once the seedlings are large enough, transplant them into your garden or containers.
15. What are some creative ways to use Malabar spinach in cooking?
Malabar spinach is a versatile ingredient that can be used in a variety of dishes. It can be used in salads, stir-fries, soups, stews,


Leave a Comment