
Collard Greens Gardening Tips: Unlock the secrets to growing your own vibrant, delicious collard greens right in your backyard! Have you ever dreamed of stepping outside and harvesting fresh, nutrient-packed greens for a healthy and satisfying meal? Well, dream no more! This DIY guide is your passport to a thriving collard green patch, even if you’re a complete beginner.
Collard greens boast a rich history, deeply rooted in Southern American cuisine. Brought over from Africa, these leafy greens became a staple, symbolizing resilience, resourcefulness, and community. For generations, families have passed down their cherished collard greens gardening tips, ensuring a bountiful harvest and a taste of home.
But why should you bother growing your own? In today’s world, where fresh produce can be expensive and its origin uncertain, cultivating your own collard greens offers a fantastic solution. You’ll have complete control over what goes into your food, ensuring it’s free from harmful pesticides and packed with flavor. Plus, there’s nothing quite like the satisfaction of nurturing a plant from seed to table. I’m excited to share these simple yet effective collard greens gardening tips that will transform your garden and your plate!
Growing Collard Greens Like a Pro: My DIY Guide
Hey there, fellow garden enthusiasts! I’m so excited to share my tried-and-true method for growing the most delicious and abundant collard greens you’ve ever seen. Forget those sad, wilted bunches at the grocery store – we’re going to have a thriving collard green patch right in your backyard! This guide is packed with everything I’ve learned over the years, from choosing the right seeds to battling pesky bugs. Let’s get started!
Choosing the Right Variety and Starting Your Seeds
Before we even think about planting, we need to decide what kind of collard greens we want to grow. There are tons of varieties out there, each with its own unique flavor and texture.
* Georgia Southern: This is a classic, reliable variety that’s known for its large, slightly crumpled leaves and mild flavor. It’s a great all-around choice.
* Vates: If you’re looking for something cold-hardy, Vates is your best bet. It can withstand frost and even some snow, making it perfect for extending your growing season.
* Champion: This variety is known for its disease resistance and fast growth. It’s a good option if you’re new to growing collard greens.
* Top Bunch: As the name suggests, this variety produces a large bunch of leaves at the top of the plant, making it easy to harvest.
Once you’ve chosen your variety, it’s time to start your seeds. You can either direct sow them in the garden or start them indoors. I prefer starting them indoors because it gives them a head start and protects them from pests.
Here’s how I start my collard green seeds indoors:
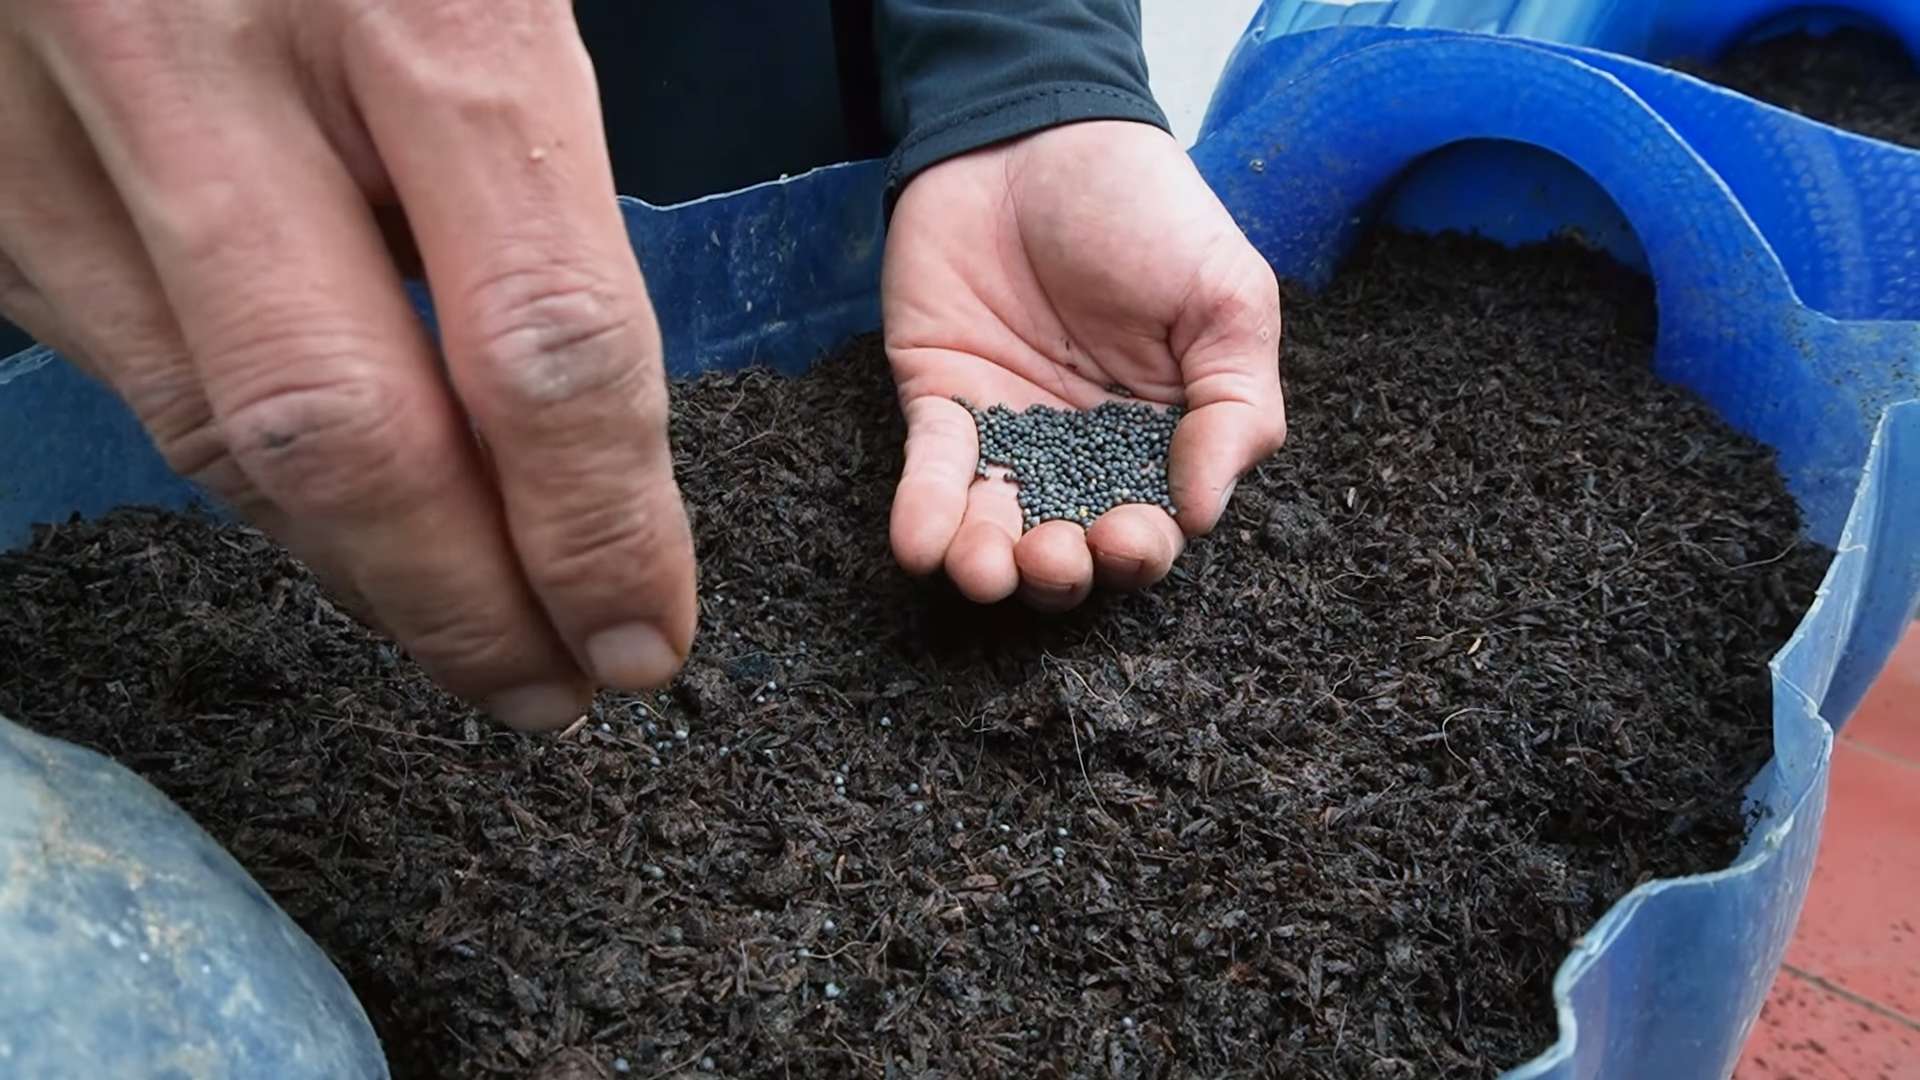
1. Gather your supplies: You’ll need seed starting trays or small pots, seed starting mix, collard green seeds, a spray bottle, and a warm, sunny spot.
2. Fill your trays or pots with seed starting mix: Make sure the mix is moist but not soggy.
3. Sow your seeds: Plant two or three seeds per cell or pot, about ¼ inch deep.
4. Gently water the seeds: Use a spray bottle to avoid disturbing the seeds.
5. Place the trays or pots in a warm, sunny spot: A south-facing window is ideal. You can also use a grow light if you don’t have enough natural light.
6. Keep the soil moist: Water regularly, but don’t overwater. The soil should be damp, not soaking wet.
7. Thin the seedlings: Once the seedlings have their first true leaves (the second set of leaves), thin them to one plant per cell or pot. Choose the strongest, healthiest seedling and snip off the others at the soil line.
Preparing Your Garden Bed
Collard greens need a sunny spot with well-drained soil. They also prefer soil that’s rich in organic matter. Before planting, I always amend my garden bed with compost and aged manure. This helps to improve the soil’s drainage, fertility, and water-holding capacity.
Here’s how I prepare my garden bed for collard greens:
1. Choose a sunny spot: Collard greens need at least six hours of sunlight per day.
2. Clear the area: Remove any weeds, rocks, or debris from the garden bed.
3. Amend the soil: Spread a 2-3 inch layer of compost and aged manure over the garden bed.
4. Till or dig the soil: Incorporate the compost and manure into the soil to a depth of 6-8 inches.
5. Smooth the soil: Rake the soil to create a smooth, even surface.
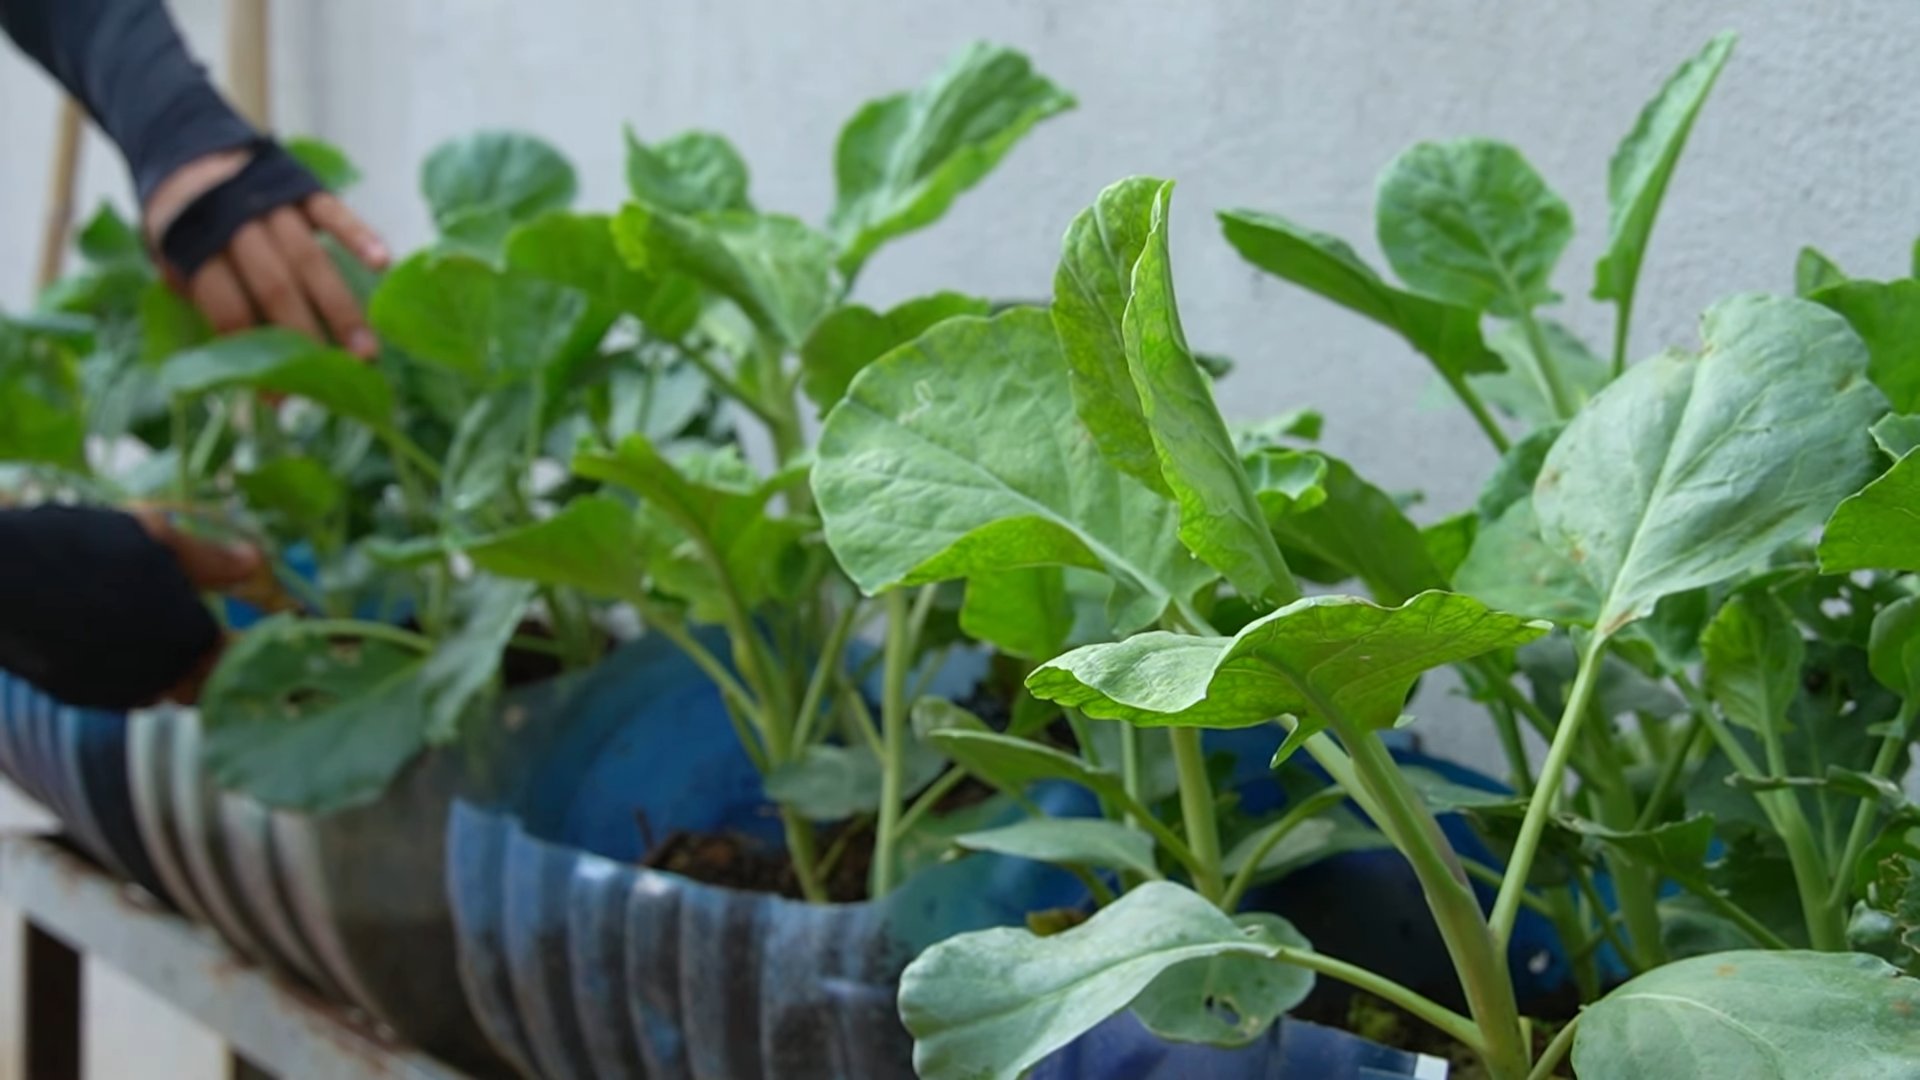
Transplanting Your Seedlings
Once your seedlings are about 4-6 inches tall and have several sets of true leaves, they’re ready to be transplanted into the garden. Before transplanting, it’s important to harden them off. This means gradually exposing them to outdoor conditions over a period of several days.
Here’s how I harden off my collard green seedlings:
1. Start by placing the seedlings outdoors in a sheltered spot for a few hours each day.
2. Gradually increase the amount of time they spend outdoors each day.
3. After a week, they should be able to tolerate full sun and wind.
Once your seedlings are hardened off, you can transplant them into the garden.
Here’s how I transplant my collard green seedlings:
1. Choose a cloudy day or late afternoon to transplant: This will help to reduce stress on the seedlings.
2. Dig holes: Space the holes about 18-24 inches apart.
3. Gently remove the seedlings from their trays or pots: Be careful not to damage the roots.
4. Place the seedlings in the holes: Make sure the top of the root ball is level with the soil surface.
5. Fill the holes with soil: Gently firm the soil around the seedlings.
6. Water the seedlings thoroughly: This will help to settle the soil and encourage root growth.
Caring for Your Collard Greens
Collard greens are relatively easy to care for, but they do need regular watering and fertilization. They’re also susceptible to a few pests and diseases.
* Watering: Water your collard greens regularly, especially during dry weather. Aim to keep the soil consistently moist but not soggy. I usually water deeply once or twice a week, depending on the weather.
* Fertilizing: Collard greens are heavy feeders, so they need regular fertilization. I like to use a balanced organic fertilizer, such as 10-10-10, every few weeks. You can also side-dress them with compost or aged manure.
* Weeding: Keep your garden bed free of weeds. Weeds compete with collard greens for water and nutrients. I like to hand-pull weeds regularly.
* Mulching: Mulch around your collard greens to help retain moisture, suppress weeds, and regulate soil temperature. I use straw, hay, or wood chips.
Dealing with Pests and Diseases
Collard greens are susceptible to a few pests and diseases, including cabbage worms, aphids, and downy mildew.
* Cabbage worms: These green caterpillars can quickly devour your collard green leaves. I control them by hand-picking them off the plants or by using Bacillus thuringiensis (Bt), a natural insecticide.
* Aphids: These tiny insects suck the sap from collard green leaves, causing them to curl and yellow. I control them by spraying the plants with a strong stream of water or by using insecticidal soap.
* Downy mildew: This fungal disease causes yellow spots on the upper surface of collard green leaves and a white, downy growth on the underside. I prevent downy mildew by providing good air circulation and avoiding overhead watering. If downy mildew does occur, I treat it with a fungicide.
My Secret Weapon: Companion Planting!
I’ve found that companion planting is a fantastic way to deter pests and improve the overall health of my collard greens. Here are a few of my favorite companion plants:
* Marigolds: These beautiful flowers repel nematodes and other soil pests.
* Dill: Dill attracts beneficial insects, such as ladybugs and lacewings, which prey on aphids and other pests.
* Garlic: Garlic repels a wide range of pests, including aphids, cabbage worms, and Japanese beetles.
* Onions: Similar to garlic, onions also deter many common garden pests.
* Nasturtiums: These edible flowers attract aphids away from your collard greens, acting as a trap crop.
Harvesting Your Collard Greens
You can start harvesting your collard greens when the leaves are about 8-10 inches long. I usually harvest the outer leaves first, leaving the inner leaves to continue growing. This allows me to harvest collard greens continuously throughout the growing season.
Here’s how I harvest my collard greens:
1. Choose the leaves you want to harvest: Select the largest, healthiest-looking leaves.
2. Cut the leaves off at the base of the stem: Use a sharp knife or scissors.
3. Wash the leaves: Rinse the leaves thoroughly with water to remove any dirt or debris.
4. Store the leaves: Store the leaves in the refrigerator in a plastic bag or container. They will keep for several days.
Enjoying Your Harvest
Now comes the best part – enjoying your delicious, homegrown collard greens! There are so many ways to prepare them.
My Favorite Ways to Cook Collard Greens:
* Southern-style: This is the classic way to cook collard greens. Simmer them with ham hocks or bacon for a rich, smoky flavor.
* Sautéed:
Conclusion
So, there you have it! Mastering the art of growing your own collard greens is not only achievable, but incredibly rewarding. From selecting the right variety to warding off pesky cabbage worms, these collard greens gardening tips provide a solid foundation for a bountiful harvest. Why settle for store-bought greens when you can cultivate your own, bursting with freshness and flavor, right in your backyard?
This isn’t just about saving money; it’s about connecting with your food source, understanding the growing process, and enjoying the unparalleled taste of homegrown produce. Imagine the satisfaction of serving a dish made with collard greens you nurtured from tiny seedlings to leafy giants. It’s a culinary experience that simply can’t be replicated.
Consider experimenting with different varieties to discover your personal favorite. Try ‘Georgia Southern’ for its heat tolerance, or ‘Champion’ for its impressive size. You can also adjust your planting schedule to ensure a continuous supply of fresh greens throughout the growing season. Succession planting, where you sow seeds every few weeks, is a fantastic way to extend your harvest.
Don’t be afraid to get your hands dirty and embrace the learning process. Gardening is a journey, and every challenge is an opportunity to grow, both literally and figuratively. Remember to pay close attention to your plants, observe their needs, and adjust your approach accordingly.
We wholeheartedly encourage you to put these collard greens gardening tips into practice. Start small, perhaps with just a few plants, and gradually expand your garden as you gain confidence. The rewards are well worth the effort.
And most importantly, we want to hear about your experiences! Share your successes, your challenges, and your favorite collard greens recipes in the comments below. Let’s create a community of passionate gardeners, sharing knowledge and inspiring each other to grow the best collard greens possible. Happy gardening!
Frequently Asked Questions (FAQs)
What are the best collard greens varieties for beginners?
For novice gardeners, some of the easiest and most rewarding collard greens varieties to grow include ‘Georgia Southern,’ ‘Vates,’ and ‘Champion.’ ‘Georgia Southern’ is known for its heat tolerance and resistance to bolting, making it a reliable choice in warmer climates. ‘Vates’ is a compact variety that’s well-suited for smaller gardens or containers. ‘Champion’ produces large, flavorful leaves and is relatively easy to care for. These varieties are generally less susceptible to common pests and diseases, providing a smoother learning curve for beginners. Remember to choose varieties that are well-suited to your local climate and growing conditions for the best results.
How often should I water my collard greens?
Consistent watering is crucial for healthy collard greens growth. Generally, you should aim to water your collard greens deeply about once or twice a week, depending on the weather and soil conditions. The goal is to keep the soil consistently moist but not waterlogged. A good rule of thumb is to check the soil moisture about an inch below the surface. If it feels dry, it’s time to water. During hot, dry periods, you may need to water more frequently. Conversely, during rainy periods, you may need to reduce watering to prevent root rot. Using a soaker hose or drip irrigation can help deliver water directly to the roots, minimizing water waste and reducing the risk of fungal diseases.
How do I deal with pests like cabbage worms on my collard greens?
Cabbage worms can be a common nuisance for collard greens growers. Fortunately, there are several effective strategies for managing these pests. One of the simplest methods is handpicking the worms off the plants. This is most effective when done regularly, especially in the early morning or late evening when the worms are most active. Another option is to use Bacillus thuringiensis (Bt), a naturally occurring bacterium that is toxic to cabbage worms but harmless to humans, pets, and beneficial insects. Bt is available in liquid or dust form and can be applied directly to the leaves of the plants. You can also use row covers to physically prevent the moths from laying their eggs on the collard greens. Companion planting with herbs like rosemary, thyme, and sage can also help deter cabbage moths.
What kind of fertilizer should I use for collard greens?
Collard greens are heavy feeders and benefit from regular fertilization. A balanced fertilizer with an NPK ratio of 10-10-10 or 14-14-14 is a good starting point. Apply the fertilizer according to the package instructions, typically about once every 4-6 weeks. You can also supplement with organic fertilizers like compost, aged manure, or fish emulsion. These organic options provide a slow-release source of nutrients and improve soil health. When applying fertilizer, be sure to avoid getting it on the leaves of the plants, as this can cause burning. Water the plants thoroughly after fertilizing to help the nutrients reach the roots.
When is the best time to harvest collard greens?
Collard greens can be harvested at any time once the leaves are large enough to eat, typically when they are about 8-10 inches long. The flavor of collard greens tends to improve after a frost, as the cold temperatures help to convert starches into sugars. To harvest, simply cut the outer leaves near the base of the plant, leaving the inner leaves to continue growing. This allows you to harvest collard greens multiple times throughout the growing season. Avoid harvesting more than one-third of the leaves at a time, as this can stress the plant. Freshly harvested collard greens are best used within a few days, but they can be stored in the refrigerator for up to a week if properly wrapped.
Can I grow collard greens in containers?
Yes, collard greens can be successfully grown in containers, making them a great option for gardeners with limited space. Choose a container that is at least 12 inches deep and wide to provide enough room for the roots to grow. Use a high-quality potting mix that is well-draining and rich in organic matter. When planting, space the collard greens plants about 12 inches apart. Container-grown collard greens may require more frequent watering and fertilization than those grown in the ground, as the soil in containers tends to dry out more quickly and nutrients can leach out more easily. Be sure to place the container in a location that receives at least 6 hours of sunlight per day.
How do I prevent my collard greens from bolting (going to seed)?
Bolting, or premature flowering, can occur in collard greens when they are exposed to stress, such as extreme temperatures or lack of water. To prevent bolting, choose bolt-resistant varieties and provide consistent care. Water the plants regularly to keep the soil consistently moist, and mulch around the base of the plants to help retain moisture and regulate soil temperature. Avoid planting collard greens during the hottest part of the summer, as high temperatures can trigger bolting. If you notice flower stalks starting to form, pinch them off to encourage the plant to focus its energy on producing leaves.
What are some good companion plants for collard greens?
Companion planting can be a beneficial strategy for growing healthy collard greens. Some good companion plants for collard greens include herbs like rosemary, thyme, and sage, which can help deter pests. Marigolds are also effective at repelling nematodes and other soil pests. Onions and garlic can help to deter aphids and other insects. Legumes like beans and peas can fix nitrogen in the soil, providing a natural source of fertilizer for the collard greens. Avoid planting collard greens near other members of the brassica family, such as broccoli, cabbage, and cauliflower, as they can attract the same pests and diseases.
Leave a Comment