
Growing Roma Tomatoes can feel like a daunting task, especially if you’re new to home gardening. But what if I told you that with a few simple tricks and DIY hacks, you could be harvesting baskets overflowing with juicy, sun-ripened Roma tomatoes right from your own backyard? Forget those bland, store-bought tomatoes – imagine the rich, intense flavor of homegrown Romas in your sauces, salads, and salsas!
The Roma tomato, with its distinctive egg shape and meaty texture, has a fascinating history. Originating in Italy, it quickly became a staple in Mediterranean cuisine, prized for its low water content and robust flavor, perfect for canning and creating the authentic Italian sauces we all know and love. For generations, families have passed down secrets for cultivating the perfect Roma, and now, I’m excited to share some of those time-tested techniques with you.
Why do you need these DIY tricks? Because growing Roma Tomatoes successfully isn’t just about planting a seed and hoping for the best. It’s about understanding the plant’s needs, providing the right environment, and knowing how to troubleshoot common problems. These hacks will save you time, money, and frustration, ensuring a bountiful harvest that will impress your friends and family. Plus, there’s nothing quite as satisfying as enjoying the fruits (or vegetables!) of your own labor. So, let’s dive in and unlock the secrets to growing the best Roma tomatoes you’ve ever tasted!
Growing Roma Tomatoes Yourself: Your Comprehensive DIY Guide
Hey garden friends! I love harvesting fresh, aromatic Roma tomatoes directly from my garden. They are perfect for sauces, soups, and salads. And the best part? It’s not that hard to grow them yourself! In this article, I’ll show you step by step how to successfully plant and care for your own Roma tomatoes. Let’s get started!
What You Need to Grow Roma Tomatoes:
- Roma tomato seeds or young plants: You can either start with seeds or buy pre-grown seedlings. Both have their pros and cons.
- Seedling pots or trays: If you start with seeds, you’ll need small pots or trays for starting them.
- Seed starting mix: This soil is specially suited for starting seedlings and contains fewer nutrients than regular potting soil.
- Potting soil: For transplanting into larger pots or outdoors, you will need high-quality potting soil.
- Large pots or a garden bed: Roma tomatoes need enough space to grow.
- Tomato stakes or cages: Roma tomatoes are determinate varieties, which means they grow bushy and not as tall as indeterminate varieties. Nevertheless, they need support.
- Pruning shears: For pruning suckers and removing leaves.
- Watering can or garden hose: for regular watering.
- Fertilizer: Special tomato fertilizer for a rich harvest.
- Mulching material (optional): Straw, wood chips, or grass clippings help to retain moisture in the soil and suppress weeds.
Phase 1: Starting from Seed (if you’re beginning with seeds)
If you decide to start with seeds, you have more control over the entire process and can choose from a wider variety of types. I always find it fascinating to see how a magnificent plant grows from a tiny seed!
- Prepare for sowing: Fill your seedling pots or trays with seed starting mix. Press the soil down lightly.
- Sow the seeds: Place 2-3 seeds per pot about 0.5 cm deep into the soil. Lightly cover the seeds with soil.
- Water: Carefully moisten the soil with a spray bottle or a watering can with a shower head attachment. The soil should be damp, but not wet.
- Keep them warm: Place the pots in a warm, bright place. A temperature of 20-25°C is ideal for germination. A mini-greenhouse or a windowsill above a heater are good options.
- Maintain moisture: Keep the soil evenly moist by spraying it regularly. Avoid waterlogging.
- Wait for germination: Germination usually takes 7-14 days. As soon as the first seedlings appear, they need a lot of light.
- Pricking out: When the seedlings have 2-3 true leaves (not just the seed leaves), it’s time to prick them out. This means you carefully take the strongest seedlings out of the pots and transplant them into larger pots with potting soil. Be careful not to damage the roots.
Phase 2: Preparing the Location
Whether you started with seeds or bought young plants, preparing the location is crucial for success. Roma tomatoes love the sun!
- Choose a location: Choose a sunny spot with at least 6-8 hours of direct sunlight per day.
- Prepare the soil: Roma tomatoes prefer well-draining, nutrient-rich soil. Loosen the soil thoroughly and remove weeds.
- Improve the soil: Mix compost or well-rotted manure into the soil to improve its structure and nutrient content.
- Prepare pots (if you’re growing in pots): Choose large pots with a diameter of at least 30 cm. Fill the pots with high-quality potting soil.
Phase 3: Transplanting Outdoors or into Pots
Now comes the exciting part: transplanting! Be sure to proceed carefully to avoid damaging the delicate roots.
- Choose the right time: Wait until there is no more danger of frost before transplanting the tomatoes outdoors or into pots. This is usually in mid-May after the last frost.
- Prepare the plants: Water the tomato plants thoroughly before transplanting.
- Dig planting holes: Dig planting holes that are slightly larger than the root balls of the tomato plants.
- Planting: Carefully remove the tomato plants from their pots and place them in the planting holes. Make sure the root ball is completely covered with soil.
- Watering in: Water the tomato plants thoroughly after transplanting.
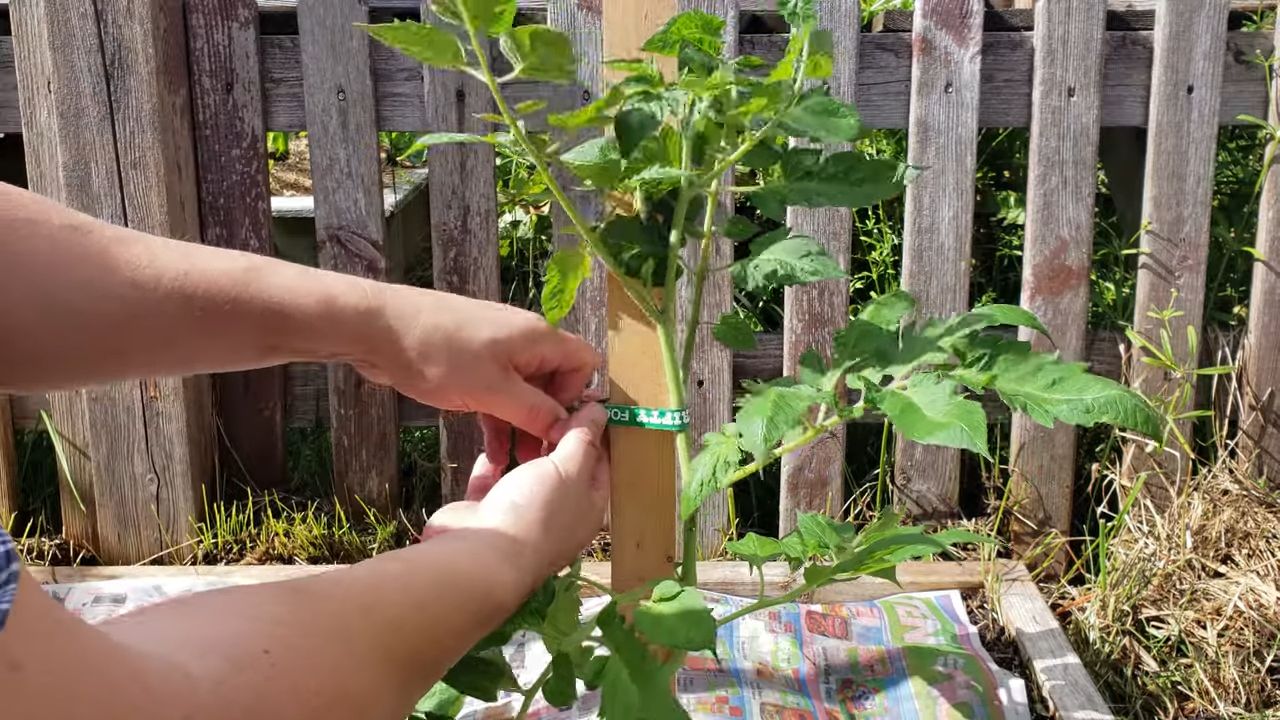
- Install tomato stakes: Place tomato stakes or cages next to the plants to give them support. Although Roma tomatoes are determinate varieties, they can still use some support.
- Mulching (optional): Cover the soil around the tomato plants with mulching material to retain moisture in the soil and suppress weeds.
Phase 4: Caring for Roma Tomatoes
Care is the key to a bountiful harvest. Regular watering, fertilizing, and pruning are important to maintain healthy and productive plants.
- Watering: Water the tomato plants regularly, especially during dry periods. Avoid watering the leaves, as this can promote fungal diseases. It’s best to water in the morning so the plants can dry off during the day.
- Fertilizing: Fertilize the tomato plants every 2-3 weeks with a special tomato fertilizer. Follow the instructions on the packaging.
- Pruning suckers: Roma tomatoes do not need to be pruned as heavily as indeterminate varieties. However, you should still regularly remove the side shoots (suckers) that form in the leaf axils. This promotes the formation of fruit and prevents the plants from becoming too dense.
- Removing leaves: Remove the lower leaves that touch the ground to prevent fungal diseases.
- Protection from pests and diseases: Regularly check the tomato plants for pests and diseases. If necessary, you can use organic pesticides or fungicides.
- Assisting pollination: Tomatoes are self-pollinating, but you can assist pollination by gently shaking the plants or brushing over the flowers with a paintbrush.
Phase 5: The Harvest
The moment you’ve been waiting for! The harvest is the reward for your hard work.
- Harvesting time: Roma tomatoes are ripe when they have a deep red color and can be easily detached from the stem.
- Harvesting: Gently pick the ripe tomatoes.
- Storage: Store the harvested tomatoes in a cool, dry place. They keep best when not stored in the refrigerator.
Additional Tips for a Successful Roma Tomato Harvest:
Choose the right variety: There are different Roma tom…
Conclusion
So, there you have it! Mastering the art of growing Roma tomatoes isn’t just about planting a seed and hoping for the best. It’s about understanding their specific needs, providing the right environment, and employing a few clever DIY tricks to maximize your yield and ensure those delicious, sauce-worthy fruits are plump, juicy, and abundant.
Why is this DIY approach a must-try? Because it empowers you to take control of your tomato-growing journey. You’re not relying solely on commercial fertilizers or generic advice. You’re tailoring your approach to the unique conditions of your garden and the specific needs of your Roma tomato plants. This hands-on approach fosters a deeper connection with your garden and a greater appreciation for the fruits (literally!) of your labor.
Think about it: store-bought tomatoes, even the best ones, often lack the intense flavor and vibrant color of homegrown varieties. And Roma tomatoes, with their meaty texture and low seed count, are particularly rewarding to grow yourself. Imagine the satisfaction of using your own homegrown Roma tomatoes to create a rich, flavorful pasta sauce, a vibrant salsa, or a sun-dried tomato pesto that bursts with freshness.
But the benefits extend beyond just taste. By using DIY methods, you’re often reducing your reliance on potentially harmful chemicals and promoting a more sustainable gardening practice. You’re also saving money by creating your own fertilizers and pest control solutions.
Ready to take your Roma tomato growing to the next level?
Here are a few suggestions and variations to consider as you embark on your DIY adventure:
* **Compost Tea Boost:** Experiment with different types of compost to create your compost tea. Worm castings, aged manure, and kitchen scraps can all contribute unique nutrients to your plants.
* **Epsom Salt Enhancement:** If you notice your plants are lacking magnesium, try adding a small amount of Epsom salt to the soil around the base of the plants. This can help improve nutrient uptake and promote healthy growth.
* **Companion Planting Power:** Explore the benefits of companion planting. Basil, marigolds, and carrots are all known to be beneficial companions for Roma tomatoes, helping to deter pests and improve growth.
* **DIY Tomato Cages:** Instead of buying expensive tomato cages, try making your own using recycled materials like bamboo stakes or chicken wire. This is a great way to save money and reduce waste.
* **Seed Saving:** Once you’ve grown a successful crop of Roma tomatoes, consider saving the seeds for future planting. This is a great way to preserve your favorite varieties and ensure a continuous supply of delicious tomatoes.
Don’t be afraid to experiment and adapt these DIY tricks to suit your specific needs and preferences. Gardening is a journey of learning and discovery, and the more you experiment, the more you’ll learn about what works best for your Roma tomato plants.
We encourage you to try these DIY tricks for growing Roma tomatoes and share your experiences with us! Let us know what worked well for you, what challenges you faced, and any other tips or tricks you’ve discovered along the way. Together, we can create a community of passionate tomato growers who are dedicated to producing the most delicious and abundant crops possible. Share your photos and stories on social media using #DIYRomaTomatoes and let’s inspire others to get growing! Your success story could be the inspiration someone else needs to start their own tomato-growing adventure. Happy gardening!
FAQ
Frequently Asked Questions About Growing Roma Tomatoes
Q: How often should I water my Roma tomato plants?
A: Roma tomato plants need consistent moisture, especially during fruit development. Water deeply and regularly, aiming for about 1-2 inches of water per week, depending on the weather and soil conditions. The best way to determine if your plants need water is to check the soil moisture. Stick your finger about an inch or two into the soil. If it feels dry, it’s time to water. Avoid overhead watering, as this can lead to fungal diseases. Instead, water at the base of the plant, using a soaker hose or drip irrigation system if possible.
Q: What kind of soil is best for growing Roma tomatoes?
A: Roma tomatoes thrive in well-drained, fertile soil with a slightly acidic pH (around 6.0-6.8). Amend your soil with compost or other organic matter to improve drainage, fertility, and water retention. If your soil is heavy clay, consider adding sand or perlite to improve drainage. A soil test can help you determine the pH of your soil and identify any nutrient deficiencies.
Q: How much sunlight do Roma tomato plants need?
A: Roma tomato plants need at least 6-8 hours of direct sunlight per day to produce a bountiful harvest. Choose a sunny location in your garden where your plants will receive ample sunlight throughout the day. If you live in a particularly hot climate, some afternoon shade may be beneficial to prevent sunscald.
Q: When should I start my Roma tomato seeds indoors?
A: Start your Roma tomato seeds indoors about 6-8 weeks before the last expected frost in your area. This will give your seedlings a head start and allow them to develop strong root systems before being transplanted outdoors. Use a seed-starting mix and provide plenty of light, either from a sunny window or a grow light.
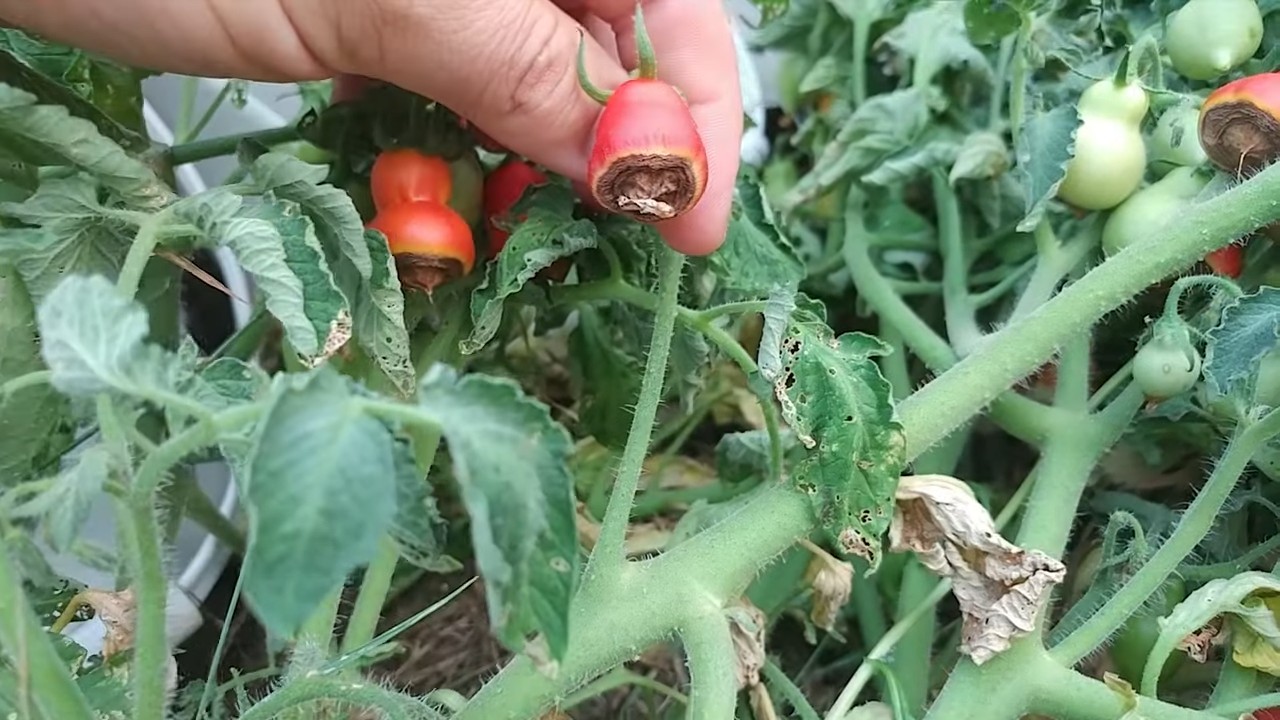
Q: How do I prevent blossom end rot on my Roma tomatoes?
A: Blossom end rot is a common problem that occurs when tomatoes don’t receive enough calcium. To prevent blossom end rot, ensure your soil is rich in calcium and that your plants are receiving consistent watering. You can add calcium to the soil by incorporating bone meal or crushed eggshells. Avoid over-fertilizing with nitrogen, as this can interfere with calcium uptake.
Q: What are some common pests and diseases that affect Roma tomatoes?
A: Common pests that affect Roma tomatoes include aphids, tomato hornworms, and whiteflies. Common diseases include early blight, late blight, and fusarium wilt. Regularly inspect your plants for signs of pests or diseases and take action promptly. Use organic pest control methods whenever possible, such as insecticidal soap or neem oil. Choose disease-resistant varieties of Roma tomatoes to minimize the risk of disease.
Q: How do I prune my Roma tomato plants?
A: Pruning Roma tomato plants can help improve air circulation, reduce disease, and encourage fruit production. Remove suckers (the small shoots that grow between the main stem and the branches) to direct the plant’s energy towards fruit development. You can also remove yellowing or diseased leaves.
Q: When is the best time to harvest Roma tomatoes?
A: Roma tomatoes are typically ready to harvest about 70-80 days after transplanting. The tomatoes should be firm, plump, and have a deep red color. Gently twist the tomato from the vine, leaving the stem attached.
Q: Can I grow Roma tomatoes in containers?
A: Yes, Roma tomatoes can be successfully grown in containers, but you’ll need to choose a large container (at least 10-15 gallons) to accommodate their root systems. Use a well-draining potting mix and provide regular watering and fertilization. Container-grown tomatoes may require more frequent watering than those grown in the ground.
Q: How do I store my harvested Roma tomatoes?
A: Store your harvested Roma tomatoes at room temperature, away from direct sunlight. Avoid refrigerating them, as this can affect their flavor and texture. If you have a large harvest, you can preserve your Roma tomatoes by canning them, making sauce, or drying them.
Leave a Comment