
Easy bean sprouts gardening – ever dreamt of having fresh, crunchy sprouts at your fingertips, ready to add a burst of flavor and nutrition to your meals? Forget those expensive store-bought containers! I’m going to show you how incredibly simple it is to grow your own delicious bean sprouts right in your kitchen.
Sprouting beans isn’t just a trendy health kick; it’s a practice with roots stretching back thousands of years. Ancient cultures, particularly in Asia, recognized the incredible nutritional benefits and ease of growing sprouts, making them a staple food source. Think of it – a readily available source of vitamins and minerals, even during harsh winters!
In today’s fast-paced world, we’re all looking for ways to eat healthier and save money. That’s where easy bean sprouts gardening comes in. Imagine skipping the grocery store run and knowing exactly where your food comes from. Plus, growing your own sprouts is a fantastic way to reduce food waste and connect with nature, even if you only have a small apartment. This DIY guide will walk you through every step, from choosing the right beans to harvesting your first batch of crunchy, nutritious sprouts. Get ready to unlock the secrets to fresh, homegrown goodness!

DIY Bean Sprouts: A Beginner’s Guide to Growing Your Own Crunchy Goodness
Hey there, fellow food enthusiasts! Ever craved fresh, crunchy bean sprouts but dreaded the grocery store trip? Well, I’m here to tell you that growing your own bean sprouts at home is surprisingly easy, incredibly rewarding, and a whole lot cheaper! Forget those pre-packaged sprouts that might be days old – we’re talking about vibrant, living sprouts bursting with flavor and nutrients, ready to add a delightful crunch to your salads, stir-fries, and sandwiches.
This guide will walk you through everything you need to know to become a bean sprout pro, even if you’ve never gardened a day in your life. Trust me, if I can do it, you can too!
What You’ll Need: The Bean Sprout Starter Kit
Before we dive in, let’s gather our supplies. The beauty of this project is that you probably already have most of these items lying around your kitchen!
* **Your Choice of Beans:** Mung beans are the classic choice for bean sprouts, but you can also experiment with adzuki beans, lentils, chickpeas, or even radish seeds for a spicier kick. I personally love mung beans for their mild flavor and reliable sprouting.
* **A Wide-Mouth Jar:** A quart-sized mason jar works perfectly. You can also use a clean glass container.
* **Sprouting Lid or Cheesecloth:** You’ll need something to cover the jar and allow for drainage. A sprouting lid is ideal, but a piece of cheesecloth secured with a rubber band will work just as well.
* **Water:** Clean, filtered water is best.
* **A Dark Place:** A cupboard, pantry, or even a cardboard box will do the trick. Darkness is crucial for proper sprout development.
* **A Bowl or Tray:** To catch any excess water that drains from the jar.
Step-by-Step Sprouting Success: The Process
Alright, let’s get sprouting! This process takes about 3-5 days, so get ready for some quick daily maintenance.
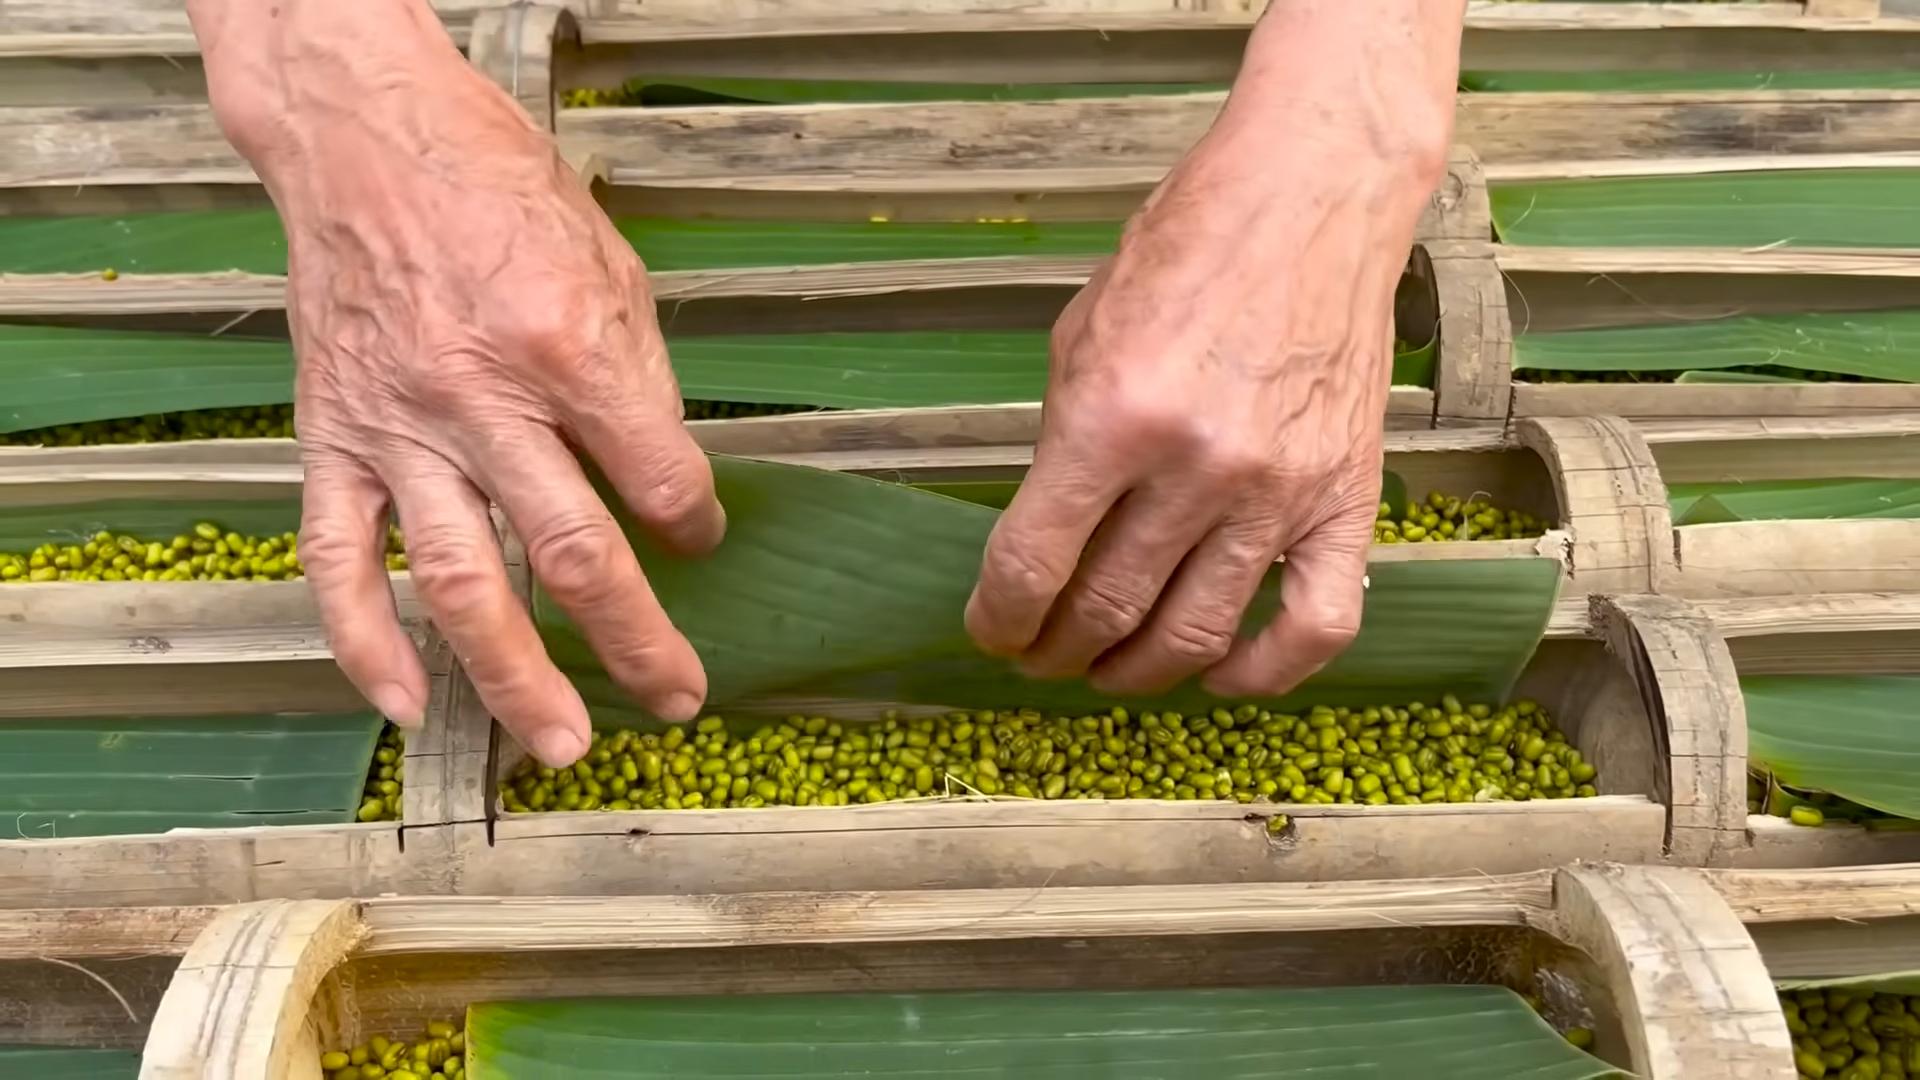
1. **Rinse and Sort Your Beans:** Start by rinsing your beans thoroughly under cool water. This will remove any dirt or debris. While you’re rinsing, take a moment to sort through the beans and discard any that are broken, discolored, or look damaged. We want only the healthiest beans for the best sprouting results.
2. **Soak the Beans:** Place the rinsed and sorted beans in your wide-mouth jar. Add enough cool water to completely cover the beans, plus a couple of inches extra. Beans will absorb a lot of water as they soak, so make sure they have plenty of room to expand. Cover the jar with your sprouting lid or cheesecloth and secure it with a rubber band. Let the beans soak for 8-12 hours, or even overnight. This soaking process is essential to kickstart the germination process. I usually soak mine overnight so they are ready to go in the morning.
3. **Drain and Rinse (The First Time):** After the soaking period, drain the water from the jar completely. Rinse the beans thoroughly with fresh, cool water. This is important to remove any accumulated starches and prevent mold growth. Swirl the beans around in the jar to ensure they are all rinsed.
4. **Invert and Drain:** After rinsing, invert the jar over a bowl or tray to allow any excess water to drain out. The goal is to keep the beans moist but not sitting in water. This is where your sprouting lid or cheesecloth comes in handy, allowing the water to drain while keeping the beans inside.
5. **Darkness is Key:** Place the jar in a dark, well-ventilated place. A cupboard or pantry is ideal. You can also use a cardboard box. The darkness helps the sprouts grow long and white, rather than short and green.
6. **Rinse and Drain (Daily):** This is the most important step! Rinse and drain your bean sprouts at least twice a day, morning and evening. This keeps them hydrated and prevents mold from forming. Use cool, fresh water each time. Make sure to drain the water thoroughly after each rinse. I usually do this over the sink, making sure to shake the jar gently to remove any excess water.
7. **Observe and Adjust:** Keep an eye on your bean sprouts. You should start to see tiny sprouts emerging within a day or two. If you notice any mold growth (it will usually appear as fuzzy white or gray patches), discard the entire batch immediately. Proper rinsing and drainage are crucial to prevent mold. If your sprouts seem dry, increase the frequency of rinsing. If they seem too wet, ensure they are draining properly.
8. **Harvest Time!** After 3-5 days, your bean sprouts should be ready to harvest. They should be about 1-2 inches long and have a nice, crunchy texture. The exact time will depend on the type of bean you’re using and the temperature of your environment.
9. **Final Rinse and Storage:** Give your bean sprouts one final rinse under cool water. Gently remove any remaining bean hulls (the outer skins). These are edible but can sometimes be a bit bitter. Drain the sprouts thoroughly. Store your freshly grown bean sprouts in an airtight container in the refrigerator. They should last for about a week.
Troubleshooting: Common Issues and Solutions
Even with the best intentions, sometimes things don’t go exactly as planned. Here are some common issues you might encounter and how to fix them:
* **Mold Growth:** This is the most common problem. It’s usually caused by insufficient rinsing or drainage. Make sure you are rinsing your sprouts thoroughly at least twice a day and that they are draining properly. If you see any mold, discard the entire batch.
* **Slow Sprouting:** If your beans are taking longer than expected to sprout, it could be due to a few factors. The temperature might be too cold. Bean sprouts prefer a slightly warmer environment (around 70-75°F). Also, make sure your beans are fresh. Older beans may have a lower germination rate.
* **Bitter Taste:** Sometimes bean sprouts can have a slightly bitter taste. This is often due to the bean hulls. Try removing as many of the hulls as possible before storing your sprouts.
* **Slimy Texture:** A slimy texture can indicate bacterial growth. This is usually caused by insufficient rinsing or drainage. Make sure you are rinsing your sprouts thoroughly and draining them well.
Beyond Mung Beans: Exploring Other Sprouting Options
While mung beans are a great starting point, don’t be afraid to experiment with other types of beans and seeds! Here are a few ideas to get you started:
* **Adzuki Beans:** These have a slightly sweeter flavor than mung beans.
* **Lentils:** Lentil sprouts are packed with protein and fiber.
* **Chickpeas:** Chickpea sprouts have a nutty flavor and a satisfying crunch.
* **Radish Seeds:** Radish sprouts have a spicy, peppery flavor.
* **Alfalfa Seeds:** Alfalfa sprouts are a classic choice for salads and sandwiches.
* **Broccoli Seeds:** Broccoli sprouts are incredibly nutritious and have a mild, slightly bitter flavor.
The sprouting process is generally the same for all of these beans and seeds, but the sprouting time may vary. Be sure to research the specific sprouting time for the type of bean or seed you’re using.
Sprout Recipes: Delicious Ways to Enjoy Your Harvest
Now that you’ve got a jar full of fresh, crunchy bean sprouts, it’s time to put them to good use! Here are a few of my favorite ways to enjoy them:
* **Salads:** Add bean sprouts to your favorite salads for a boost of flavor and texture. They pair well with Asian-inspired dressings.
* **Stir-Fries:** Toss bean sprouts into your stir-fries during the last minute of cooking to maintain their crunch.
* **Sandwiches and Wraps:** Add bean sprouts to sandwiches and wraps for a refreshing crunch.
* **Spring Rolls:** Bean sprouts are a classic ingredient in fresh spring rolls.
* **Soups:** Add bean sprouts to soups just before serving for a burst of freshness.
* **As a Garnish:** Sprinkle bean sprouts over your favorite dishes as a garnish.
Tips for Success: My Personal Sprouting Secrets
Over time, I’ve learned a few tricks that have helped me consistently grow delicious bean sprouts. Here are a few of my personal tips:
* **Use Fresh Beans:** The fresher the beans, the better the germination rate. Try to use beans that are relatively new.
* **Maintain a Consistent Temperature:** Bean sprouts prefer a slightly warmer environment. If your kitchen is too cold, consider placing the jar in a warmer location.
* **Don’t Overcrowd the Jar:** Don’t put too many beans in the jar. They need room to expand and sprout.
* **Be Patient:** Sprouting takes time. Don’t get discouraged if your sprouts don’t grow overnight. Just keep rinsing and draining them, and they will eventually sprout.
* **Experiment!** Don’t be afraid to experiment with different types of beans and seeds. You might discover a new favorite!
So there you have it! Everything you
Conclusion
So, there you have it! Transforming humble beans into a vibrant harvest of fresh, crunchy bean sprouts right in your own kitchen is not only incredibly easy but also immensely rewarding. Forget those limp, flavorless sprouts from the grocery store – with this simple DIY trick, you’ll be enjoying the freshest, most flavorful bean sprouts imaginable, bursting with nutrients and ready to elevate your salads, stir-fries, and sandwiches.
This isn’t just about saving money; it’s about connecting with your food, understanding where it comes from, and experiencing the satisfaction of growing something yourself. It’s a fantastic project for families, a great way to introduce kids to the wonders of gardening, and a sustainable practice that reduces your reliance on commercially produced goods.
But the best part? The possibilities are endless! Experiment with different types of beans – mung beans are the classic choice, but adzuki beans, lentils, and even chickpeas can be sprouted with equally delicious results. Try varying the sprouting time to achieve your preferred sprout length and texture. Add a touch of spice by including a pinch of chili flakes during the soaking process, or infuse your sprouts with a subtle herbal aroma by placing a sprig of rosemary or thyme in the sprouting jar.
Consider using different sprouting containers. While a mason jar with a sprouting lid is a great starting point, you can also explore using a multi-tiered sprouting tray for larger batches or even a simple colander lined with cheesecloth. The key is to ensure proper drainage and ventilation to prevent mold growth.
Don’t be afraid to get creative and personalize your bean sprouts gardening experience. The beauty of this DIY project lies in its simplicity and adaptability. It’s a blank canvas for your culinary imagination.
We wholeheartedly encourage you to give this DIY bean sprouts gardening method a try. It’s a fun, affordable, and incredibly satisfying way to add fresh, healthy ingredients to your diet. And once you’ve tasted the difference between homegrown sprouts and store-bought ones, you’ll never go back!
Share your experiences with us! We’d love to hear about your successes, your challenges, and any variations you’ve discovered. Post photos of your beautiful bean sprouts on social media using #DIYBeanSprouts and tag us so we can celebrate your green thumb. Let’s build a community of sprout enthusiasts and inspire others to embrace the joy of homegrown goodness. Happy sprouting!
Frequently Asked Questions (FAQ)
1. What types of beans are best for sprouting?
The most common and readily available bean for sprouting is the mung bean. Mung beans sprout quickly and reliably, producing the classic bean sprouts you find in many Asian dishes. However, you can also successfully sprout other types of beans and legumes, including:
* Adzuki beans: These have a slightly sweeter flavor than mung beans and are often used in desserts.
* Lentils: Lentils sprout quickly and have a slightly nutty flavor. They are a good source of protein and fiber.
* Chickpeas: Chickpeas take a bit longer to sprout than other beans, but they offer a hearty and satisfying sprout.
* Green peas: These offer a fresh, sweet flavor and are a great addition to salads.
* Radish seeds: While not technically beans, radish seeds sprout quickly and add a spicy kick to your dishes.
Avoid sprouting kidney beans, lima beans, and other large beans without cooking them first, as they contain toxins that are neutralized by heat. Always research the specific bean you plan to sprout to ensure it’s safe to eat raw.
2. How long does it take for bean sprouts to grow?
The sprouting time varies depending on the type of bean and the environmental conditions (temperature, humidity). Generally, mung beans will sprout in 3-5 days. Lentils and adzuki beans may take 2-4 days. Chickpeas can take up to 5-7 days. Keep in mind that warmer temperatures will accelerate the sprouting process, while cooler temperatures will slow it down.
3. How do I prevent mold growth during sprouting?
Mold growth is a common concern when sprouting beans, but it can be easily prevented by following these tips:
* Use clean equipment: Thoroughly wash your sprouting jar, lid, and any other equipment with hot, soapy water before each use.
* Rinse frequently: Rinse the beans at least twice a day, preferably 3-4 times, with fresh, cool water. This helps to remove any bacteria or mold spores that may be present.
* Ensure proper drainage: Make sure the sprouting jar or container has adequate drainage to prevent water from pooling around the beans.
* Provide good ventilation: Avoid overcrowding the beans in the jar and ensure there is good airflow around the sprouting container.
* Use fresh beans: Old or damaged beans are more susceptible to mold growth. Use fresh, high-quality beans for best results.
* If you see mold: Discard the entire batch of sprouts immediately. Do not attempt to salvage any of the sprouts.
4. How do I store bean sprouts?
Once your bean sprouts have reached your desired length, rinse them thoroughly and drain them well. Store them in an airtight container lined with a paper towel in the refrigerator. The paper towel will help to absorb excess moisture and keep the sprouts fresh. Bean sprouts can typically be stored in the refrigerator for up to 5-7 days.
5. Are bean sprouts safe to eat?
Homegrown bean sprouts are generally safe to eat if you follow proper hygiene and sprouting practices. However, it’s important to be aware of the potential risks of bacterial contamination, such as Salmonel
So, there you have it! Transforming humble beans into a vibrant harvest of fresh, crunchy bean sprouts right in your own kitchen is not only incredibly easy but also immensely rewarding. Forget those limp, flavorless sprouts from the grocery store – with this simple DIY trick, you’ll be enjoying the freshest, most flavorful bean sprouts imaginable, bursting with nutrients and ready to elevate your salads, stir-fries, and sandwiches.
This isn’t just about saving money; it’s about connecting with your food, understanding where it comes from, and experiencing the satisfaction of growing something yourself. It’s a fantastic project for families, a great way to introduce kids to the wonders of gardening, and a sustainable practice that reduces your reliance on commercially produced goods.
But the best part? The possibilities are endless! Experiment with different types of beans – mung beans are the classic choice, but adzuki beans, lentils, and even chickpeas can be sprouted with equally delicious results. Try varying the sprouting time to achieve your preferred sprout length and texture. Add a touch of spice by including a pinch of chili flakes during the soaking process, or infuse your sprouts with a subtle herbal aroma by placing a sprig of rosemary or thyme in the sprouting jar.
Consider using different sprouting containers. While a mason jar with a sprouting lid is a great starting point, you can also explore using a multi-tiered sprouting tray for larger batches or even a simple colander lined with cheesecloth. The key is to ensure proper drainage and ventilation to prevent mold growth.
Don’t be afraid to get creative and personalize your bean sprouts gardening experience. The beauty of this DIY project lies in its simplicity and adaptability. It’s a blank canvas for your culinary imagination.
We wholeheartedly encourage you to give this DIY bean sprouts gardening method a try. It’s a fun, affordable, and incredibly satisfying way to add fresh, healthy ingredients to your diet. And once you’ve tasted the difference between homegrown sprouts and store-bought ones, you’ll never go back!
Share your experiences with us! We’d love to hear about your successes, your challenges, and any variations you’ve discovered. Post photos of your beautiful bean sprouts on social media using #DIYBeanSprouts and tag us so we can celebrate your green thumb. Let’s build a community of sprout enthusiasts and inspire others to embrace the joy of homegrown goodness. Happy sprouting!
Frequently Asked Questions (FAQ)
1. What types of beans are best for sprouting?
The most common and readily available bean for sprouting is the mung bean. Mung beans sprout quickly and reliably, producing the classic bean sprouts you find in many Asian dishes. However, you can also successfully sprout other types of beans and legumes, including:
* Adzuki beans: These have a slightly sweeter flavor than mung beans and are often used in desserts.
* Lentils: Lentils sprout quickly and have a slightly nutty flavor. They are a good source of protein and fiber.
* Chickpeas: Chickpeas take a bit longer to sprout than other beans, but they offer a hearty and satisfying sprout.
* Green peas: These offer a fresh, sweet flavor and are a great addition to salads.
* Radish seeds: While not technically beans, radish seeds sprout quickly and add a spicy kick to your dishes.
Avoid sprouting kidney beans, lima beans, and other large beans without cooking them first, as they contain toxins that are neutralized by heat. Always research the specific bean you plan to sprout to ensure it’s safe to eat raw.
2. How long does it take for bean sprouts to grow?
The sprouting time varies depending on the type of bean and the environmental conditions (temperature, humidity). Generally, mung beans will sprout in 3-5 days. Lentils and adzuki beans may take 2-4 days. Chickpeas can take up to 5-7 days. Keep in mind that warmer temperatures will accelerate the sprouting process, while cooler temperatures will slow it down.
3. How do I prevent mold growth during sprouting?
Mold growth is a common concern when sprouting beans, but it can be easily prevented by following these tips:
* Use clean equipment: Thoroughly wash your sprouting jar, lid, and any other equipment with hot, soapy water before each use.
* Rinse frequently: Rinse the beans at least twice a day, preferably 3-4 times, with fresh, cool water. This helps to remove any bacteria or mold spores that may be present.
* Ensure proper drainage: Make sure the sprouting jar or container has adequate drainage to prevent water from pooling around the beans.
* Provide good ventilation: Avoid overcrowding the beans in the jar and ensure there is good airflow around the sprouting container.
* Use fresh beans: Old or damaged beans are more susceptible to mold growth. Use fresh, high-quality beans for best results.
* If you see mold: Discard the entire batch of sprouts immediately. Do not attempt to salvage any of the sprouts.
4. How do I store bean sprouts?
Once your bean sprouts have reached your desired length, rinse them thoroughly and drain them well. Store them in an airtight container lined with a paper towel in the refrigerator. The paper towel will help to absorb excess moisture and keep the sprouts fresh. Bean sprouts can typically be stored in the refrigerator for up to 5-7 days.
5. Are bean sprouts safe to eat?
Homegrown bean sprouts are generally safe to eat if you follow proper hygiene and sprouting practices. However, it’s important to be aware of the potential risks of bacterial contamination, such as Salmonella or E. coli. To minimize these risks:
* Start with clean beans and equipment.
* Rinse the beans thoroughly and frequently.
* Store the sprouts properly in the refrigerator.
* If you are pregnant, elderly, or have a weakened immune system, it’s best to cook bean sprouts thoroughly before eating them.
6. Can I sprout beans without a special sprouting jar?
Yes, you can sprout beans without a special sprouting jar. A mason jar with a cheesecloth secured with a rubber band works well. You can also use a colander lined with cheesecloth or a multi-tiered sprouting tray. The key is to ensure proper drainage and ventilation.
7. My bean sprouts are bitter. What did I do wrong?
Bitterness in bean sprouts can be caused by several factors:
* Over-sprouting: Sprouting the beans for too long can result in a bitter taste. Try reducing the sprouting time in your next batch.
* Poor water quality: Using tap water with high chlorine content can sometimes affect the flavor of the sprouts. Try using filtered water for rinsing.
* Bean variety: Some bean varieties are naturally more bitter than others. Experiment with different types of beans to find one you prefer.
8. Can I use tap water for sprouting?
While you can use tap water for sprouting, filtered water is generally recommended. Tap water can contain chlorine and other chemicals that may affect the flavor of the sprouts or inhibit their growth. If you do use tap water, let it sit for a few hours to allow the chlorine to dissipate.
9. How do I know when my bean sprouts are ready to eat?
Bean sprouts are ready to eat when they have reached your desired length and have a crisp, crunchy texture. The ideal length is typically around 1-2 inches. Taste a few sprouts to ensure they have a fresh, clean flavor.
10. Can I grow bean sprouts in direct sunlight?
No, bean sprouts should not be grown in direct sunlight. Direct sunlight can cause the sprouts to overheat and dry out, which can inhibit their growth and promote mold growth. Keep the sprouting container in a cool, dark place, such as a cupboard or pantry.

Leave a Comment