
Grow melons successfully, and you’ll unlock a world of juicy, sweet rewards right in your own backyard! Imagine biting into a perfectly ripe, homegrown watermelon on a hot summer day – the taste is simply unmatched. But let’s be honest, cultivating these delicious fruits can sometimes feel like a daunting task. That’s where these DIY tricks and hacks come in!
Melons have a rich history, dating back thousands of years to Africa and Asia. They were prized by ancient civilizations for their refreshing taste and nutritional value. Today, the tradition continues, and many gardeners are eager to grow melons successfully. However, common challenges like pests, diseases, and inconsistent watering can often lead to disappointing results.
That’s why I’ve compiled this guide filled with simple, effective DIY solutions to help you overcome these hurdles. Whether you’re a seasoned gardener or just starting out, these tips will empower you to create the ideal environment for your melon plants to thrive. From clever watering techniques to natural pest control methods, we’ll cover everything you need to know to enjoy a bountiful harvest of sweet, succulent melons. Get ready to roll up your sleeves and transform your garden into a melon paradise!

Growing Melons Like a Pro: My DIY Guide to Sweet Success
Okay, so you want to grow melons? Awesome! There’s nothing quite like biting into a juicy, homegrown melon on a hot summer day. I’ve been growing melons for years, and while it can seem a little daunting at first, I promise it’s totally achievable with a little planning and effort. This guide is all about sharing my secrets to help you grow the sweetest, most delicious melons you’ve ever tasted. Let’s get started!
Choosing the Right Melon Variety
First things first, you need to pick your melon! There are so many varieties to choose from, and the best one for you will depend on your climate, space, and personal preferences. Here’s a quick rundown of some popular choices:
* Watermelons: These are the classic summer melon. They need a lot of space and sun. Consider smaller “icebox” varieties if you have limited space.
* Cantaloupes: These are known for their sweet, orange flesh and netted rind. They’re a bit easier to grow than watermelons and don’t need quite as much space.
* Honeydew Melons: These have a smooth, pale green rind and sweet, light green flesh. They’re similar to cantaloupes in terms of growing requirements.
* Galia Melons: A cross between a cantaloupe and a honeydew, these have a yellow rind and a spicy-sweet flavor.
* Specialty Melons: Don’t be afraid to experiment! There are tons of unique melon varieties out there, like Crenshaw, Casaba, and Korean melons.
My Tip: Check your local nursery or seed catalog for varieties that are well-suited to your specific climate. Look for disease-resistant varieties to minimize problems later on.
Preparing Your Melon Patch
Melons are sun-loving, hungry plants, so proper soil preparation is key.
* Sunlight: Melons need at least 6-8 hours of direct sunlight per day. Choose a location that gets plenty of sun throughout the growing season.
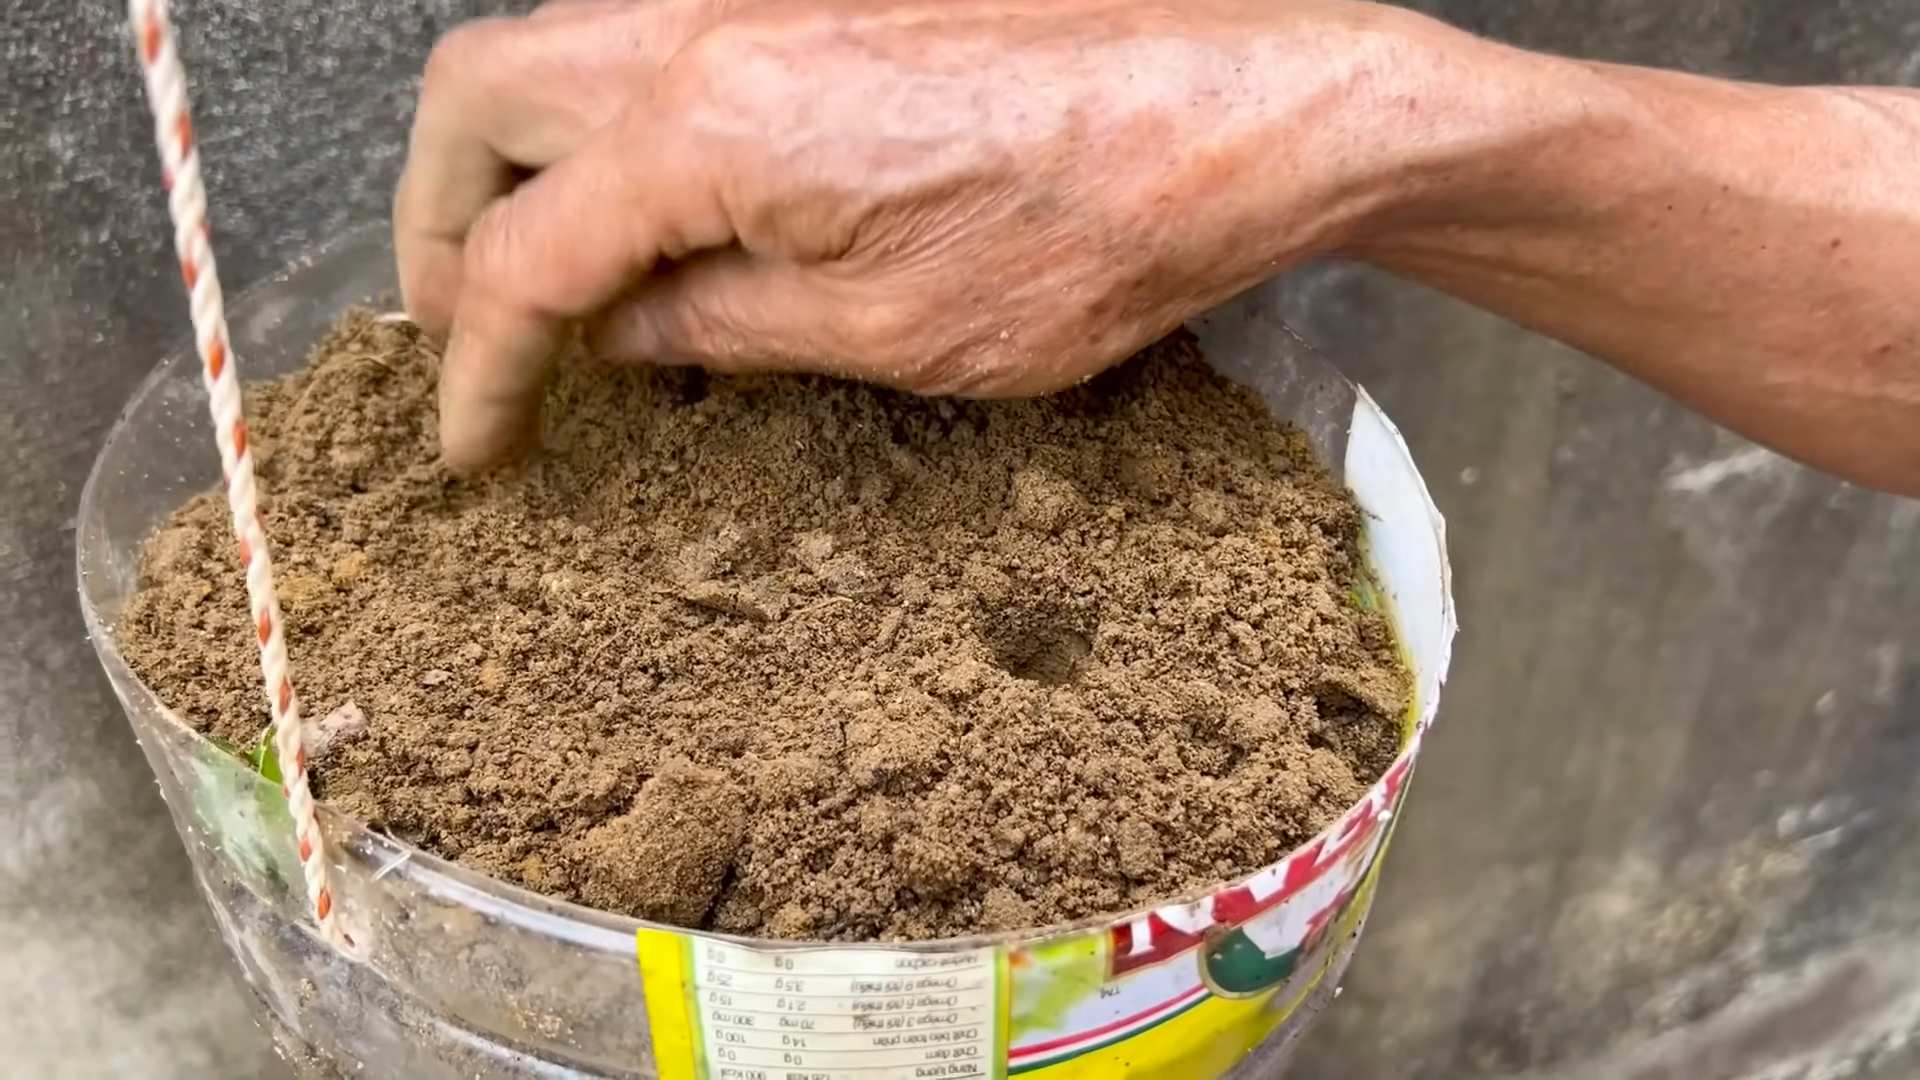
* Soil: Melons prefer well-drained, fertile soil with a pH between 6.0 and 6.8. Amend your soil with plenty of compost or well-rotted manure to improve drainage and fertility.
* Space: Melons need a lot of space to sprawl. Watermelons can easily take up 10-15 square feet per plant, while cantaloupes and honeydews need about 4-6 square feet. Consider using trellises for smaller melon varieties to save space.
* Watering: Consistent watering is crucial, especially during fruit development. Aim for about 1-2 inches of water per week.
* Fertilizing: Melons are heavy feeders, so fertilize them regularly with a balanced fertilizer. I like to use a fertilizer that’s high in phosphorus and potassium to promote fruit production.
Step-by-Step Planting Guide
Now for the fun part – planting! You can either start your melon seeds indoors or direct sow them in the garden. I usually start mine indoors to get a head start on the season.
Starting Seeds Indoors (Optional)
1. Timing: Start your seeds about 4-6 weeks before the last expected frost.
2. Containers: Use individual peat pots or seed trays filled with seed-starting mix.
3. Sowing: Sow the seeds about 1 inch deep.
4. Watering: Keep the soil consistently moist but not soggy.
5. Warmth: Melons need warm temperatures to germinate. Use a heat mat to keep the soil temperature between 80-90°F (27-32°C).
6. Light: Once the seedlings emerge, provide them with plenty of light. A sunny windowsill or grow lights will work well.
7. Hardening Off: Before transplanting your seedlings outdoors, you’ll need to “harden them off” to acclimate them to the outdoor conditions. Gradually expose them to longer periods of sunlight and cooler temperatures over a period of 1-2 weeks.
Direct Sowing Seeds Outdoors
1. Timing: Wait until the soil has warmed up to at least 70°F (21°C) before direct sowing your melon seeds.
2. Planting: Sow the seeds about 1 inch deep and space them according to the variety’s recommendations.
3. Watering: Keep the soil consistently moist until the seedlings emerge.
4. Thinning: Once the seedlings have a few true leaves, thin them to the strongest plant per hill.
Transplanting Seedlings Outdoors
1. Timing: Transplant your seedlings outdoors after the last expected frost, when the soil has warmed up to at least 70°F (21°C).
2. Preparation: Dig a hole that’s slightly larger than the root ball of the seedling.
3. Planting: Gently remove the seedling from its container and place it in the hole. Backfill with soil and water thoroughly.
4. Spacing: Space the plants according to the variety’s recommendations.
5. Mulching: Apply a layer of mulch around the plants to help retain moisture, suppress weeds, and regulate soil temperature.
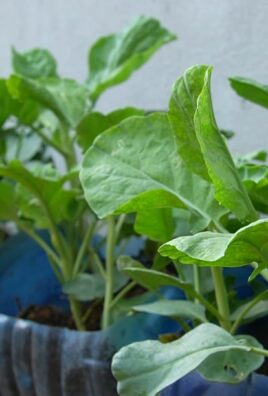
Caring for Your Melon Plants
Once your melon plants are in the ground, it’s time to give them the TLC they need to thrive.
* Watering: Water deeply and regularly, especially during hot, dry weather. Avoid overhead watering, as this can promote fungal diseases. Drip irrigation is a great option for melons.
* Fertilizing: Fertilize your melon plants every 2-3 weeks with a balanced fertilizer. You can also side-dress them with compost or well-rotted manure.
* Weeding: Keep your melon patch free of weeds, as they can compete with the plants for nutrients and water.
* Pest Control: Keep an eye out for common melon pests like aphids, squash bugs, and cucumber beetles. Use organic pest control methods like insecticidal soap or neem oil to control these pests.
* Disease Control: Melons are susceptible to fungal diseases like powdery mildew and downy mildew. Prevent these diseases by providing good air circulation, avoiding overhead watering, and applying a fungicide if necessary.
* Pollination: Melons need to be pollinated in order to produce fruit. If you’re not seeing any fruit set, you may need to hand-pollinate the flowers. To do this, use a small paintbrush to transfer pollen from the male flowers to the female flowers. Female flowers have a small, immature melon at the base of the flower.
Trellising Melons (Optional)
Trellising melons can save space and improve air circulation, which can help prevent diseases.
* Choosing a Trellis: Use a sturdy trellis that can support the weight of the melons. A tomato cage, cattle panel, or wooden trellis will work well.
* Training the Vines: As the melon vines grow, train them to climb up the trellis. You may need to tie the vines to the trellis with twine or plant clips.
* Supporting the Fruit: As the melons develop, they may need additional support to prevent them from breaking off the vine. Use slings made from pantyhose or netting to support the fruit.
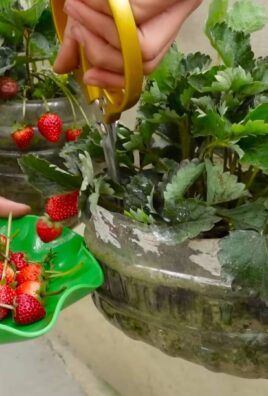
Harvesting Your Melons
The moment you’ve been waiting for! Knowing when to harvest your melons is crucial for getting the best flavor.
* Watermelons: Look for a dry tendril closest to the melon, a dull sound when you thump the melon, and a yellow spot on the underside where the melon rested on the ground.
* Cantaloupes: The melon should slip easily from the vine when it’s ripe. It should also have a sweet aroma.
* Honeydew Melons: The melon should have a slightly waxy feel and a sweet aroma. The blossom end should be slightly soft.
My Tip: Don’t be afraid to taste a small piece of melon to check for ripeness.
Troubleshooting Common Melon Problems
Even with the best care, you may encounter some problems while growing melons. Here are a few common issues and how to fix them:
* Poor Fruit Set: This can be caused by lack of pollination, hot weather, or nutrient deficiencies. Hand-pollinate the flowers, provide shade during the hottest part of the day, and fertilize with a balanced fertilizer.
* Cracked Melons: This can be caused by inconsistent watering. Water deeply and regularly, especially during dry weather.
* Blossom End Rot: This is caused by a calcium deficiency. Amend your soil with lime before planting and water regularly.
* Pest Infestations: Use organic pest control methods to control pests.
* Fungal Diseases: Provide good air circulation, avoid overhead watering,
Conclusion
So, there you have it! Mastering the art of growing melons successfully doesn’t require a green thumb blessed by the gardening gods. It simply requires a little know-how, a dash of patience, and the willingness to embrace this simple yet effective DIY trick. We’ve walked you through the steps, highlighting the benefits of this method for boosting your melon yield and protecting your precious fruits from ground pests and diseases.
Why is this a must-try? Because it’s a game-changer. Imagine biting into a juicy, homegrown cantaloupe or watermelon, knowing you nurtured it from seed to table with your own hands. This DIY approach empowers you to take control of your melon cultivation, ensuring healthier, more flavorful fruits while minimizing the risk of common problems that plague ground-grown melons. It’s about maximizing your garden space, optimizing sunlight exposure, and creating an environment where your melons can thrive.
But don’t stop there! Feel free to experiment and adapt this technique to suit your specific needs and preferences. Consider using different types of supports, such as trellises or slings, depending on the size and weight of your melon varieties. For smaller melon types like personal watermelons or cantaloupes, a simple trellis system might suffice. For larger varieties, you might need to create more robust slings using burlap or netting to provide extra support as the fruits mature.
Another variation to explore is the type of container you use. While we’ve focused on raised beds and large pots, you could also experiment with grow bags. Grow bags offer excellent drainage and aeration, which are crucial for healthy root development. Just be sure to choose a bag that’s large enough to accommodate the mature size of your melon plant.
Furthermore, think about companion planting. Marigolds, for example, are known to deter pests and can be planted near your melons to provide natural protection. Basil is another excellent companion plant, as it attracts beneficial insects and can improve the overall health of your melon plants.
The key takeaway here is that growing melons successfully is an achievable goal for any gardener, regardless of experience level. This DIY trick is a valuable tool in your arsenal, offering a simple yet effective way to enhance your melon-growing efforts.
We wholeheartedly encourage you to give this method a try. Don’t be afraid to get your hands dirty and experiment with different variations. The reward of harvesting your own delicious, homegrown melons is well worth the effort.
And most importantly, we want to hear about your experiences! Share your successes, your challenges, and any tips or tricks you discover along the way. Let’s create a community of melon enthusiasts who are passionate about growing the best possible fruits. Post your photos, share your stories, and let’s learn from each other. Happy gardening!
Frequently Asked Questions (FAQ)
What type of melons does this DIY trick work best for?
This technique is versatile and can be applied to a wide range of melon varieties, including watermelons, cantaloupes, honeydews, and even smaller melon types like Galia melons. The key is to adjust the support system based on the size and weight of the mature fruit. For heavier varieties, you’ll need a more robust support structure to prevent the melons from falling off the vine. For smaller varieties, a simple trellis or netting might suffice. Experiment and see what works best for your chosen melon type.
How often should I water my melons when using this method?
Watering frequency depends on several factors, including the weather, the type of soil you’re using, and the size of your container. As a general rule, melons need consistent moisture, especially during fruit development. Check the soil moisture regularly by sticking your finger about an inch into the soil. If it feels dry, it’s time to water. Aim to keep the soil consistently moist but not waterlogged. Overwatering can lead to root rot, so ensure your container has good drainage. During hot, dry periods, you may need to water daily, while during cooler, wetter periods, you may only need to water every few days.
What type of fertilizer should I use for my melons?
Melons are heavy feeders and require a balanced fertilizer to thrive. Look for a fertilizer that’s specifically formulated for fruits and vegetables, with a higher phosphorus and potassium content than nitrogen. Phosphorus promotes root development and flowering, while potassium is essential for fruit production and ripening. Apply fertilizer according to the package instructions, typically every 2-3 weeks during the growing season. You can also supplement with organic fertilizers like compost tea or fish emulsion. Avoid over-fertilizing, as this can lead to excessive foliage growth at the expense of fruit production.
How do I protect my melons from pests and diseases when they are off the ground?
While this DIY trick helps to minimize contact with ground pests and diseases, it’s still important to take preventative measures. Regularly inspect your melon plants for signs of pests like aphids, squash bugs, and vine borers. Handpick any pests you find or use insecticidal soap or neem oil to control infestations. To prevent fungal diseases, ensure good air circulation around your plants and avoid overhead watering. If you notice any signs of disease, such as powdery mildew or leaf spot, treat promptly with a fungicide. Companion planting with marigolds and basil can also help to deter pests and diseases naturally.
Can I use this method in a small garden or on a balcony?
Absolutely! One of the great advantages of this DIY trick is that it’s perfect for small spaces. By growing your melons vertically, you can maximize your garden space and enjoy fresh, homegrown melons even if you only have a balcony or patio. Choose smaller melon varieties that are well-suited for container gardening, and use a large pot or grow bag to provide ample space for the roots to develop. Ensure your plants receive at least 6-8 hours of sunlight per day, and provide adequate support for the growing vines and fruits.
How do I know when my melons are ripe and ready to harvest?
Determining the ripeness of a melon can be tricky, but there are a few telltale signs to look for. For watermelons, check the underside of the melon where it rests on the ground. This spot should be creamy yellow or slightly orange. Also, thump the melon with your knuckles. A ripe watermelon will sound hollow and deep. For cantaloupes, the stem should easily slip off the vine when the melon is ripe. The melon should also have a sweet, fragrant aroma. Honeydews are ripe when they turn a pale yellow color and have a slightly waxy feel. Don’t be afraid to taste a small piece of the melon to confirm its ripeness.
What if my melons start to crack or split?
Cracking or splitting can occur when melons experience inconsistent watering, especially after a period of drought. To prevent this, ensure your melons receive consistent moisture throughout the growing season. Mulch around the base of the plants to help retain moisture in the soil. If you notice any cracks, harvest the melon immediately, as it’s more susceptible to pests and diseases. Even if the melon isn’t fully ripe, it will still be edible, although it may not be as sweet or flavorful.
How do I support the weight of the melons as they grow larger?
As your melons grow larger, they will become heavier and require additional support. Use slings made from burlap, netting, or even old t-shirts to cradle the fruits and prevent them from falling off the vine. Tie the slings securely to the support structure, ensuring they are strong enough to hold the weight of the mature melons. Adjust the slings as the melons grow larger, providing additional support as needed. Regularly inspect the slings for any signs of wear and tear, and replace them if necessary.
Can I reuse the soil from my melon containers for other plants?
Yes, you can reuse the soil from your melon containers, but it’s important to amend it with fresh compost or other organic matter to replenish the nutrients that were depleted during the growing season. You may also want to sterilize the soil to kill any potential pests or diseases. This can be done by baking the soil in the oven or microwaving it. However, be aware that sterilizing the soil can also kill beneficial microorganisms, so it’s important to reintroduce them by adding compost or other organic amendments.
What are some common mistakes to avoid when growing melons using this method?
Some common mistakes to avoid include:
* **Overwatering:** Melons need consistent moisture, but overwatering can lead to root rot.
* **Underwatering:** Insufficient watering can stress the plants and reduce fruit production.
* **Insufficient sunlight:** Melons need at least 6-8 hours of sunlight per day to thrive.
* **Poor soil drainage:** Ensure your container has good drainage to prevent waterlogging.
* **Inadequate support:** Provide adequate support for the growing vines and fruits to prevent them from falling off.
* **Ignoring pests and diseases:** Regularly inspect your plants for signs of pests and diseases and take prompt action to control them.
* **Harvesting too early or too late:** Learn the signs of ripeness for your chosen melon variety and harvest at the optimal time for the best flavor.

Leave a Comment