
Salt and Detergent Cleaning Mix: Your secret weapon for a sparkling home, without breaking the bank or relying on harsh chemicals! Have you ever looked at a grimy surface and thought, “There has to be a better way?” I know I have! That’s why I’m so excited to share this incredibly effective and surprisingly simple DIY cleaning solution with you.
The concept of using readily available ingredients for cleaning isn’t new. In fact, before the mass production of commercial cleaners, generations relied on the power of natural substances like salt, vinegar, and, yes, even homemade soaps. Think of your grandmother’s cleaning rituals – chances are, she had a few tricks up her sleeve that involved simple, everyday items. This salt and detergent cleaning mix is a modern take on those time-tested methods.
Why do you need this DIY trick? Because it’s a game-changer! We’re all looking for ways to save money, reduce our exposure to potentially harmful chemicals, and achieve a truly clean home. This mix is perfect for tackling stubborn stains, greasy build-up, and even mildew. Plus, it’s incredibly easy to make and use. So, ditch those expensive, store-bought cleaners and let’s get ready to create a powerful, all-natural cleaning solution that will leave your home sparkling!
DIY Power Cleaner: Salt and Detergent Cleaning Mix
Hey everyone! I’m so excited to share this amazing DIY cleaning hack with you. I stumbled upon this recipe while trying to find a natural and effective way to clean my grimy oven, and let me tell you, it’s a game-changer! This salt and detergent cleaning mix is incredibly versatile and can be used on a variety of surfaces, from stubborn stovetop stains to dingy bathroom tiles. Plus, it’s super cheap to make, using ingredients you probably already have in your pantry and laundry room.
What Makes This Cleaning Mix So Effective?
Before we dive into the recipe, let’s talk about why this combination works so well.
* Salt: Salt acts as a gentle abrasive, helping to scrub away dirt, grime, and stubborn stains without scratching most surfaces. It’s also a natural disinfectant and deodorizer.
* Detergent: Detergent, especially dish soap or laundry detergent, is a powerful surfactant. This means it reduces the surface tension of water, allowing it to penetrate and lift away grease and dirt more effectively. It also helps to emulsify oils, making them easier to rinse away.
When combined, these two ingredients create a synergistic cleaning powerhouse that’s tough on grime but gentle on your wallet and the environment (compared to harsh chemical cleaners, anyway!).
What You’ll Need
Here’s a list of everything you’ll need to create your own salt and detergent cleaning mix:
* 1 cup of table salt (or coarse salt, depending on the surface you’re cleaning)
* 1/2 cup of liquid dish soap (I prefer using a grease-cutting formula) OR 1/4 cup of liquid laundry detergent (use a gentle, dye-free option if you’re concerned about staining)
* Warm water
* A clean spray bottle or container for mixing and storing
* A sponge, scrub brush, or microfiber cloth for cleaning
* Gloves (optional, but recommended, especially if you have sensitive skin)
* A measuring cup and spoons
Step-by-Step Instructions: Making the Cleaning Mix
Okay, let’s get down to business! Here’s how to make your own batch of this amazing cleaning mix:
1. Choose Your Detergent: First, decide whether you want to use dish soap or laundry detergent. Dish soap is great for greasy messes and general cleaning, while laundry detergent can be more effective on tougher stains and fabrics. If you’re unsure, start with dish soap.
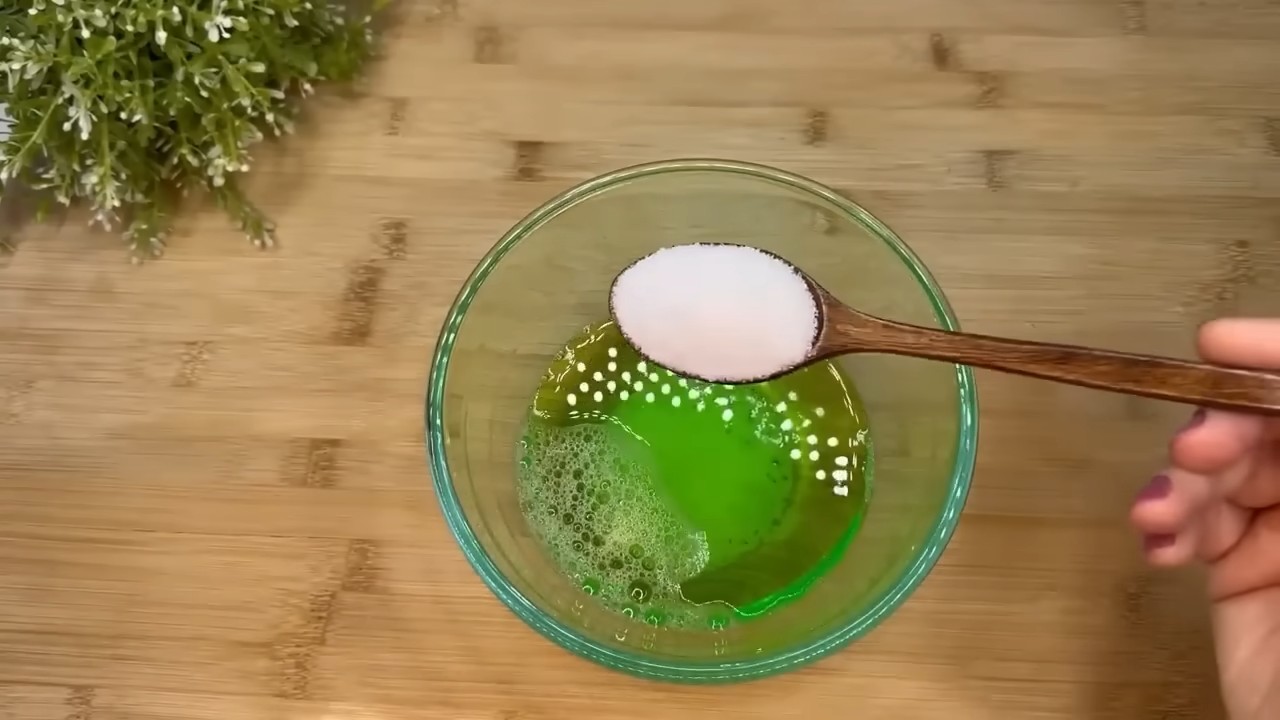
2. Combine Salt and Detergent: In your spray bottle or container, pour in the salt and then add the dish soap or laundry detergent.
3. Add Warm Water: Slowly add warm water to the mixture, stirring gently as you go. You want to add enough water to dissolve the salt and create a slightly thick, paste-like consistency. Don’t add too much water, or the mixture will be too runny. I usually start with about 1/2 cup of warm water and add more as needed.
4. Mix Thoroughly: Continue stirring until the salt is mostly dissolved and the mixture is well combined. It’s okay if there are still a few salt crystals remaining; they’ll help with scrubbing.
5. Test on a Small Area: Before using the cleaning mix on a large surface, it’s always a good idea to test it on a small, inconspicuous area first. This will help you ensure that it doesn’t damage or discolor the surface.
6. Store Properly: Once you’re satisfied with the consistency and have tested the mixture, you can store it in your spray bottle or container. Be sure to label it clearly so you don’t accidentally use it for something else!
Using the Cleaning Mix: Different Applications
Now that you’ve made your cleaning mix, let’s explore some of the ways you can use it around your home.
Cleaning Your Stovetop
My stovetop is constantly covered in splatters and spills, and this cleaning mix works wonders on baked-on grease.
1. Apply the Mix: Apply a generous amount of the cleaning mix to the dirty areas of your stovetop.
2. Let it Sit: Let the mixture sit for about 10-15 minutes to allow it to penetrate the grime.
3. Scrub Gently: Use a non-abrasive scrub brush or sponge to gently scrub the stovetop. The salt will help to loosen the dirt and grease.
4. Wipe Clean: Wipe away the cleaning mix with a damp cloth.
5. Dry: Dry the stovetop with a clean towel.
Cleaning Your Oven
Cleaning the oven is one of my least favorite chores, but this cleaning mix makes it so much easier!
1. Prepare the Oven: Remove any loose debris from the oven.
2. Apply the Mix: Apply a thick layer of the cleaning mix to the interior surfaces of the oven, avoiding the heating elements.
3. Let it Sit Overnight: For best results, let the mixture sit overnight. This will give it plenty of time to break down the baked-on grime.
4. Scrub and Wipe: The next day, scrub the oven with a scrub brush or sponge. The grime should come off much more easily. Wipe away the cleaning mix with a damp cloth.
5. Rinse Thoroughly: Rinse the oven thoroughly with clean water to remove any remaining residue.
6. Dry: Dry the oven with a clean towel.
Cleaning Bathroom Tiles and Grout
This cleaning mix is also great for cleaning bathroom tiles and grout.
1. Apply the Mix: Apply the cleaning mix to the tiles and grout.
2. Let it Sit: Let it sit for about 5-10 minutes.
3. Scrub: Use a scrub brush or sponge to scrub the tiles and grout.
4. Rinse: Rinse thoroughly with clean water.
5. Dry: Dry with a clean towel.
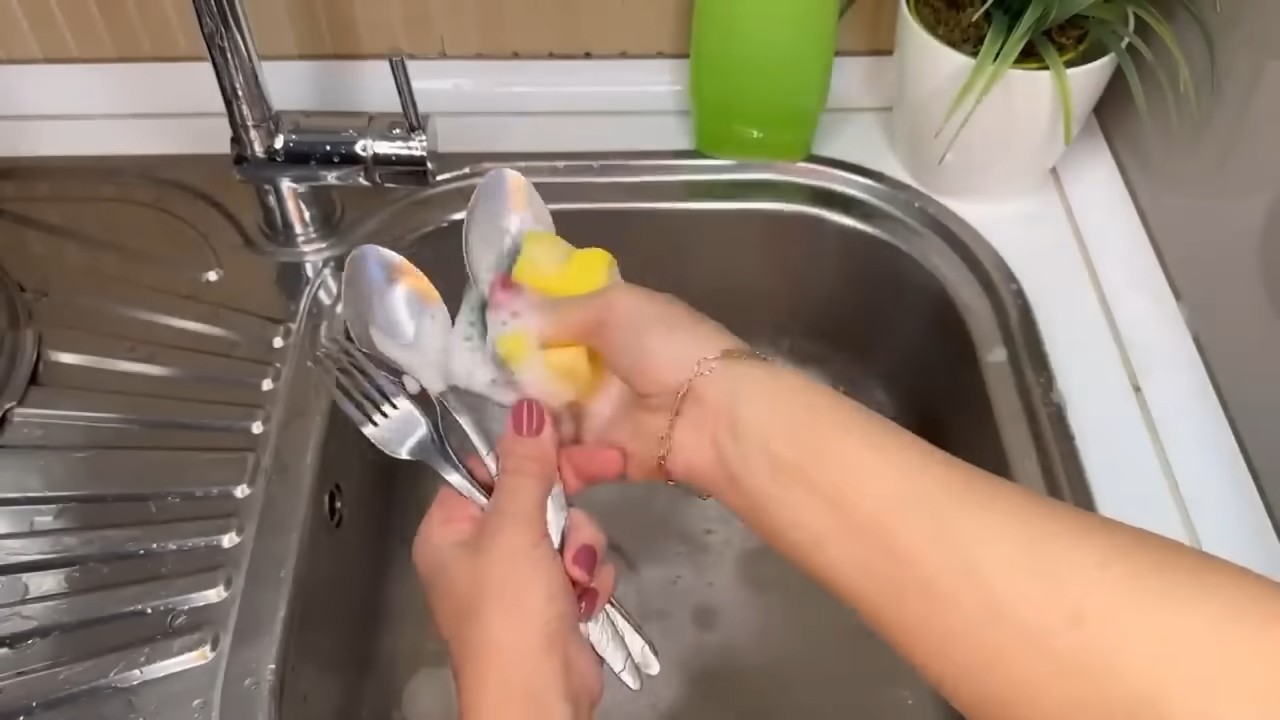
Cleaning Sinks and Faucets
This mix can also bring shine back to your sinks and faucets.
1. Apply the Mix: Apply a small amount of the cleaning mix to a sponge or cloth.
2. Scrub: Scrub the sink and faucet to remove water spots and grime.
3. Rinse: Rinse thoroughly with clean water.
4. Dry: Dry with a clean towel for a sparkling finish.
Cleaning Laundry Stains (Use with Caution)
While I primarily use this mix for hard surfaces, it can also be used to pre-treat laundry stains. However, proceed with caution and always test on an inconspicuous area of the fabric first.
1. Test First: Apply a small amount of the cleaning mix to a hidden area of the fabric, such as an inside seam. Let it sit for a few minutes, then rinse and check for any discoloration or damage.
2. Apply to Stain: If the fabric is colorfast, apply the cleaning mix directly to the stain.
3. Gently Rub: Gently rub the mixture into the stain with your fingers or a soft cloth.
4. Let it Sit: Let it sit for about 15-30 minutes.
5. Launder as Usual: Launder the garment as usual, following the care instructions on the label.
Important Considerations and Safety Tips
While this cleaning mix is relatively safe and natural, there are a few things to keep in mind:
* Avoid Using on Delicate Surfaces: Do not use this cleaning mix on delicate surfaces such as marble, granite, or wood, as the salt can scratch them.
* Always Test First: As mentioned earlier, always test the cleaning mix on a small, inconspicuous area before using it on a large surface.
* Wear Gloves: If you have sensitive skin, it’s a good idea to wear gloves when using this cleaning mix.
* Keep Out of Reach of Children and Pets: As with all cleaning products, keep this cleaning mix out of reach of children and pets.
* Don’t Mix with Other Cleaners: Never mix this cleaning mix with other cleaning products, as this could create dangerous fumes.
* Rinse Thoroughly: Always rinse surfaces thoroughly with clean water after using this cleaning mix to remove any remaining residue.
Troubleshooting
* Salt Not Dissolving: If the salt isn’t dissolving completely, try using warmer water or stirring the mixture for a longer period of time. You can also use a finer grain of salt.
* Mixture Too Runny: If the mixture is too runny, add a little more salt to thicken it up.
* Mixture Too Thick: If the mixture is too thick, add a little more warm water to thin it out.
* Not Cleaning Effectively: If the cleaning mix isn’t cleaning effectively, try letting it sit on the surface for a longer period of time or using a more abrasive scrub brush.
Conclusion
So, there you have it! This simple yet incredibly effective salt and detergent cleaning mix is a game-changer for tackling stubborn stains and grime around your home. We’ve explored how this dynamic duo, readily available in most households, can be combined to create a powerful cleaning solution that rivals many commercial products, often at a fraction of the cost.
But why is this DIY trick a must-try? It’s not just about saving money, although that’s certainly a perk. It’s about having a versatile cleaner that’s tough on dirt but relatively gentle on surfaces. Think about those baked-on messes in your oven, the greasy residue on your stovetop, or the stubborn soap scum in your bathroom. This salt and detergent cleaning mix can handle them all.
Beyond its cleaning prowess, this method offers a level of control you simply don’t get with pre-packaged cleaners. You can adjust the ratio of salt to detergent to suit the specific task at hand. For instance, for heavily soiled areas, you might opt for a higher concentration of salt to leverage its abrasive properties. For more delicate surfaces, a gentler mix with more detergent and less salt might be preferable.
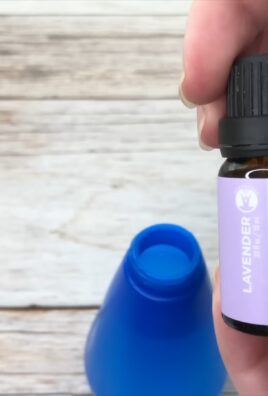
Speaking of variations, don’t be afraid to experiment! Consider adding a few drops of your favorite essential oil for a pleasant scent. Lemon, lavender, or tea tree oil not only smell great but also possess additional cleaning and disinfecting properties. Another variation involves using different types of salt. Coarse sea salt can provide extra scrubbing power, while finer table salt is ideal for more delicate surfaces. You could even try using borax in addition to the salt for an extra boost of cleaning power, but always remember to test in an inconspicuous area first.
The beauty of this DIY cleaning solution lies in its simplicity and adaptability. It’s a testament to the fact that sometimes, the most effective solutions are the ones we create ourselves, using readily available ingredients. It’s also a step towards a more sustainable lifestyle, reducing our reliance on harsh chemicals and single-use plastic bottles.
We genuinely believe that once you try this salt and detergent cleaning mix, you’ll wonder how you ever cleaned without it. It’s a cost-effective, versatile, and environmentally friendly alternative to many commercial cleaners.
So, what are you waiting for? Gather your salt, your detergent, and a little bit of elbow grease, and get ready to transform your cleaning routine. We’re confident that you’ll be amazed by the results.
But don’t just take our word for it! We encourage you to try this DIY cleaning trick and share your experience with us. Let us know what surfaces you cleaned, what variations you tried, and what results you achieved. Your feedback will not only help us refine this recipe but also inspire others to embrace the power of DIY cleaning. Share your tips, tricks, and before-and-after photos in the comments section below. We can’t wait to hear from you! Let’s create a community of DIY cleaning enthusiasts and discover the endless possibilities of this simple yet effective solution.
Frequently Asked Questions (FAQs)
1. What type of detergent should I use for this cleaning mix?
The best type of detergent to use is a liquid dish soap. It’s readily available, effective at cutting through grease and grime, and generally safe for most surfaces. Avoid using laundry detergent, as it can be too harsh and may leave behind a residue. A mild, pH-neutral dish soap is always a good choice, especially if you’re unsure about the surface you’re cleaning. You can also experiment with different brands to see which one works best for you. Some people prefer detergents with added degreasers for particularly tough cleaning jobs.
2. Can I use any type of salt?
Yes, you can use various types of salt, but the texture will affect the cleaning power. Table salt is the most common and readily available, and it works well for general cleaning. However, for tougher stains and grime, coarse sea salt or kosher salt can provide extra scrubbing power due to their larger granules. Just be mindful of using coarse salt on delicate surfaces, as it could potentially scratch them. Epsom salt can also be used, especially for cleaning bathroom fixtures, as it helps to dissolve soap scum and hard water stains.
3. What surfaces can I safely clean with this mix?
This salt and detergent cleaning mix is generally safe for use on a variety of surfaces, including:
* Kitchen surfaces: Countertops (excluding marble and granite, unless properly sealed), stovetops, ovens, sinks, and backsplashes.
* Bathroom surfaces: Tiles, bathtubs, showers, sinks, and toilets.
* Floors: Tile, linoleum, and vinyl floors.
* Outdoor furniture: Plastic and metal furniture.
However, it’s crucial to test the solution in an inconspicuous area first, especially on delicate or sensitive surfaces like marble, granite, wood, or painted surfaces. Avoid using it on surfaces that are prone to scratching, such as stainless steel appliances, without diluting the mixture significantly and testing first.
4. How do I make the salt and detergent cleaning mix?
The basic recipe involves mixing equal parts of salt and liquid dish soap. A good starting point is 1/4 cup of salt and 1/4 cup of detergent. Mix them together in a bowl or container until you form a paste. You can adjust the ratio depending on the cleaning task. For tougher stains, use more salt. For more delicate surfaces, use more detergent. You can also add a little water to create a more liquid consistency if needed.
5. How do I use the cleaning mix?
Apply the paste or liquid mixture to the surface you want to clean. Let it sit for a few minutes to allow the salt and detergent to work their magic. Then, scrub the surface with a sponge, cloth, or brush. Rinse thoroughly with water and dry with a clean cloth. For stubborn stains, you may need to repeat the process or let the mixture sit for a longer period of time.
6. Can I store the leftover cleaning mix?
Yes, you can store the leftover cleaning mix in an airtight container. It’s best to store it in a cool, dry place. The mixture may separate over time, so give it a good stir before using it again. It’s generally recommended to use the mixture within a few weeks for optimal effectiveness.
7. Is this cleaning mix safe for pets and children?
While the ingredients are generally considered safe, it’s always best to keep the cleaning mix out of reach of pets and children. Avoid using it on surfaces that pets or children may lick or come into direct contact with. Rinse surfaces thoroughly after cleaning to remove any residue. If you’re concerned about potential allergies or sensitivities, consider wearing gloves while using the mix.
8. Can I add other ingredients to the cleaning mix?
Yes, you can add other ingredients to enhance the cleaning power or scent of the mix. Some popular additions include:
* Essential oils: Add a few drops of your favorite essential oil for a pleasant scent and added cleaning benefits. Lemon, lavender, and tea tree oil are all great choices.
* Vinegar: Adding a small amount of vinegar can help to cut through grease and grime.
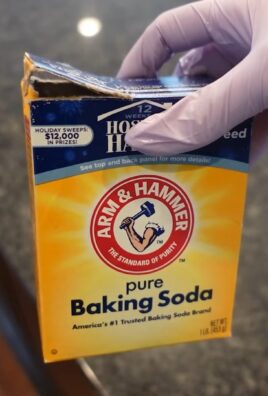
* Baking soda: Baking soda can provide extra scrubbing power and help to deodorize surfaces.
* Borax: Borax can boost the cleaning power of the mix, but use it with caution and always test in an inconspicuous area first.
Always remember to test any new additions in an inconspicuous area before applying the mixture to the entire surface.
9. What should I do if the cleaning mix scratches a surface?
If you notice any scratching, stop using the mix immediately. Rinse the surface thoroughly with water and dry with a clean cloth. Avoid using abrasive cleaners or scrub brushes on the scratched surface. You may be able to buff out minor scratches with a polishing compound or furniture polish. In the future, use a gentler cleaning mix with less salt or test the mix in an inconspicuous area before applying it to the entire surface.
10. Can this mix be used to clean grout?
Yes, the salt and detergent cleaning mix can be very effective for cleaning grout. Apply the paste to the grout lines, let it sit for a few minutes, and then scrub with a grout brush. Rinse thoroughly with water. For stubborn stains, you may need to repeat the process or use a stronger concentration of salt. You can also add baking soda to the mix for extra cleaning power.
Leave a Comment