
Growing peanuts at home – doesn’t that sound like an exciting gardening adventure? Imagine harvesting your own freshly roasted peanuts right from your garden! This is not only incredibly satisfying but also much easier than you might think. I’ll show you how it’s done!
For centuries, peanuts have been cultivated in various cultures, from South America, where they originate, to Africa and Asia. They are not only a delicious snack but also an important food source. And now, you can become part of this long tradition by growing your own peanuts.
Why should you go to the trouble of growing peanuts at home? It’s simple: you know exactly what’s in them! No unnecessary additives, no pesticides—just pure, natural peanuts. It’s also a great project for the whole family and a super way to bring children closer to nature. And let’s be honest, who can say they harvest their own peanuts? In this article, I’ll show you the best tricks and DIY hacks so you can soon become a proud peanut gardener too. Let’s get started!
Growing Peanuts at Home: Your DIY Guide for a Successful Harvest
Hey garden friends! Have you ever wondered how peanuts actually grow? And even better: have you imagined growing them right at home? Sounds crazy, but it’s not! I’ll show you how you can harvest your own peanuts with a little patience and the right steps. Let’s get started!
What You Need: The Preparation
Before we start planting, we naturally need the right equipment and the right conditions. Here is a list to make sure you don’t forget anything:
- Peanuts: Untreated, raw peanuts (preferably from an organic store or a seed supplier). Roasted or salted peanuts will not sprout!
- Pots or Bed: Large pots (at least 30 cm in diameter and depth) or a sunny bed with loose, well-draining soil.
- Soil: High-quality potting soil or a mixture of garden soil, compost, and sand.
- Water: Regular watering is important, especially during germination and flowering.
- Sun: Peanuts love the sun! At least 6-8 hours of direct sunlight per day are ideal.
- Fertilizer: An organic fertilizer or compost tea helps the plants grow.
- Patience: Peanuts take time! The harvest takes about 4-5 months.
Step-by-Step Guide: From Seed to Plant
Now, let’s get down to business! Here is a detailed guide on how to get your peanuts to germinate and plant them successfully:
1. Preparing the Peanuts:
- First, you should carefully remove the peanuts from their shells. Be careful not to damage the thin, brown skin around the kernels.
- Place the peanut kernels in lukewarm water for about 24 hours. This helps to speed up germination.
- Optional: You can also pre-sprout the peanuts. To do this, place them on a damp paper towel in a plastic container and put it in a warm place. After a few days, small roots should be visible.
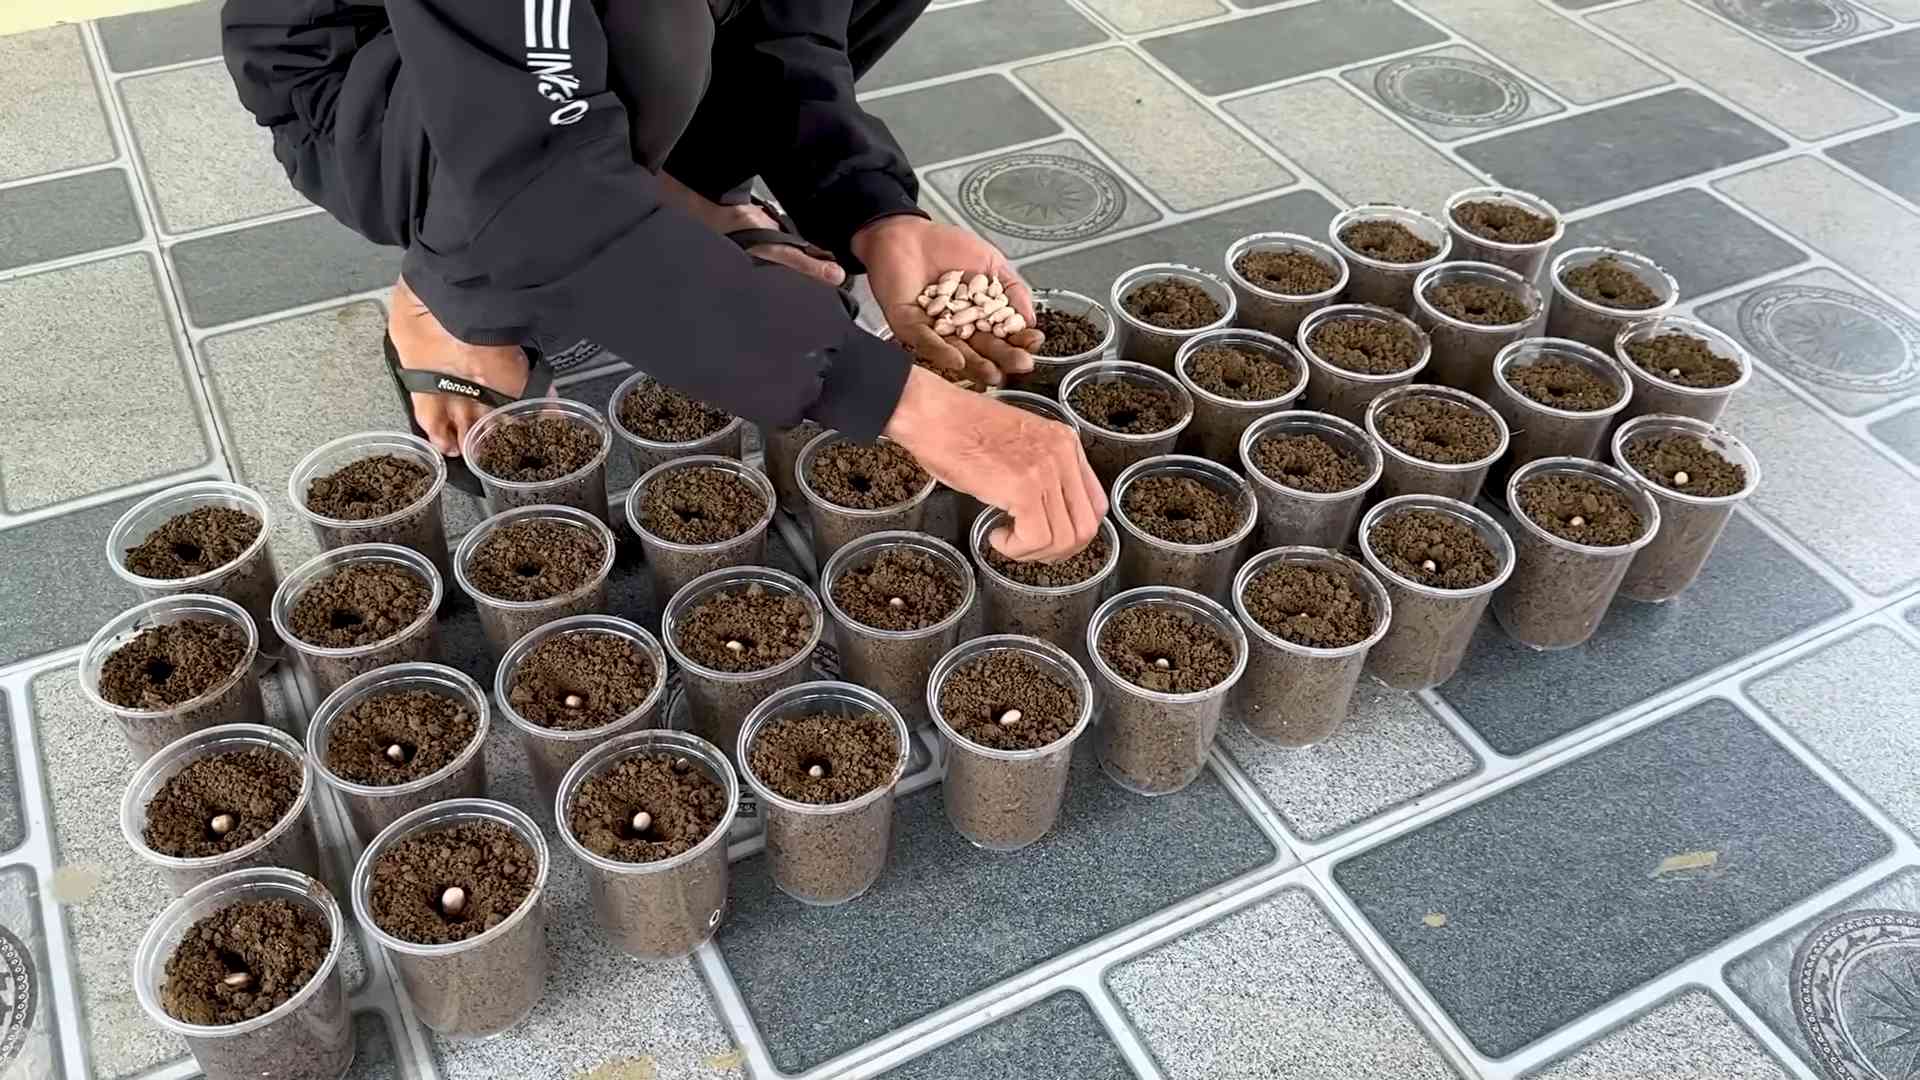
2. Sowing:
- Fill your pots or the bed with the prepared soil.
- Make small holes (approx. 2-3 cm deep) about 15-20 cm apart.
- Place 2-3 peanut kernels in each hole. This increases the chance that at least one plant will germinate.
- Cover the holes with soil and press down lightly.
- Water the soil gently but thoroughly.
3. Care:
- Place the pots in a sunny spot or ensure the bed gets enough sun.
- Keep the soil moist, but not wet. Avoid waterlogging, as this can lead to rot.
- After about 1-2 weeks, the first seedlings should be visible.
- Once the plants are a bit larger (approx. 10-15 cm), you can fertilize them with an organic fertilizer or compost tea.
- Remove weeds regularly to avoid competition for the peanut plants.
The Flowering Period: When the Magic Begins
Peanuts are special because their flowers self-pollinate and then form so-called “pegs” (fruit stalks), which dig into the soil where the peanuts then ripen.
1. Observation:
- Watch for the yellow, pea-shaped flowers that form on the plants.
- After flowering, the blossoms wither and the pegs form.
2. Hilling:
- As soon as the pegs grow into the soil, you should lightly hill the plants. This means you add some soil around the base of the plants. This encourages the formation of peanuts.
3. Watering:
- During the flowering and fruiting period, it is particularly important to water the plants sufficiently.
The Harvest: The Reward for Your Efforts
After about 4-5 months, the time has finally come: the harvest is here!
1. Signs of Ripeness:
- The leaves of the plants turn yellow and begin to wither.
- The peanuts feel firm and plump.
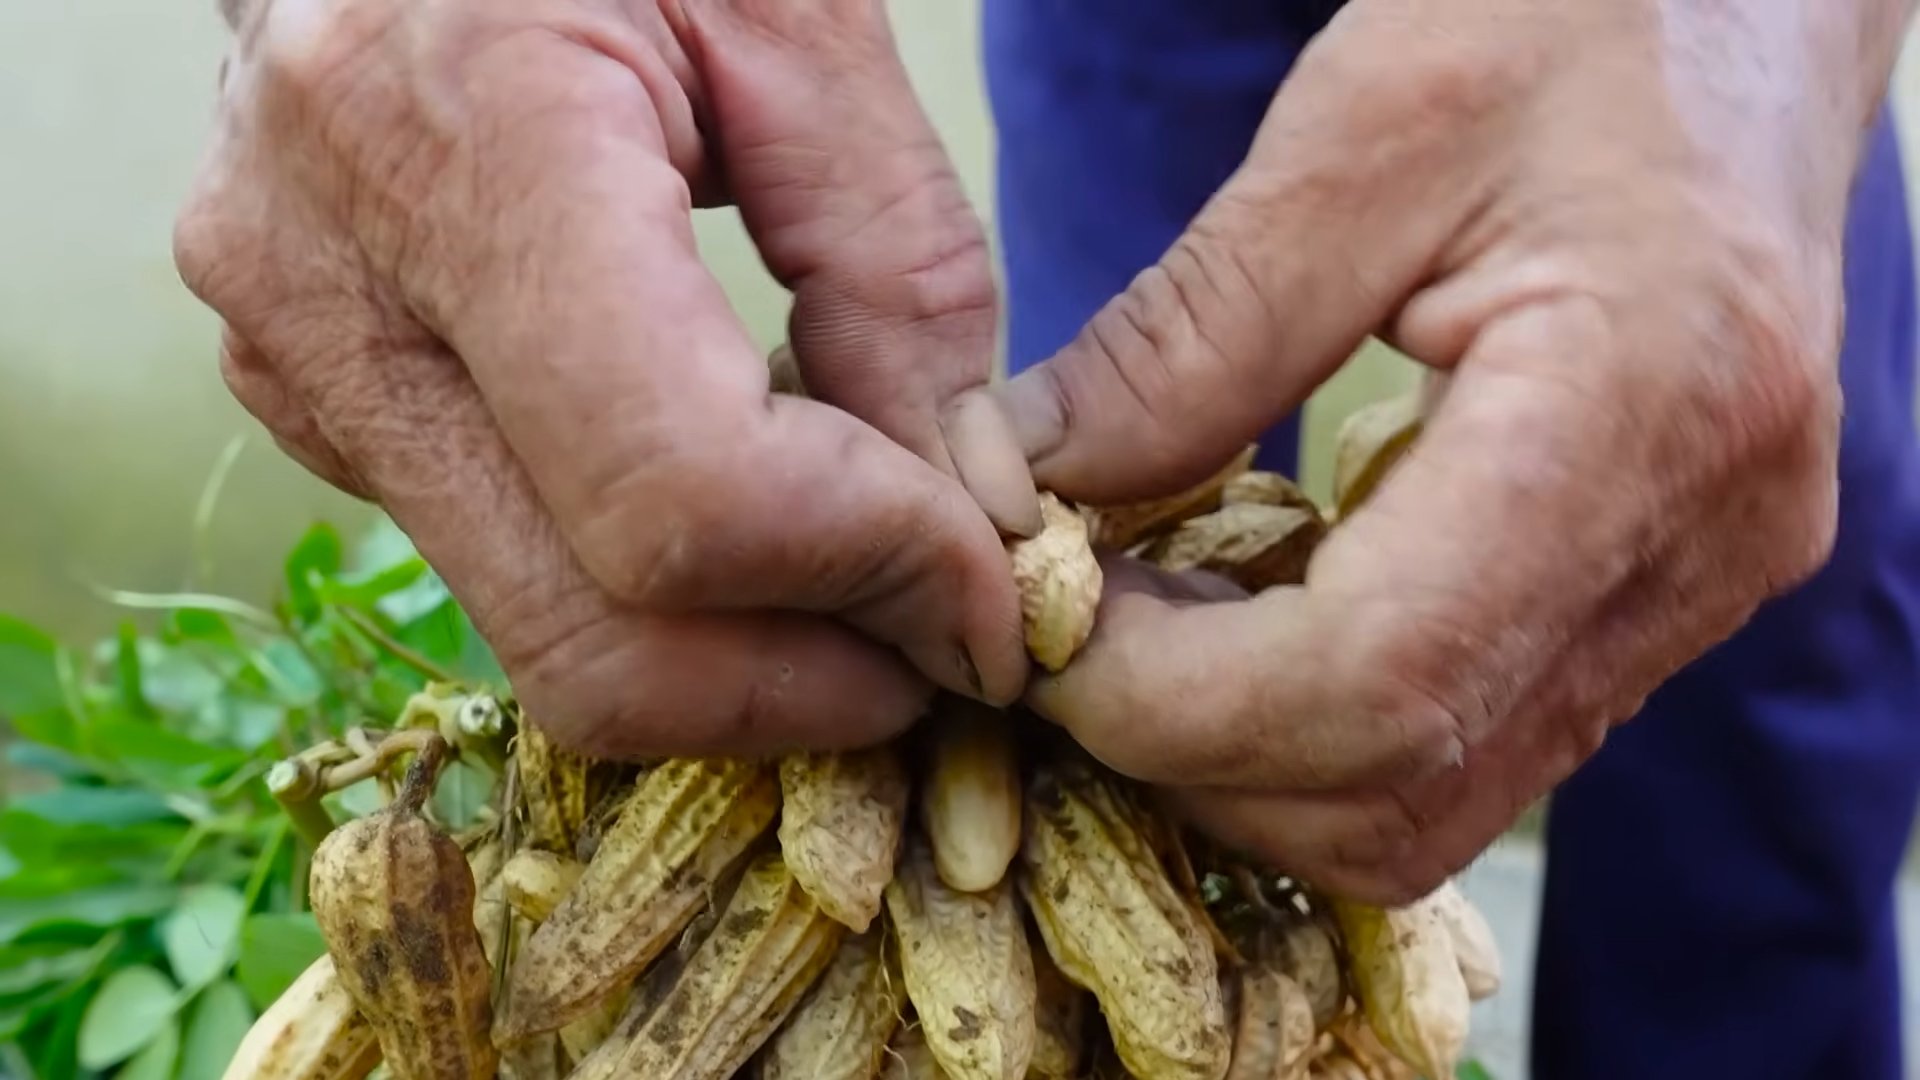
2. Harvesting:
- Carefully dig up the plants. A garden fork works best for this.
- Shake the soil off the roots.
- Pick the peanuts from the roots.
3. Drying:
- Wash the peanuts thoroughly.
- Spread them out on a rack or newspaper and let them dry in a dry, well-ventilated place. This can take 1-2 weeks.
- Turn the peanuts regularly so they dry evenly.
4. Storing:
- Once the peanuts are completely dry, you can store them in an airtight container in a cool, dry place.
Common Problems and Solutions
Problems can also arise when growing peanuts. Here are some common challenges and how you can overcome them:
- Poor Germination:
- Cause: Peanuts are too old, temperatures are too cold, soil is too dry or too wet.
- Solution: Use fresh peanuts, ensure the right temperature (20-25°C), and maintain even moisture.
- Pests:
- Peanuts can be infested by aphids, snails, or other pests.
- Solution: Check the plants regularly and remove pests by hand or use an organic pesticide.
- Diseases:
- Fungal diseases can occur, especially in damp weather.
- Solution: Ensure good ventilation, avoid waterlogging, and use a fungicide if necessary.
- No Peanuts:
- Cause: Lack of pollination, too little sun, not enough nutrients.
- Solution: Provide enough sun, fertilize the plants regularly, and ensure good soil quality.
Additional Tips for a Bountiful Harvest
Here are a few more tips to help you maximize your peanut harvest:
- Variety Selection: There are different varieties of peanuts. Find out which variety is best suited for your climate.
- Crop Rotation: Do not plant peanuts in the same spot every year to prevent diseases and pests.
- Soil Improvement: Mix compost or organic fertilizer into the soil to improve its quality.
- Mulching: Mulch the soil around the plants to retain moisture and suppress weeds.
Conclusion: Your Own Peanut Paradise
Growing peanuts at home is an exciting and rewarding project. With a little patience and the right steps, you can harvest and enjoy your own peanuts. Give it a try and be surprised by the diversity of nature! Happy gardening!
Conclusion
Growing peanuts at home is not only a fascinating project but also an incredibly rewarding experience. Imagine being able to enjoy your own freshly harvested peanuts without ever having to rely on store-bought ones again. This DIY trick is an absolute must for any garden lover looking for a new challenge while also wanting to maintain control over the quality and origin of their food.
So, why should you go to the trouble of growing peanuts yourself? First, it’s a fantastic way to learn more about the life cycle of a plant and experience nature up close. From planting the seeds to harvesting the ripe peanuts, you will witness an impressive process. Second, you can be sure that your peanuts are free of harmful pesticides and chemicals often used in commercial agriculture. You have full control over the growing conditions and can thus harvest a healthy and sustainable product.
Furthermore, the taste of homegrown peanuts is incomparable. The freshness and natural flavor are simply unbeatable. You can roast the peanuts, cook them, make them into peanut butter, or simply enjoy them plain. The possibilities are endless!
For those who like to experiment, there are numerous variations you can try. Try growing different peanut varieties to discover different flavors and textures. Or experiment with different growing methods, such as growing in pots or raised beds. You can also try different fertilizers and soil amendments to optimize the growth and yield of your peanut plants.
Another tip: Plant companion plants like marigolds or basil near your peanut plants to deter pests and promote growth. These natural helpers can contribute to your peanuts growing healthy and strong.
We strongly encourage you to try this DIY trick and grow your own peanuts at home. It is a rewarding and educational project that not only provides you with delicious peanuts but also gives you a deeper understanding of nature and food production. Share your experiences, tips, and tricks with us and other garden lovers. Let’s build a community of peanut growers together and share the joy of DIY!
Don’t forget that success in growing peanuts depends heavily on local climate conditions and soil quality. Adjust the growing conditions accordingly and be patient. With a little care and attention, you will soon be able to harvest your own delicious peanuts. Good luck!
FAQ – Frequently Asked Questions about Growing Peanuts
1. Which peanut variety is best for growing at home?
The choice of the right peanut variety depends on your climate and personal preferences. Virginia peanuts are large and good for roasting, while Runner peanuts are smaller and often used for peanut butter. Spanish peanuts are sweeter and have a reddish skin. Valencia peanuts have several kernels per shell and are also sweet. Research which varieties thrive in your region or ask for recommendations at a local nursery. Be sure to use certified seeds to ensure the plants are healthy and free from disease.
2. When is the best time to sow peanuts?
Peanuts need warm weather to germinate and grow. Sow the peanuts only when the soil temperature is consistently above 18°C (65°F) and there is no more risk of frost. In most regions, this is in late spring or early summer. You can speed up germination by soaking the peanuts in water for 24 hours before sowing.
3. What kind of soil do peanuts need?
Peanuts prefer loose, well-draining soil with a pH between 6.0 and 6.5. Avoid heavy clay soils, as they can hinder the development of the peanut pods. Improve the soil with compost or other organic material to enhance drainage and nutrient supply. Good drainage is crucial, as waterlogging can lead to root rot.
4. How often do peanut plants need to be watered?
Peanut plants require regular watering, especially during the flowering and pod formation periods. Make sure the soil stays evenly moist but not waterlogged. Avoid wetting the leaves to prevent fungal diseases. A layer of mulch around the plants can help retain soil moisture and suppress weeds.
5. How do you fertilize peanut plants correctly?
Peanuts are legumes and can fix nitrogen from the air. Therefore, they generally do not need nitrogen-rich fertilizers. However, a light application of phosphorus and potassium can promote growth and pod formation. Use a balanced fertilizer or a special fertilizer for legumes. Avoid over-fertilizing, as this can lead to excessive leaf growth and lower pod production.
6. What pests and diseases can affect peanut plants?
Peanut plants can be attacked by various pests such as aphids, spider mites, and caterpillars. Check the plants regularly for signs of pest infestation and take action if necessary. Natural pesticides like neem oil or insecticidal soap can be effective. Common diseases include leaf spot diseases and root rot. Ensure good air circulation and avoid waterlogging to prevent diseases.
7. When are the peanuts ready for harvest?
The harvest time depends on the variety and growing conditions. Typically, peanuts are ready after about 120 to 150 days. A sign of maturity is when the leaves turn yellow and die back. Dig up one plant and check the pods. If the pods are fully developed and the inside of the shell is dark, the peanuts are ripe.
8. How do you harvest peanuts correctly?
Carefully dig up the peanut plants and shake off the soil. Hang the plants upside down in a dry, well-ventilated place to dry. Let the peanuts dry for about two to three weeks until the shells are brittle. Separate the pods from the plants and store them in a cool, dry place.
9. How do you store harvested peanuts?
Store the dried peanut pods in a cool, dry, and well-ventilated place. You can also store the peanuts in an airtight container in the refrigerator or freezer to extend their shelf life. Roasted peanuts should also be stored in an airtight container to protect them from moisture.
10. Can you grow peanuts in a pot?
Yes, peanuts can also be grown in a pot, as long as the pot is large enough (at least 30 cm in diameter and depth) and has good drainage. Use high-quality potting soil and place the pot in a sunny location. Ensure regular watering and fertilization. Growing in a pot is a good option for regions with shorter growing seasons or for gardeners with limited space.
Leave a Comment