
DIY kitchen repair hacks – who doesn’t love saving money and feeling like a superhero at the same time? Let’s face it, the kitchen is the heart of the home, but it’s also a high-traffic zone prone to wear and tear. From leaky faucets to sticky drawers, those little kitchen annoyances can quickly turn into major headaches (and expensive repair bills!). But fear not, fellow home dwellers!
For centuries, resourceful individuals have been finding clever ways to mend and maintain their homes. Think about it – before the age of professional repair services, fixing things yourself was a necessity! This spirit of self-reliance is something we can all tap into.
That’s why I’ve put together this collection of easy-to-follow DIY kitchen repair hacks. Whether you’re a seasoned DIY enthusiast or a complete beginner, these tips and tricks will empower you to tackle common kitchen problems with confidence. Imagine the satisfaction of fixing that wobbly cabinet door or unclogging that stubborn drain all by yourself! Not only will you save money, but you’ll also gain a deeper appreciation for your home and the skills to keep it running smoothly. So, grab your toolbox, and let’s get started on transforming your kitchen from a source of frustration into a haven of happy cooking!
DIY Kitchen Repair Hacks: Save Money and Fix It Yourself!
Hey there, fellow home improvers! Let’s face it, kitchen repairs can be a real pain, both for your sanity and your wallet. But before you call a professional for every little thing, I’m here to show you some simple DIY kitchen repair hacks that can save you a ton of money and give you that satisfying “I fixed it myself!” feeling. I’ve tackled these myself, and trust me, if I can do it, so can you!
Fixing a Leaky Faucet
A dripping faucet is annoying and wastes water. Luckily, it’s often a simple fix.
What You’ll Need:
* Adjustable wrench
* Screwdrivers (Phillips and flathead)
* Penetrating oil (like WD-40)
* Replacement O-rings and washers (take the old ones to the hardware store to match)
* Plumber’s grease
* Clean cloths or paper towels
* Basin wrench (optional, for stubborn nuts)
Step-by-Step Instructions:
1. Turn Off the Water Supply: This is crucial! Locate the shut-off valves under your sink. There should be one for hot water and one for cold. Turn them both clockwise until they’re completely closed. If you don’t have individual shut-off valves, you’ll need to turn off the main water supply to your house.
2. Protect Your Sink: Place a towel or cloth in the sink to prevent scratches from dropped tools.
3. Disassemble the Faucet: This is where things can get a little tricky, as faucet designs vary. However, the general principle is the same.
* Remove the Handle(s): Look for a small screw (often hidden under a decorative cap) on the handle. Use a screwdriver to remove the screw and then gently pull the handle off. Some handles might just pull straight off without a screw.
* Remove the Faucet Stem: Once the handle is off, you’ll see a nut holding the faucet stem in place. Use an adjustable wrench to loosen and remove this nut. Be careful not to scratch the faucet finish. If the nut is stuck, apply some penetrating oil and let it sit for a few minutes before trying again.
* Pull Out the Stem: After removing the nut, you should be able to pull the faucet stem straight out.
4. Inspect and Replace Worn Parts: Now, examine the stem and the inside of the faucet body for worn or damaged parts.
* O-rings: These are small rubber rings that seal the stem. They often become brittle and cracked over time. Replace any damaged O-rings with new ones. Apply a small amount of plumber’s grease to the new O-rings before installing them.
* Washers: These are flat, rubber or fiber discs that also help to seal the faucet. Replace any worn or damaged washers.
* Cartridge (for cartridge faucets): If you have a cartridge faucet (a single-handle faucet), the cartridge might be the culprit. You can usually remove the cartridge by unscrewing a retaining clip. Inspect the cartridge for damage and replace it if necessary.
5. Reassemble the Faucet: Now, put everything back together in the reverse order that you took it apart.
* Insert the Stem: Slide the stem back into the faucet body.
* Tighten the Nut: Tighten the nut that holds the stem in place with the adjustable wrench. Don’t overtighten it, or you could damage the faucet.
* Reattach the Handle(s): Put the handle(s) back on and secure them with the screw (if applicable).
6. Turn the Water Back On: Slowly turn the water supply valves back on. Check for leaks around the faucet. If you see any leaks, tighten the connections slightly.
7. Test the Faucet: Turn the faucet on and off to make sure it’s working properly.
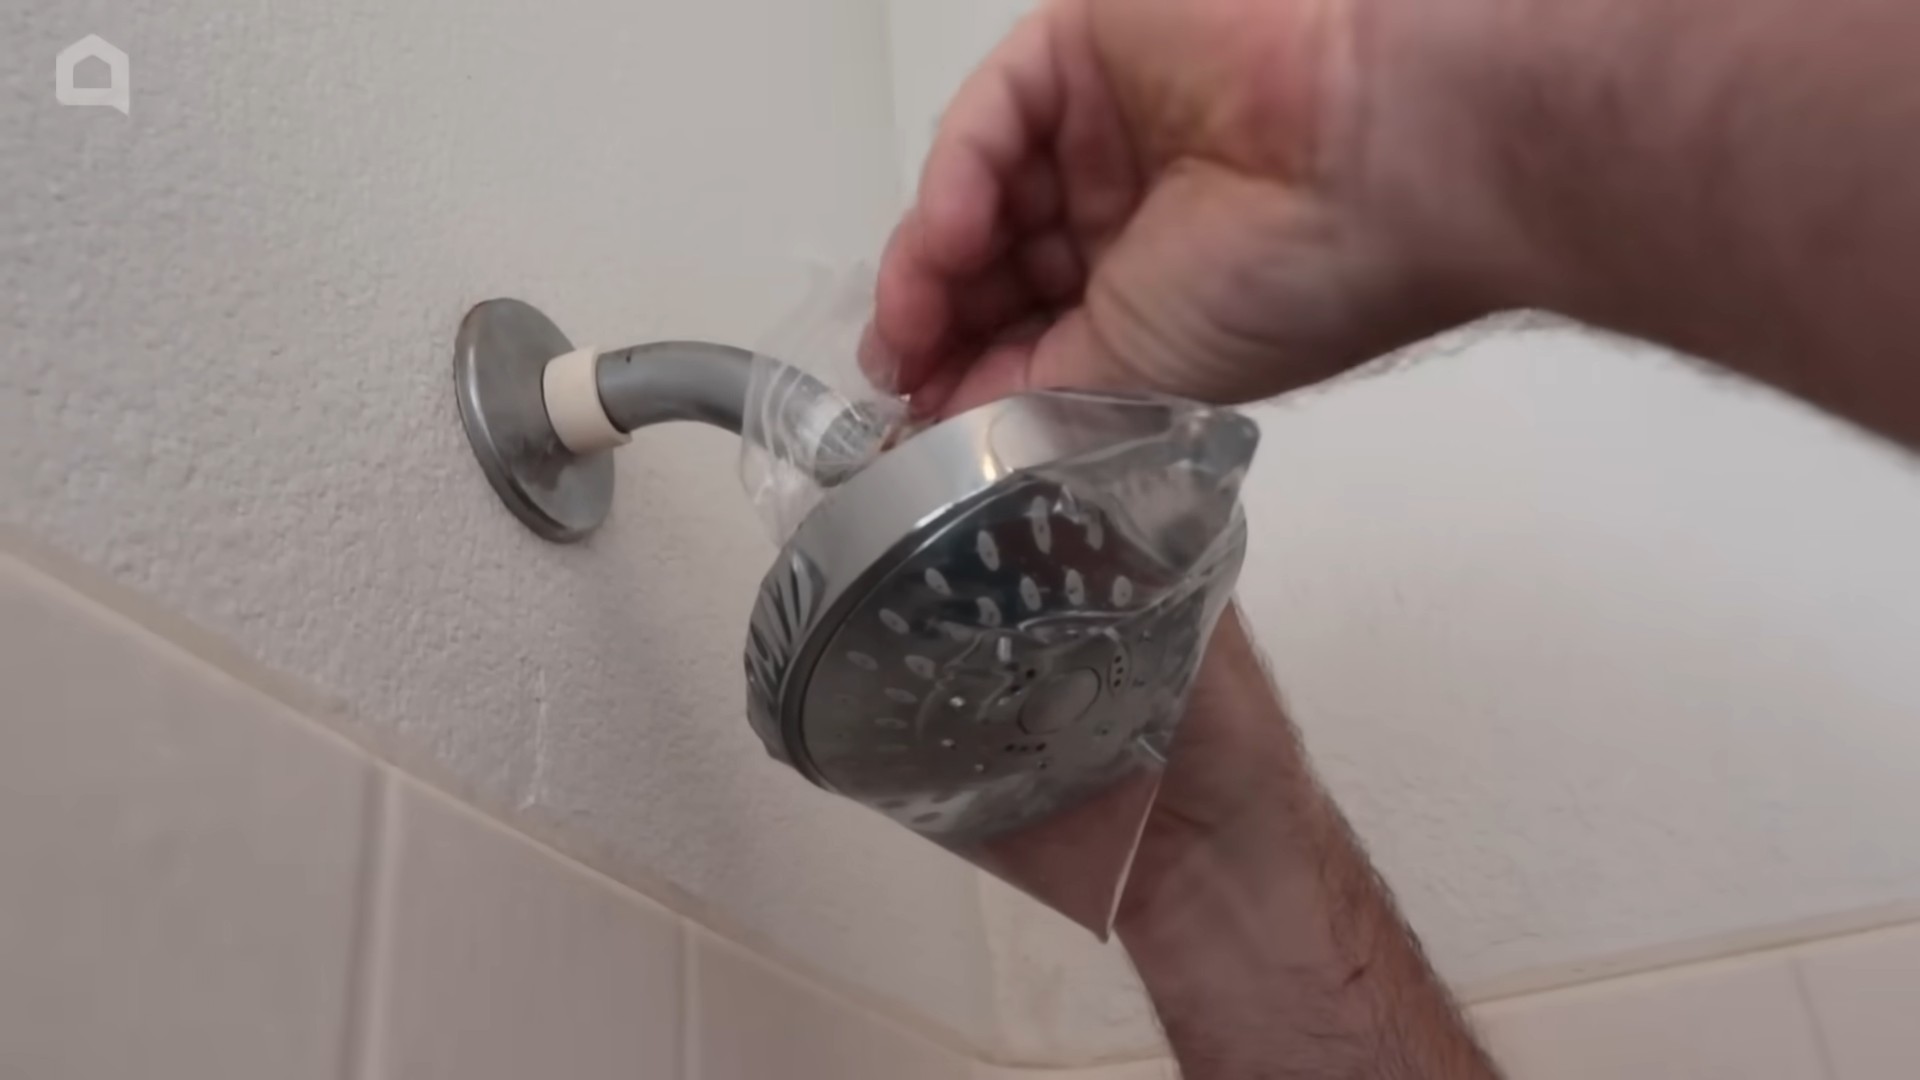
Unclogging a Slow Drain
A slow drain is a common kitchen problem, usually caused by grease, food particles, and other debris.
What You’ll Need:
* Plunger
* Baking soda
* White vinegar
* Boiling water
* Drain snake (optional, for stubborn clogs)
* Bucket
Step-by-Step Instructions:
1. Try the Plunger First: Make sure there’s enough water in the sink to cover the cup of the plunger. Place the plunger over the drain opening, creating a tight seal. Push and pull the plunger up and down vigorously for several minutes. Remove the plunger and see if the water drains. Repeat if necessary.
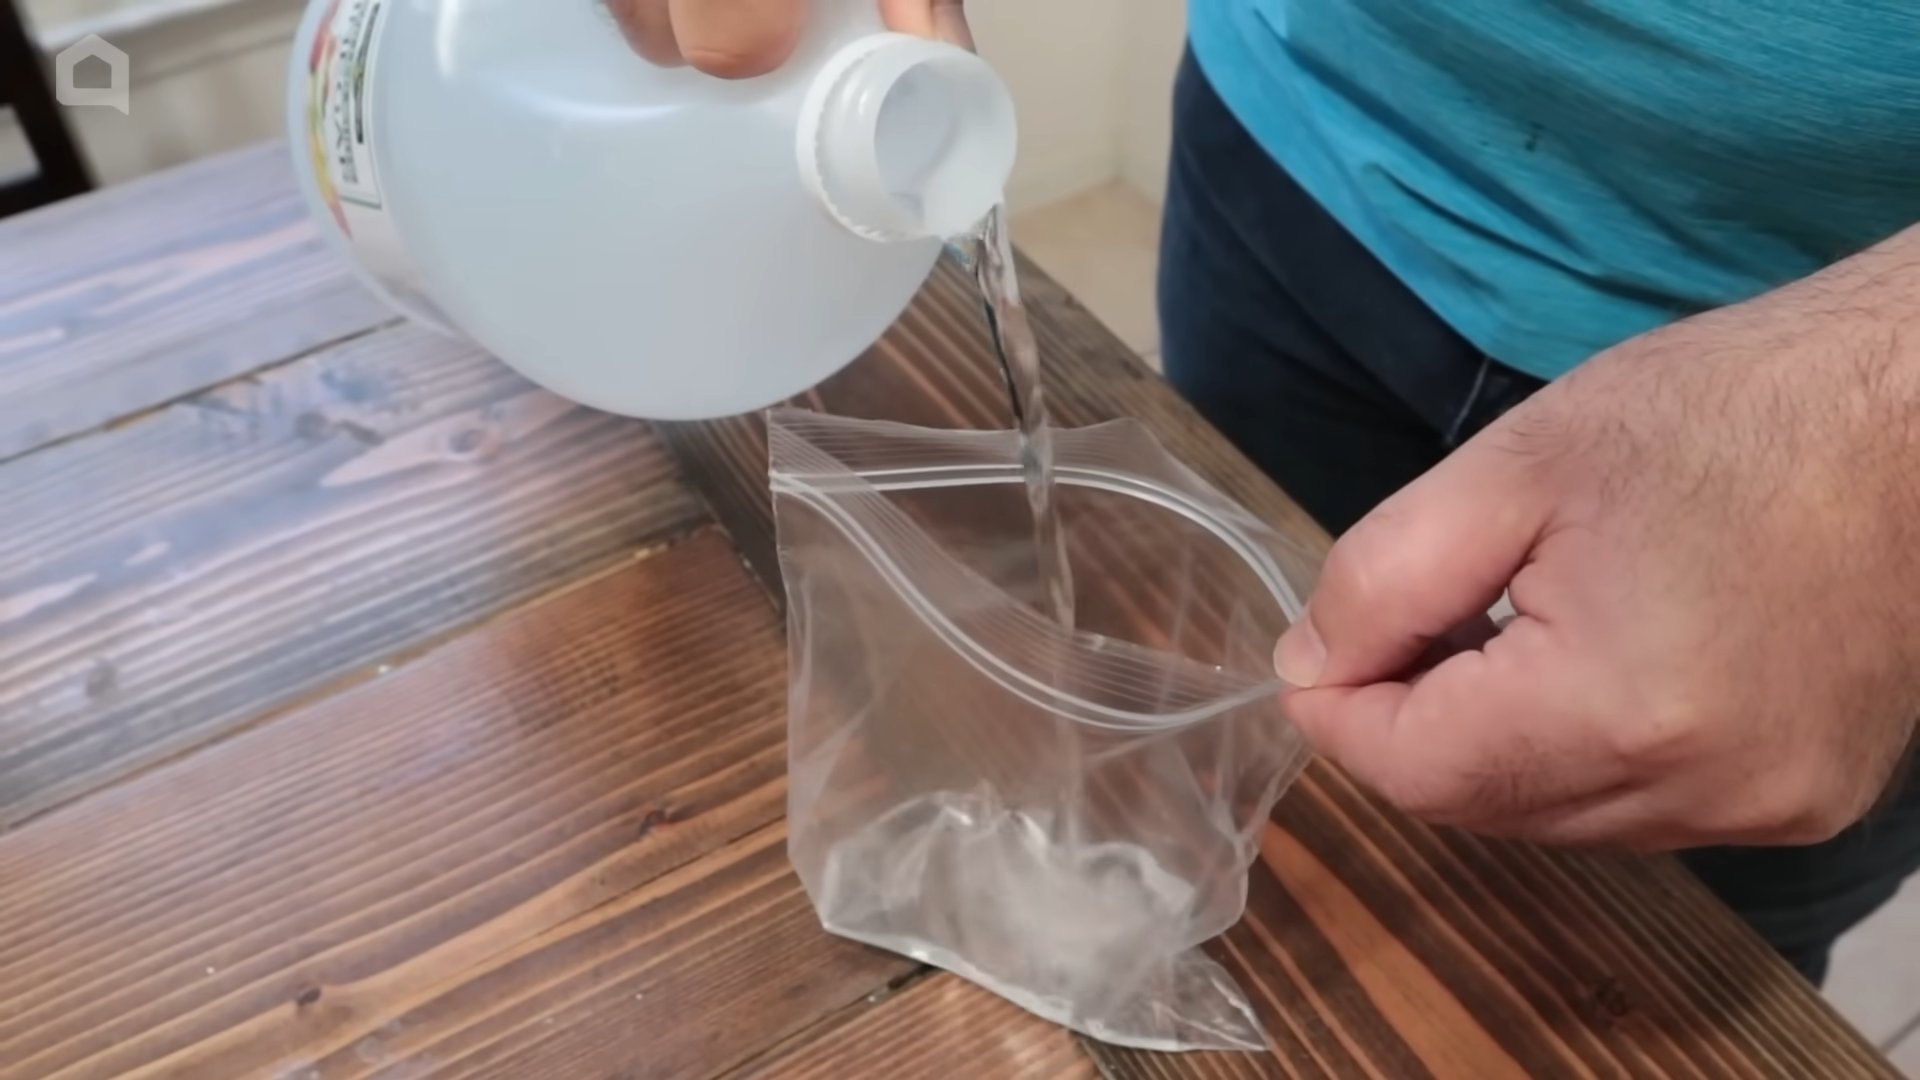
2. Baking Soda and Vinegar Solution: If the plunger doesn’t work, try this natural solution.
* Pour about 1 cup of baking soda down the drain.
* Follow with 1 cup of white vinegar.
* Let the mixture fizz and bubble for about 30 minutes.
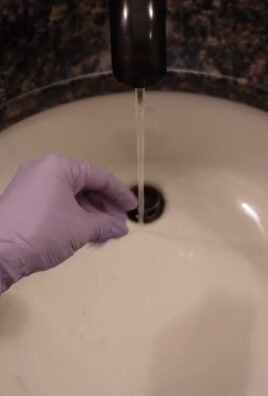
* Pour a pot of boiling water down the drain to flush away the clog.
3. Use a Drain Snake: If the clog is still there, you might need to use a drain snake (also called a plumber’s snake).
* Insert the drain snake into the drain opening.
* Rotate the snake as you push it down the drain.
* When yo
Hey there, fellow home improvers! Let’s face it, kitchen repairs can be a real pain, both for your sanity and your wallet. But before you call a professional for every little thing, I’m here to show you some simple DIY kitchen repair hacks that can save you a ton of money and give you that satisfying “I fixed it myself!” feeling. I’ve tackled these myself, and trust me, if I can do it, so can you!
Fixing a Leaky Faucet
A dripping faucet is annoying and wastes water. Luckily, it’s often a simple fix.
What You’ll Need:
* Adjustable wrench
* Screwdrivers (Phillips and flathead)
* Penetrating oil (like WD-40)
* Replacement O-rings and washers (take the old ones to the hardware store to match)
* Plumber’s grease
* Clean cloths or paper towels
* Basin wrench (optional, for stubborn nuts)
Step-by-Step Instructions:
1. Turn Off the Water Supply: This is crucial! Locate the shut-off valves under your sink. There should be one for hot water and one for cold. Turn them both clockwise until they’re completely closed. If you don’t have individual shut-off valves, you’ll need to turn off the main water supply to your house.
2. Protect Your Sink: Place a towel or cloth in the sink to prevent scratches from dropped tools.
3. Disassemble the Faucet: This is where things can get a little tricky, as faucet designs vary. However, the general principle is the same.
* Remove the Handle(s): Look for a small screw (often hidden under a decorative cap) on the handle. Use a screwdriver to remove the screw and then gently pull the handle off. Some handles might just pull straight off without a screw.
* Remove the Faucet Stem: Once the handle is off, you’ll see a nut holding the faucet stem in place. Use an adjustable wrench to loosen and remove this nut. Be careful not to scratch the faucet finish. If the nut is stuck, apply some penetrating oil and let it sit for a few minutes before trying again.
* Pull Out the Stem: After removing the nut, you should be able to pull the faucet stem straight out.
4. Inspect and Replace Worn Parts: Now, examine the stem and the inside of the faucet body for worn or damaged parts.
* O-rings: These are small rubber rings that seal the stem. They often become brittle and cracked over time. Replace any damaged O-rings with new ones. Apply a small amount of plumber’s grease to the new O-rings before installing them.
* Washers: These are flat, rubber or fiber discs that also help to seal the faucet. Replace any worn or damaged washers.
* Cartridge (for cartridge faucets): If you have a cartridge faucet (a single-handle faucet), the cartridge might be the culprit. You can usually remove the cartridge by unscrewing a retaining clip. Inspect the cartridge for damage and replace it if necessary.
5. Reassemble the Faucet: Now, put everything back together in the reverse order that you took it apart.
* Insert the Stem: Slide the stem back into the faucet body.
* Tighten the Nut: Tighten the nut that holds the stem in place with the adjustable wrench. Don’t overtighten it, or you could damage the faucet.
* Reattach the Handle(s): Put the handle(s) back on and secure them with the screw (if applicable).
6. Turn the Water Back On: Slowly turn the water supply valves back on. Check for leaks around the faucet. If you see any leaks, tighten the connections slightly.
7. Test the Faucet: Turn the faucet on and off to make sure it’s working properly.
Unclogging a Slow Drain
A slow drain is a common kitchen problem, usually caused by grease, food particles, and other debris.
What You’ll Need:
* Plunger
* Baking soda
* White vinegar
* Boiling water
* Drain snake (optional, for stubborn clogs)
* Bucket
Step-by-Step Instructions:
1. Try the Plunger First: Make sure there’s enough water in the sink to cover the cup of the plunger. Place the plunger over the drain opening, creating a tight seal. Push and pull the plunger up and down vigorously for several minutes. Remove the plunger and see if the water drains. Repeat if necessary.
2. Baking Soda and Vinegar Solution: If the plunger doesn’t work, try this natural solution.
* Pour about 1 cup of baking soda down the drain.
* Follow with 1 cup of white vinegar.
* Let the mixture fizz and bubble for about 30 minutes.
* Pour a pot of boiling water down the drain to flush away the clog.
3. Use a Drain Snake: If the clog is still there, you might need to use a drain snake (also called a plumber’s snake).
* Insert the drain snake into the drain opening.
* Rotate the snake as you push it down the drain.
* When you feel resistance, you’ve likely reached the clog. Continue rotating the snake to break up the clog.
* Pull the snake out of the drain, removing any debris that’s attached to it.
* Flush the drain with hot water.
4. Prevent Future Clogs: To prevent future clogs, avoid pouring grease down the drain. Scrape food scraps into the trash before washing dishes. You can also use a drain strainer to catch food particles.
Repairing a Loose Cabinet Door Hinge
A wobbly cabinet door can be annoying and can eventually damage the cabinet frame.
What You’ll Need:
* Screwdriver (Phillips head)
* Wood glue
* Toothpicks or wooden matchsticks
* Clamps (optional)
Step-by-Step Instructions:
1. Remove the Screws: Remove the screws that are holding the hinge to the cabinet frame. If the screws are just loose, try tightening them first. If they spin freely and don’t grip, the screw holes are likely stripped.
2. Fill the Stripped Screw Holes: This is the key to a solid repair.
* Apply a small amount of wood glue to the inside of the stripped screw holes.
* Insert several toothpicks or wooden matchsticks into the holes, breaking them off flush with the surface of the cabinet frame.
* Let the glue dry completely (at least 30 minutes).
3. Reattach the Hinge: Once the glue is dry, carefully reattach the hinge to the cabinet frame, using the same screws. The toothpicks or matchsticks will provide a new surface for the screws to grip.
4. Tighten the Screws: Tighten the screws until the hinge is securely attached to the cabinet frame. Don’t overtighten them, or you could strip the screw holes again.
5. Optional: Use Clamps: For extra stability, you can use clamps to hold the hinge in place while the glue dries.
Fixing Scratches on Wood Cabinets
Scratches on wood cabinets are inevitable, but you can often minimize their appearance with a few simple techniques.
What You’ll Need:
* Furniture polish
* Scratch repair marker (matching the color of your cabinets)
* Walnut or pecan
* Soft cloths
Step-by-Step Instructions:
1. Clean the Surface: Wipe the scratched area with a clean, damp cloth to remove any dirt or debris.
2. Try Furniture Polish First: Sometimes, a simple application of furniture polish can help to minimize the appearance of minor scratches. Apply the polish to a soft cloth and rub it into the scratched area.
3. Use a Scratch Repair Marker: For deeper scratches, use a scratch repair marker that matches the color of your cabinets.
* Apply the marker to the scratch, following the grain of the wood.
* Wipe away any excess marker with a clean cloth.
* Let the marker dry completely.
4. Use a Walnut or Pecan: This is a surprisingly effective trick for hiding scratches.
* Rub the meat of a walnut or pecan over the scratch, applying gentle pressure. The natural oils in the nut will help to fill in the scratch and blend it with the surrounding wood.
* Wipe away any excess oil with a clean cloth.
5. Apply Furniture Polish Again: After using a scratch repair marker or a walnut, apply furniture polish to the entire surface
Conclusion
So, there you have it! These DIY kitchen repair hacks aren’t just about saving money; they’re about empowering you to take control of your kitchen’s upkeep and breathe new life into your space. From banishing stubborn stains to reviving tired cabinets, these simple solutions offer a satisfying alternative to expensive professional repairs or replacements.
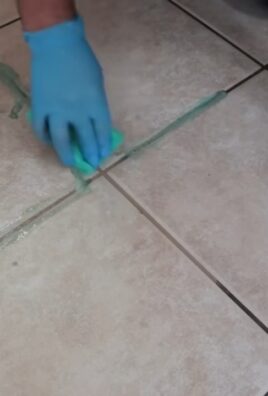
Think about the satisfaction of fixing that chipped countertop yourself, knowing you’ve not only saved a considerable sum but also personalized the repair to perfectly match your style. Or imagine the pride you’ll feel when guests compliment your sparkling clean grout, unaware of the simple baking soda paste that worked its magic. These small victories add up, transforming your kitchen from a source of frustration to a haven of culinary creativity.
But the real beauty of these DIY kitchen repair hacks lies in their adaptability. Feel free to experiment with different cleaning solutions, paint colors, or hardware finishes to create a truly unique and personalized look. For instance, instead of using plain white caulk, consider a tinted version that complements your backsplash. Or, if you’re feeling adventurous, try adding a stencil design to your freshly painted cabinets for a touch of whimsy. The possibilities are endless!
Don’t be intimidated by the thought of tackling these repairs yourself. Each hack is designed to be simple and straightforward, requiring minimal tools and expertise. With a little patience and a willingness to learn, you’ll be amazed at what you can accomplish. Remember to always prioritize safety by wearing appropriate protective gear, such as gloves and eye protection, and by following the instructions carefully.
We wholeheartedly encourage you to try these DIY kitchen repair hacks and experience the satisfaction of transforming your kitchen on a budget. Whether you’re dealing with a minor scratch or a more significant issue, these solutions offer a practical and cost-effective way to restore your kitchen to its former glory.
And most importantly, we want to hear about your experiences! Share your before-and-after photos, your favorite variations, and any tips or tricks you’ve discovered along the way. Let’s create a community of DIY enthusiasts who are passionate about keeping their kitchens beautiful and functional. So, grab your toolbox, gather your supplies, and get ready to unleash your inner handyman (or handywoman!). Your kitchen – and your wallet – will thank you for it. Embrace the power of DIY kitchen repair hacks and transform your kitchen into a space you truly love.
Frequently Asked Questions (FAQ)
Q: What are the most common kitchen repairs I can tackle myself?
A: Many common kitchen repairs are surprisingly easy to handle yourself. These include fixing leaky faucets, unclogging drains, repairing chipped countertops or cabinets, replacing cabinet hardware, and touching up paint. Addressing these issues promptly can prevent them from escalating into more significant and costly problems. Remember to always turn off the water supply before working on plumbing repairs and disconnect any electrical appliances before working on electrical issues.
Q: I’m a complete beginner. Are these DIY kitchen repair hacks really for me?
A: Absolutely! These hacks are designed with beginners in mind. We’ve focused on simple, straightforward solutions that require minimal tools and expertise. Each hack includes clear, step-by-step instructions that are easy to follow. Start with a small, manageable project, like cleaning grout or replacing a cabinet knob, to build your confidence. As you gain experience, you can tackle more challenging repairs. Don’t be afraid to make mistakes – that’s how we learn! There are also tons of online resources, including videos and tutorials, that can provide additional guidance.
Q: What tools and supplies will I need for most of these DIY kitchen repair hacks?
A: The specific tools and supplies will vary depending on the repair, but some essentials include:
* A basic toolkit with screwdrivers, pliers, a wrench, and a hammer.
* Safety glasses and gloves.
* Cleaning supplies like baking soda, vinegar, dish soap, and a scrub brush.
* Caulk and a caulking gun.
* Sandpaper and paint for touch-ups.
* Wood filler for repairing chips and cracks.
* A putty knife for applying filler and caulk.
* Measuring tape.
* A level.
It’s a good idea to create a dedicated DIY repair kit so you have everything you need on hand when a problem arises.
Q: How can I prevent future kitchen repairs?
A: Prevention is key to minimizing kitchen repairs. Here are a few tips:
* Clean up spills immediately to prevent stains and damage.
* Avoid pouring grease down the drain, as it can clog pipes.
* Regularly inspect your plumbing for leaks and address them promptly.
* Use cutting boards to protect your countertops from scratches.
* Don’t overload your cabinets or drawers, as this can strain the hinges and hardware.
* Periodically check and tighten loose screws on cabinets and appliances.
* Ventilate your kitchen properly to prevent moisture buildup, which can lead to mold and mildew.
Q: What if I try a DIY repair and it doesn’t work?
A: It’s okay if your first attempt isn’t perfect! Don’t get discouraged. Take a step back, reassess the situation, and try again. Sometimes, a little extra patience or a different approach is all you need. If you’re still struggling, consider consulting online resources or asking for help from a friend or family member who has experience with DIY repairs. If the problem is beyond your skill level, it’s always best to call a professional. It’s better to spend a little money on a professional repair than to risk causing further damage.
Q: Are there any repairs I should *never* attempt myself?
A: Yes, certain repairs are best left to the professionals. These include:
* Major plumbing repairs, such as replacing pipes or repairing water heaters.
* Electrical repairs, especially those involving wiring or circuit breakers.
* Gas appliance repairs.
* Structural repairs, such as repairing damaged walls or floors.
Working on these types of repairs can be dangerous and may require specialized knowledge and equipment. It’s always better to err on the side of caution and call a qualified professional.
Q: How do I choose the right paint color for touching up my cabinets?
A: The best way to ensure a perfect match is to take a sample of your cabinet paint to a paint store. They can use a color-matching system to create a custom paint that matches your existing color. If you don’t have a sample, try to find the original paint can or look for a color code on the inside of a cabinet door. When applying the touch-up paint, use a small brush and apply thin coats to avoid creating a noticeable patch.
Q: How can I make my DIY kitchen repairs last longer?
A: Proper preparation is key to ensuring the longevity of your DIY repairs. Clean the area thoroughly before starting any repair, and use high-quality materials. Apply sealants and protectants as needed to prevent future damage. Regularly inspect your repairs and address any minor issues promptly. By taking these steps, you can extend the life of your DIY kitchen repairs and keep your kitchen looking its best.
Leave a Comment