
Growing Tomatoes Windowsill: Imagine plucking a sun-ripened, juicy tomato right from your windowsill, even if you don’t have a sprawling garden! Sounds like a dream, right? Well, it doesn’t have to be! For centuries, people have cultivated plants indoors, adapting techniques to bring the bounty of nature into their homes. From ancient Egyptians growing herbs in containers to Victorian-era conservatories brimming with exotic flora, the desire to nurture life indoors is deeply rooted in our history.
But let’s be honest, not everyone has a green thumb or the space for a traditional garden. That’s where these simple, yet effective DIY tricks come in. Growing Tomatoes Windowsill is not only possible, but it’s also incredibly rewarding. This article is packed with easy-to-follow instructions and clever hacks that will empower you to cultivate delicious tomatoes, regardless of your experience level or living situation.
Why do you need these DIY tricks? Because fresh, homegrown tomatoes taste infinitely better than anything you can buy at the store! Plus, it’s a fantastic way to reduce your carbon footprint, save money, and connect with nature. I’m going to show you how to transform your sunny windowsill into a mini-tomato farm, providing you with a constant supply of fresh, flavorful fruit. Get ready to roll up your sleeves and discover the joy of growing your own tomatoes indoors!
Growing Tomatoes on Your Windowsill: A Beginner’s Guide
Hey there, fellow plant enthusiasts! Ever dreamed of having fresh, juicy tomatoes right at your fingertips, even if you don’t have a sprawling garden? Well, you’re in luck! Growing tomatoes on a windowsill is totally achievable, and I’m here to guide you through the process. It’s a rewarding experience, and nothing beats the taste of a homegrown tomato, especially one you nurtured from a tiny seed.
Choosing the Right Tomato Variety
Not all tomatoes are created equal, especially when it comes to windowsill gardening. You’ll want to opt for compact, determinate varieties that are bred for container growing. These types stay relatively small and don’t require extensive pruning.
Here are some of my favorite windowsill-friendly tomato varieties:
* Tiny Tim: As the name suggests, these are super compact and produce adorable, bite-sized tomatoes.
* Red Robin: Another dwarf variety that’s perfect for small spaces. Expect a good yield of small, sweet tomatoes.
* Balcony Tomato: Bred specifically for balconies and patios, these are well-suited for windowsill growing.
* Roma: A classic paste tomato that can be grown in a container.
* Tumbling Tom: A trailing variety that looks beautiful in hanging baskets or containers placed on a windowsill.
Gathering Your Supplies
Before you get started, let’s make sure you have everything you need. This will save you time and frustration later on.
* Tomato Seeds: Choose your desired variety from the list above or explore other dwarf or determinate options.
* Seed Starting Tray or Small Pots: These will be used to germinate your seeds.
* Seed Starting Mix: This is a light, sterile mix that’s ideal for delicate seedlings.
* Larger Pots (at least 6-8 inches in diameter): These will be the permanent homes for your tomato plants.
* Potting Mix: A good quality potting mix that drains well is essential.
* Watering Can or Spray Bottle: For gentle watering.
* Liquid Fertilizer: A balanced liquid fertilizer formulated for tomatoes.
* Grow Lights (optional): If your windowsill doesn’t receive enough sunlight, grow lights can be a lifesaver.
* Small Stakes or Tomato Cages (optional): To provide support as your plants grow.
Starting Your Tomato Seeds
This is where the magic begins! Starting your seeds indoors gives them a head start before transplanting them to their final containers.
1. Prepare Your Seed Starting Tray or Pots: Fill your seed starting tray or small pots with seed starting mix. Gently moisten the mix with water.
2. Sow the Seeds: Sow 2-3 tomato seeds per cell or pot, about 录 inch deep.
3. Cover and Label: Lightly cover the seeds with more seed starting mix and gently pat it down. Label each cell or pot with the tomato variety. This is crucial so you don’t get them mixed up!
4. Provide Warmth and Moisture: Cover the tray or pots with a clear plastic lid or plastic wrap to create a humid environment. Place them in a warm location, ideally around 70-75掳F (21-24掳C). A heat mat can be helpful if your home is cool.
5. Wait for Germination: Keep the seed starting mix consistently moist, but not soggy. Check daily and mist with water as needed. Germination typically takes 5-10 days.
6. Remove the Cover: Once the seedlings emerge, remove the plastic lid or wrap.
7. Provide Light: Place the seedlings under grow lights or in a very sunny windowsill. Rotate the tray or pots regularly to ensure even growth.
8. Thin the Seedlings: Once the seedlings have their first true leaves (the second set of leaves that appear after the initial seed leaves), thin them to one seedling per cell or pot. Choose the strongest, healthiest-looking seedling and snip off the others at the soil line.
Transplanting Your Tomato Seedlings
Once your seedlings have grown a bit and developed a strong root system, it’s time to transplant them into their larger, permanent pots.
1. Prepare Your Larger Pots: Fill your larger pots (at least 6-8 inches in diameter) with potting mix.
2. Gently Remove the Seedlings: Carefully remove the seedlings from their seed starting tray or pots. Be gentle to avoid damaging the roots.
3. Plant the Seedlings: Dig a hole in the potting mix large enough to accommodate the root ball. Place the seedling in the hole and gently backfill with potting mix.
4. Water Thoroughly: Water the transplanted seedlings thoroughly.
5. Provide Support (Optional): If you’re using a taller variety, insert a small stake or tomato cage into the pot to provide support as the plant grows.
Caring for Your Windowsill Tomato Plants
Now that your tomato plants are in their permanent homes, it’s time to provide them with the care they need to thrive.
1. Sunlight: Tomatoes need at least 6-8 hours of direct sunlight per day. Place your plants in the sunniest windowsill you have. If you don’t have enough natural light, supplement with grow lights.
2. Watering: Water your tomato plants regularly, keeping the soil consistently moist but not soggy. Water deeply when the top inch of soil feels dry to the touch. Avoid overwatering, as this can lead to root rot.
3. Fertilizing: Feed your tomato plants with a balanced liquid fertilizer every 2-3 weeks. Follow the instructions on the fertilizer label.
4. Pruning: Determinate tomato varieties generally don’t require extensive pruning. However, you can remove any yellowing or dead leaves.
5. Pollination: Tomatoes are self-pollinating, but sometimes they need a little help, especially indoors. Gently shake the plants or use a small brush to transfer pollen from one flower to another. You can also use a fan to circulate air around the plants, which can help with pollination.
6. Pest and Disease Control: Keep an eye out for pests like aphids, whiteflies, and spider mites. If you spot any pests, treat them with insecticidal soap or neem oil. Ensure good air circulation to prevent fungal diseases.
Harvesting Your Tomatoes
The moment you’ve been waiting for! Harvesting your own homegrown tomatoes is incredibly satisfying.
1. Wait for Ripening: Tomatoes are ready to harvest when they are fully colored and slightly soft to the touch.
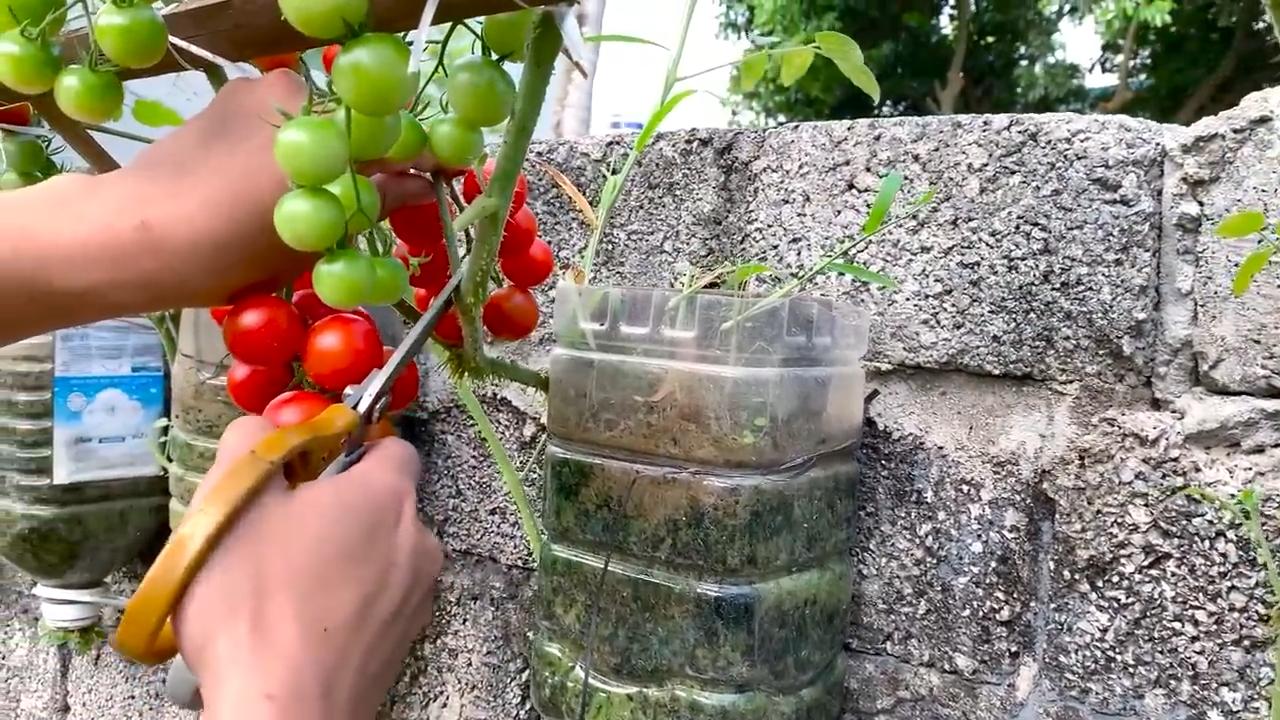
2. Gently Pick the Tomatoes: Gently twist or snip the tomatoes from the plant.
3. Enjoy Your Harvest: Enjoy your fresh, homegrown tomatoes in salads, sandwiches, sauces, or simply eat them straight from the plant!
Troubleshooting Common Problems
Even with the best care, you might encounter some challenges along the way. Here are some common problems and how to address them:
* Yellowing Leaves: This could be a sign of overwatering, underwatering, nutrient deficiency, or pest infestation. Check the soil moisture, fertilize if needed, and inspect for pests.
* Blossom Drop: This is when the flowers fall off the plant without producing fruit. It can be caused by temperature stress, lack of pollination, or nutrient deficiency. Ensure your plants are getting enough sunlight and water, and try hand-pollinating the flowers.
* Leggy Seedlings: This means your seedlings are tall and spindly, usually due to insufficient light. Provide more light by moving them to a sunnier location or using grow lights.
* Pests: Aphids, whiteflies, and spider mites are common pests that can infest tomato plants. Treat them with insecticidal soap or neem oil.
Tips for Success
Here are a few extra tips to help you succeed in growing tomatoes on your windowsill:
* Choose the Right Location: A south-facing windowsill is ideal, as it receives the most sunlight.
* Use High-Quality Potting Mix: A good quality potting mix will provide your plants with the nutrients they need.
* Don’t Overwater: Overwatering is a common mistake that can lead to root rot.
* Provide Support: As your plants grow, they may need support to prevent them from falling over.
* Be Patient: Growing tomatoes takes time and patience. Don’t get discouraged if you don’t see results immediately.
Growing tomatoes on a windowsill is a fun and rewarding experience. With a little care and attention, you can enjoy fresh, homegrown tomatoes all year round! Happy gardening!
Conclusion
So, there you have it! Growing tomatoes on a windowsill isn’t just a whimsical dream; it’s a tangible reality within reach, even if you don’t have a sprawling garden. This DIY trick offers a fantastic way to enjoy fresh, homegrown tomatoes, adding a burst of flavor to your meals and a touch of green to your indoor space. It’s a rewarding experience that connects you to the food you eat, fostering a deeper appreciation for the natural world.
Why is this a must-try? Because it’s accessible, space-saving, and incredibly satisfying. Imagine plucking a ripe, juicy tomato straight from your windowsill and adding it to your salad or sandwich. The taste difference compared to store-bought varieties is remarkable. Plus, it’s a fantastic project for families, teaching children about plant life cycles and the importance of sustainable food practices.
But the beauty of this DIY project lies in its adaptability. Feel free to experiment with different tomato varieties. Cherry tomatoes and other smaller varieties are particularly well-suited for windowsill growing due to their compact size and prolific fruit production. Consider using self-watering containers to simplify the watering process, especially if you tend to forget. You can also add companion plants like basil or marigolds to your windowsill garden. Basil is known to improve the flavor of tomatoes and deter pests, while marigolds attract beneficial insects.
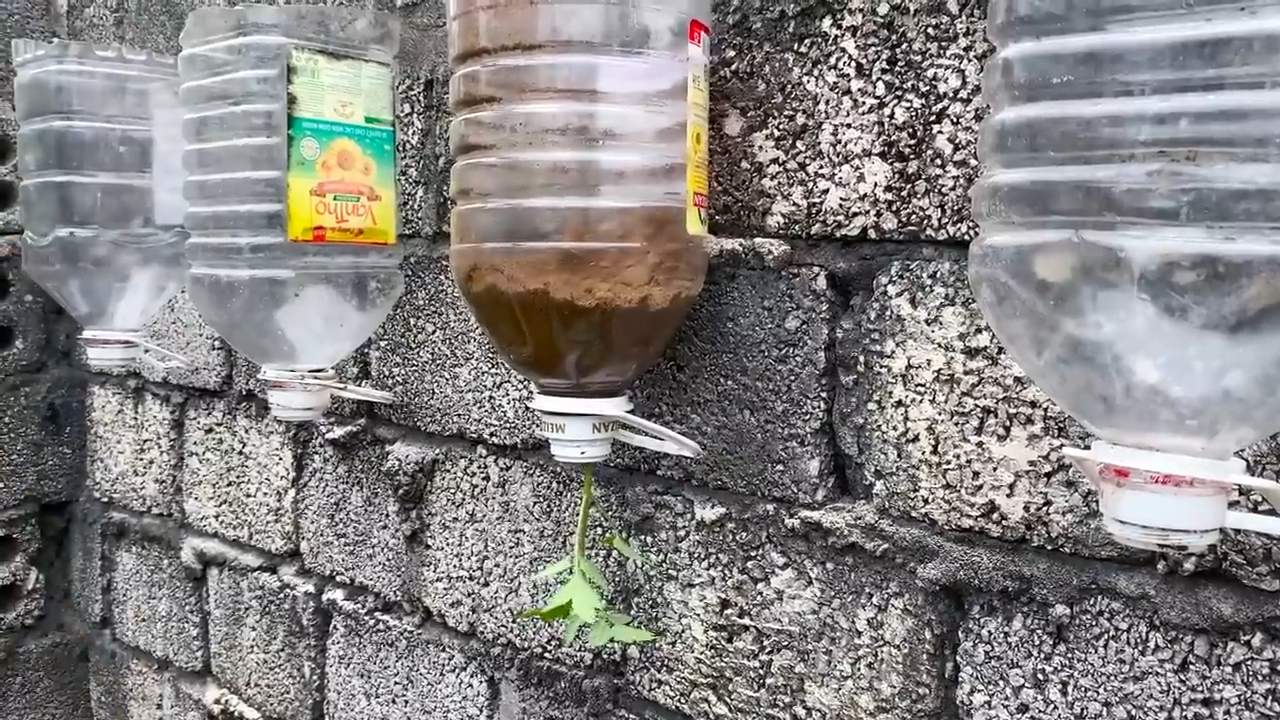
Don’t be afraid to get creative with your setup. Upcycle old containers, decorate your pots, and create a visually appealing windowsill garden that reflects your personal style. The possibilities are endless!
We wholeheartedly encourage you to give this DIY trick a try. It’s a simple yet profound way to bring the joy of gardening into your home, regardless of your living situation. And most importantly, we want to hear about your experiences! Share your successes, challenges, and any variations you’ve tried in the comments below. Let’s create a community of windowsill tomato growers, sharing tips and inspiring each other to cultivate our own little slices of paradise. Remember, even a small windowsill can yield a bountiful harvest with a little care and attention. Embrace the journey of growing tomatoes on a windowsill, and savor the delicious rewards!
Frequently Asked Questions (FAQ)
What kind of tomatoes grow best on a windowsill?
Smaller tomato varieties, such as cherry tomatoes, grape tomatoes, and other dwarf or bush varieties, are generally the best choices for windowsill growing. These varieties tend to be more compact and produce fruit more quickly than larger, indeterminate varieties. Look for varieties specifically labeled as “patio tomatoes” or “container tomatoes,” as these are bred to thrive in smaller spaces. Roma tomatoes can also be grown, but they might require more support.
How much sunlight do my tomato plants need?
Tomato plants require at least 6-8 hours of direct sunlight per day to thrive. A south-facing windowsill is ideal, as it typically receives the most sunlight. If you don’t have a south-facing window, an east- or west-facing window can also work, but you may need to supplement with artificial light. Consider using a grow light for a few hours each day, especially during the winter months or in areas with limited sunlight.
What kind of soil should I use?
Use a high-quality potting mix specifically formulated for containers. Avoid using garden soil, as it can be too heavy and may not drain well. A good potting mix will provide adequate drainage and aeration, which are essential for healthy root growth. You can also amend the potting mix with compost or other organic matter to improve its fertility.
How often should I water my tomato plants?
Water your tomato plants regularly, keeping the soil consistently moist but not waterlogged. The frequency of watering will depend on factors such as the size of the container, the temperature, and the humidity. Check the soil moisture level daily by sticking your finger into the soil. If the top inch of soil feels dry, it’s time to water. Water deeply, allowing the water to drain out of the bottom of the container. Avoid overwatering, as this can lead to root rot.
Do I need to fertilize my tomato plants?
Yes, tomato plants are heavy feeders and require regular fertilization to produce abundant fruit. Use a balanced fertilizer specifically formulated for tomatoes, following the instructions on the package. Start fertilizing your plants a few weeks after transplanting them into their final containers. Fertilize every 2-3 weeks during the growing season. You can also use organic fertilizers, such as compost tea or fish emulsion.
How do I support my tomato plants?
As your tomato plants grow, they may need support to prevent them from toppling over. Use stakes, cages, or trellises to provide support. Insert the support structure into the container when you transplant the seedlings to avoid damaging the roots later. Tie the stems of the tomato plants to the support structure as they grow.
How do I pollinate my tomato plants indoors?
While tomato plants are self-pollinating, they may need a little help with pollination when grown indoors. You can hand-pollinate your tomato plants by gently shaking the flowers or using a small paintbrush to transfer pollen from one flower to another. You can also use a fan to create a gentle breeze, which can help to distribute the pollen.
What are some common pests and diseases that affect tomato plants?
Common pests that can affect tomato plants include aphids, whiteflies, and spider mites. Common diseases include early blight, late blight, and blossom end rot. Inspect your plants regularly for signs of pests or diseases. If you find any, take action immediately to control them. You can use insecticidal soap or neem oil to control pests. To prevent diseases, ensure good air circulation and avoid overwatering. Blossom end rot is often caused by calcium deficiency, so you can add calcium to the soil or use a calcium-rich fertilizer.
How long does it take for tomatoes to ripen?
The time it takes for tomatoes to ripen depends on the variety and the growing conditions. Generally, it takes about 60-85 days from transplanting for tomatoes to ripen. The tomatoes will turn from green to red (or yellow, orange, or purple, depending on the variety) when they are ripe. They should also be slightly soft to the touch.
Can I grow tomatoes on a windowsill year-round?
With the right conditions, you can grow tomatoes on a windowsill year-round. However, you may need to supplement with artificial light during the winter months to provide adequate sunlight. You may also need to adjust your watering and fertilizing schedule depending on the season.

Leave a Comment