
Growing Chili Peppers in Pots: Unleash the fiery flavors of homegrown goodness right on your patio! Have you ever dreamed of adding a zesty kick to your meals with peppers you’ve nurtured yourself? Well, dream no more! This DIY guide is your passport to a vibrant, pepper-filled paradise, even if you only have a small balcony or a sunny windowsill.
For centuries, chili peppers have been more than just a spice; they’ve been woven into the fabric of cultures worldwide. From the ancient Aztecs using them in rituals to the fiery curries of India, these potent pods have a rich and fascinating history. Now, you can become a part of that story by cultivating your own chili peppers at home.
Why should you embark on this exciting journey? Because growing chili peppers in pots is surprisingly easy, incredibly rewarding, and offers a taste experience you simply can’t get from store-bought varieties. Imagine the satisfaction of plucking a perfectly ripe chili from your own plant, knowing exactly where it came from and how it was grown. Plus, it’s a fantastic way to add a splash of color and life to your outdoor (or indoor!) space. I’m excited to share my favorite tips and tricks to help you succeed, even if you’re a complete beginner. Let’s get started!
Growing Fiery Chili Peppers in Pots: A DIY Guide to Spice Up Your Life!
Okay, chili pepper lovers, gather ’round! I’m going to walk you through everything you need to know to successfully grow your own chili peppers in pots. Trust me, there’s nothing quite like the satisfaction of harvesting your own homegrown heat. Plus, it’s a lot easier than you might think!
Choosing Your Chili Pepper Variety
First things first, let’s talk peppers! The world of chili peppers is vast and exciting, ranging from mild and fruity to face-meltingly hot. Consider these factors when choosing your varieties:
* Heat Level: This is measured using the Scoville Heat Unit (SHU) scale. Do you prefer a gentle warmth, a fiery kick, or something that will make you sweat? Research the SHU of different peppers before you commit.
* Size and Shape: Some chili peppers are small and compact, perfect for stuffing or pickling. Others are long and slender, ideal for drying or making hot sauce. Think about how you plan to use your peppers.
* Growing Conditions: Some varieties are more tolerant of cooler temperatures or shorter growing seasons than others. Check the seed packet or plant label for specific requirements.
* Personal Preference: Ultimately, the best chili pepper is the one you enjoy the most! Experiment with different varieties to find your favorites.
Some popular choices for growing in pots include:
* Jalapeño: A classic, medium-heat pepper that’s versatile and easy to grow.
* Serrano: A bit hotter than jalapeño, with a bright, fresh flavor.
* Cayenne: A long, thin pepper with a significant kick, perfect for drying and grinding into powder.
* Habanero: A very hot pepper with a fruity, tropical flavor. Handle with care!
* Thai Chili: Small but mighty, these peppers pack a punch and are great for Asian cuisine.
* Bell Peppers: Okay, not technically chili peppers, but they are peppers and easy to grow in pots!
Gathering Your Supplies
Now that you’ve chosen your peppers, let’s get our supplies in order. Here’s what you’ll need:
* Chili Pepper Seeds or Seedlings: You can start from seed or buy established seedlings from a nursery. Starting from seed gives you more variety options, but seedlings will give you a head start.
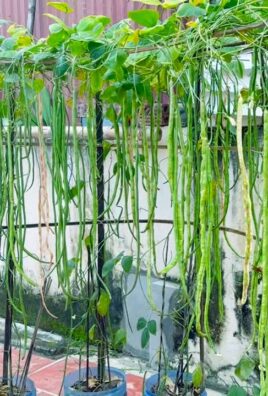
* Pots: Choose pots that are at least 12 inches in diameter. Larger pots are better, as they provide more room for the roots to grow. Make sure the pots have drainage holes!
* Potting Mix: Use a high-quality potting mix that’s well-draining. Avoid using garden soil, as it can become compacted in pots.
* Fertilizer: A balanced fertilizer (e.g., 10-10-10) or a fertilizer specifically formulated for tomatoes and peppers will provide the nutrients your plants need.
* Watering Can or Hose: For watering your plants.
* Optional:
* Grow Lights: If you don’t have a sunny spot, grow lights can help your plants thrive.
* Plant Markers: To label your different varieties of peppers.
* Gloves: To protect your hands when handling hot peppers.
* Pruning Shears: For trimming and shaping your plants.
* Tomato Cage or Stakes: To support taller pepper plants.
Planting Your Chili Peppers
Alright, let’s get our hands dirty! Here’s how to plant your chili peppers in pots:
Starting from Seed:
1. Sow the Seeds: Fill small pots or seed trays with potting mix. Sow the seeds about ¼ inch deep and gently water them.
2. Provide Warmth: Chili pepper seeds need warmth to germinate. Place the pots in a warm location, such as a sunny windowsill or on a heat mat.
3. Keep the Soil Moist: Keep the soil consistently moist, but not soggy.
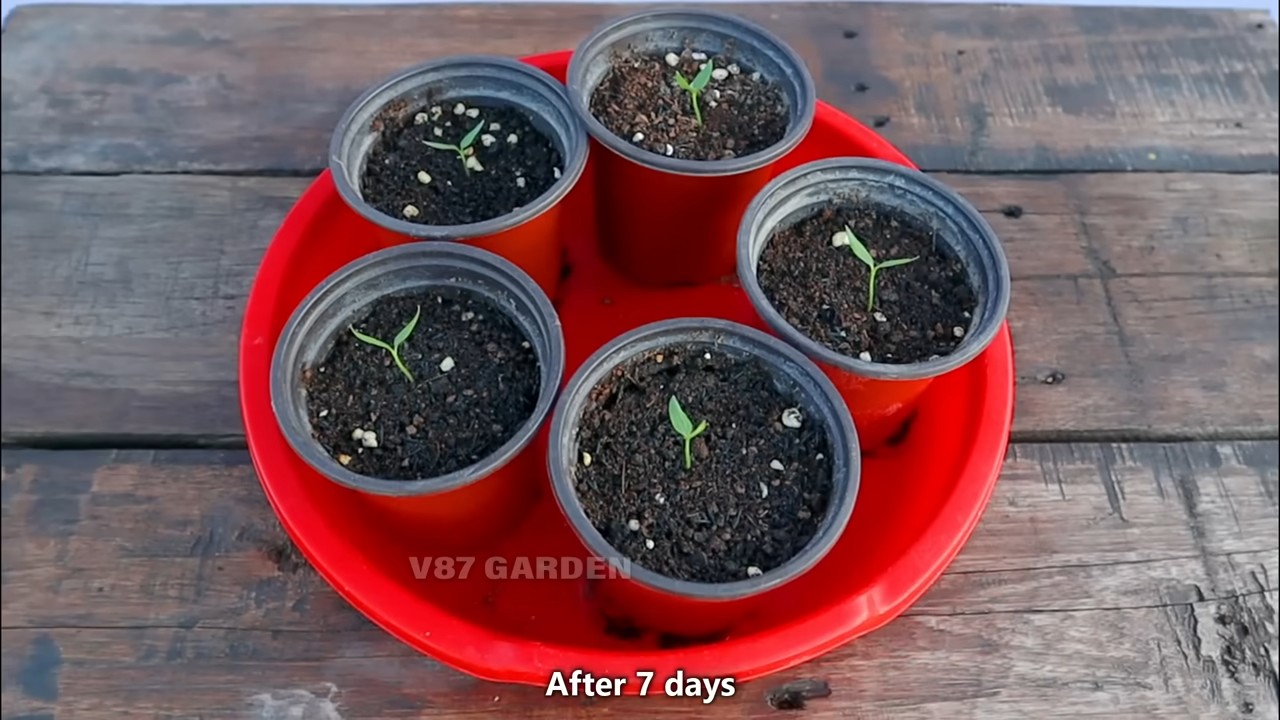
4. Wait for Germination: Germination typically takes 7-14 days.
5. Transplant Seedlings: Once the seedlings have developed a few sets of true leaves (the leaves that look like miniature versions of the adult leaves), transplant them into larger pots.
Planting Seedlings:
1. Prepare the Pot: Fill the pot with potting mix, leaving a few inches of space at the top.
2. Remove the Seedling: Gently remove the seedling from its container. If the roots are pot-bound (tightly circling the bottom of the pot), gently loosen them before planting.
3. Plant the Seedling: Dig a hole in the potting mix that’s large enough to accommodate the root ball. Place the seedling in the hole and backfill with potting mix.
4. Water Thoroughly: Water the seedling thoroughly after planting.
Caring for Your Chili Peppers
Now that your chili peppers are planted, it’s time to give them the care they need to thrive.
Sunlight:
Chili peppers need at least 6-8 hours of sunlight per day. Place your pots in a sunny location, such as a south-facing balcony or patio. If you don’t have enough sunlight, consider using grow lights.
Watering:
Water your chili peppers regularly, especially during hot, dry weather. The soil should be consistently moist, but not soggy. Water deeply, allowing the water to drain out of the drainage holes. Avoid watering the foliage, as this can lead to fungal diseases. I usually stick my finger about an inch into the soil to check the moisture level. If it feels dry, it’s time to water.
Fertilizing:
Fertilize your chili peppers every 2-3 weeks with a balanced fertilizer or a fertilizer specifically formulated for tomatoes and peppers. Follow the instructions on the fertilizer label. I like to use a liquid fertilizer diluted in water for easy application.
Pruning:
Pruning can help to improve air circulation and encourage bushier growth. Remove any yellowing or dead leaves. You can also pinch back the tips of the branches to encourage more branching.
Pest and Disease Control:
Keep an eye out for pests and diseases. Common pests of chili peppers include aphids, spider mites, and whiteflies. You can control these pests with insecticidal soap or neem oil. Common diseases include fungal diseases like powdery mildew and blossom end rot. Prevent fungal diseases by providing good air circulation and avoiding overwatering. Blossom end rot is caused by a calcium deficiency, so make sure your soil is rich in calcium.
Supporting the Plants:
As your chili pepper plants grow, they may need support. Use tomato cages or stakes to prevent the plants from falling over, especially when they’re loaded with peppers.
Harvesting Your Chili Peppers
The moment you’ve been waiting for! Here’s how to harvest your chili peppers:
* Timing: The timing of the harvest depends on the variety of chili pepper and your personal preference. Some peppers are best harvested when they’re green, while others are best harvested when they’re fully ripe and have turned red, yellow, or orange.
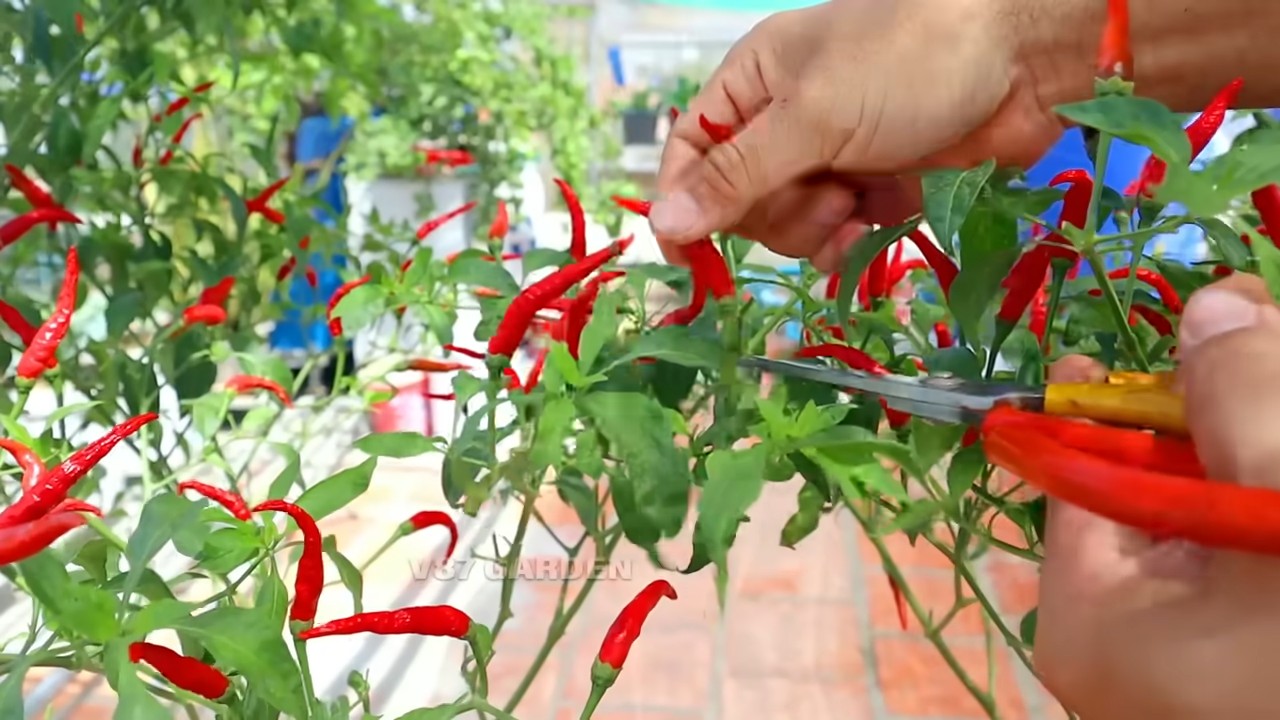
* Method: Use pruning shears or scissors to cut the peppers from the plant. Leave a small stem attached to the pepper.
* Storage: Fresh chili peppers can be stored in the refrigerator for up to a week. You can also dry, freeze, or pickle your chili peppers for longer storage.
Troubleshooting Common Problems
Even with the best care, you may encounter some problems when growing chili peppers. Here are some common issues and how to address them:
* Yellowing Leaves: This can be caused by overwatering, underwatering, nutrient deficiencies, or pests. Check the soil moisture and adjust your watering accordingly. Fertilize your plants regularly. Inspect the leaves for pests.
* Blossom Drop: This is when the flowers fall off the plant without producing fruit. It can be caused by temperature stress, lack of pollination, or nutrient deficiencies. Ensure your plants are getting enough sunlight and water. Hand-pollinate the flowers by gently shaking the plant or using a small brush to transfer pollen from one flower to another. Fertilize your plants regularly.
* Blossom End Rot: This is when the bottom of the pepper turns black and rotten. It’s caused by a calcium deficiency. Ensure your soil is rich in calcium. You can also add calcium to the soil by using bone meal or eggshells.
* Pests: Aphids, spider mites, and whiteflies can damage your chili pepper plants. Control these pests with insecticidal soap or neem oil.
* Fungal Diseases: Powdery mildew and other fungal diseases can affect chili pepper plants. Prevent fungal diseases by providing good air circulation and avoiding overwatering. Treat fungal diseases with a fungicide.
Enjoying Your Homegrown Chili Peppers
Congratulations! You’ve successfully grown your own chili peppers in pots. Now it’s time to
Conclusion
So, there you have it! Growing chili peppers in pots isn’t just a gardening trend; it’s a gateway to fresh, fiery flavor right at your fingertips. We’ve explored the ins and outs of creating the perfect potted pepper paradise, from selecting the right variety and pot size to nurturing your plants with the proper soil, sunlight, and watering techniques.
Why is this DIY trick a must-try? Because it empowers you to control every aspect of your chili pepper’s environment, leading to healthier, more productive plants and a more abundant harvest. Imagine the satisfaction of plucking vibrant, sun-ripened chilies from your own balcony or patio, knowing you nurtured them from seedling to spicy sensation. It’s a rewarding experience that connects you to your food in a tangible and delicious way.
But the beauty of growing chili peppers in pots lies in its adaptability. Feel free to experiment with different varieties to discover your personal favorites. Try a scorching habanero for intense heat, a fruity jalapeño for versatile flavor, or a colorful bell pepper for a milder touch. You can also explore different pot sizes and materials to find what works best for your space and aesthetic. Consider adding companion plants like basil or marigolds to deter pests and enhance the overall health of your chili peppers.
Don’t be afraid to get creative with your potting mix, either. Adding compost or aged manure can provide extra nutrients, while perlite or vermiculite can improve drainage. Remember to adjust your watering schedule based on the weather and the moisture level of the soil.
Ultimately, the key to success is observation and adaptation. Pay attention to your plants’ needs and adjust your care accordingly. If you notice yellowing leaves, it could be a sign of overwatering or nutrient deficiency. If you see pests, take action promptly to prevent them from spreading.
We wholeheartedly encourage you to embark on this exciting journey of growing chili peppers in pots. It’s a simple, rewarding, and incredibly flavorful way to enhance your culinary creations and connect with nature. And most importantly, don’t forget to share your experiences! Post photos of your thriving chili pepper plants on social media, tag us, and let us know what varieties you’re growing and what tips you’ve discovered along the way. Your insights could inspire others to join the potted pepper revolution! Let’s cultivate a community of chili pepper enthusiasts and share the joy of homegrown heat. So, grab your pots, seeds, and gardening gloves, and get ready to experience the thrill of growing your own delicious chili peppers!
Frequently Asked Questions (FAQ)
What is the best time of year to start growing chili peppers in pots?
The ideal time to start growing chili peppers depends on your climate. In warmer regions with long growing seasons, you can start seeds indoors 6-8 weeks before the last expected frost. In cooler climates, you may need to start them even earlier. The goal is to have seedlings ready to transplant outdoors once the weather has warmed up and the risk of frost has passed. A good rule of thumb is to wait until nighttime temperatures consistently stay above 50°F (10°C). You can also purchase established seedlings from a local nursery if you prefer to skip the seed-starting process.
What size pot is best for growing chili peppers?
The size of the pot depends on the variety of chili pepper you’re growing. Smaller varieties like Thai chilies or ornamental peppers can thrive in pots as small as 5 gallons. Larger varieties like bell peppers or jalapeños will need at least a 10-gallon pot to accommodate their larger root systems. A general guideline is to choose a pot that is at least 12 inches in diameter and 12 inches deep. Make sure the pot has drainage holes to prevent waterlogging.
What type of soil should I use for growing chili peppers in pots?
Chili peppers need well-draining soil that is rich in organic matter. A good potting mix will typically contain a blend of peat moss, perlite, and vermiculite. You can also amend the soil with compost or aged manure to provide extra nutrients. Avoid using garden soil, as it can be too heavy and may not drain well in pots. The ideal pH for chili peppers is between 6.0 and 7.0.
How much sunlight do chili peppers need?
Chili peppers need at least 6-8 hours of direct sunlight per day to thrive. Choose a location that receives plenty of sunlight throughout the day. If you live in a hot climate, you may need to provide some afternoon shade to prevent the plants from getting scorched. If you don’t have enough natural sunlight, you can supplement with grow lights.
How often should I water my chili peppers in pots?
Water your chili peppers when the top inch of soil feels dry to the touch. Avoid overwatering, as this can lead to root rot. Water deeply, allowing the water to drain out of the drainage holes. The frequency of watering will depend on the weather, the size of the pot, and the type of soil you’re using. In hot, dry weather, you may need to water daily. In cooler, wetter weather, you may only need to water every few days.
What kind of fertilizer should I use for chili peppers?
Chili peppers benefit from regular fertilization. Use a balanced fertilizer with equal amounts of nitrogen, phosphorus, and potassium. You can also use a fertilizer that is specifically formulated for tomatoes or peppers. Fertilize every 2-3 weeks during the growing season. Avoid over-fertilizing, as this can lead to excessive foliage growth and fewer peppers.
How do I prevent pests and diseases on my chili peppers?
To prevent pests and diseases, start with healthy plants and provide them with the proper growing conditions. Inspect your plants regularly for signs of pests or diseases. If you find any, take action promptly. You can use insecticidal soap or neem oil to control pests. For diseases, you can use a fungicide. Avoid overhead watering, as this can promote fungal diseases.
How do I harvest chili peppers?
Harvest chili peppers when they have reached their mature color and size. Use scissors or pruning shears to cut the peppers from the plant. Be careful not to damage the plant when harvesting. The spiciness of chili peppers increases as they ripen. You can harvest them at any stage of ripeness, depending on your preference.
Can I overwinter my chili pepper plants?
Yes, you can overwinter your chili pepper plants indoors. Before the first frost, prune the plants back to about 6 inches tall and transplant them into smaller pots. Bring the plants indoors and place them in a sunny location. Water sparingly during the winter months. In the spring, gradually acclimate the plants to outdoor conditions before transplanting them back into larger pots.
What are some common problems when growing chili peppers in pots?
Some common problems when growing chili peppers in pots include:
* **Aphids:** Small, sap-sucking insects that can cause yellowing leaves and stunted growth.
* **Spider mites:** Tiny pests that can cause webbing on the leaves.
* **Blossom end rot:** A condition caused by calcium deficiency that results in dark, sunken spots on the bottom of the peppers.
* **Root rot:** A fungal disease that can occur in overwatered soil.
* **Sunscald:** Damage to the peppers caused by excessive sun exposure.
By addressing these problems promptly, you can ensure a healthy and productive chili pepper harvest.
Leave a Comment