
Backyard celery growing tips are your ticket to enjoying crisp, flavorful celery straight from your garden! Imagine biting into a juicy stalk, knowing you nurtured it from seed to table. Forget those bland, store-bought bunches 鈥?we’re diving into the world of homegrown celery, and trust me, it’s easier than you think!
Celery has a fascinating history, dating back to ancient times where it was used medicinally before becoming a culinary staple. From flavoring soups and stews to being the perfect crunchy snack with peanut butter, celery is a versatile veggie. But let’s be honest, buying it can be a gamble. Sometimes it’s perfect, other times it’s limp and flavorless. That’s where our DIY guide comes in!
Why should you bother with these backyard celery growing tips? Because fresh, homegrown celery tastes infinitely better! Plus, you control the growing process, ensuring it’s free from unwanted chemicals. I’m going to share simple, effective hacks that will help you cultivate thriving celery plants, even if you’re a beginner gardener. We’ll cover everything from seed starting to harvesting, ensuring you have a bountiful supply of this crunchy goodness. Get ready to transform your backyard into a celery oasis!
Growing Celery in Your Backyard: A Beginner’s Guide
Hey there, fellow gardening enthusiasts! I’m so excited to share my experience growing celery right in my backyard. It’s surprisingly easier than you might think, and the taste of fresh, homegrown celery is just unbeatable. Forget the bland, watery stuff from the grocery store 鈥?we’re talking crisp, flavorful stalks that will elevate your soups, salads, and snacking game. Let’s dive in!
Choosing the Right Celery Variety
First things first, you need to pick the right celery variety for your climate and preferences. Here are a few popular options:
* ‘Utah Improved’: This is a classic, reliable variety that’s known for its good flavor and disease resistance. It’s a great choice for beginners.
* ‘Golden Self-Blanching’: If you’re looking for a milder flavor, this variety is a good bet. It’s also known for its beautiful golden color.
* ‘Giant Red’: Want to add some visual interest to your garden? This variety produces stunning red stalks with a slightly stronger flavor.
* ‘Pascal’: Another popular choice, ‘Pascal’ is known for its crisp texture and excellent flavor.
Starting Celery Seeds Indoors
Celery has a long growing season, so starting seeds indoors is crucial, especially if you live in a cooler climate. I usually start my seeds about 10-12 weeks before the last expected frost.
1. Gather Your Supplies: You’ll need seed starting trays or small pots, seed starting mix (I prefer a peat-based mix), celery seeds, a spray bottle, and a heat mat (optional, but helpful).
2. Sow the Seeds: Celery seeds are tiny, so sprinkle them very lightly on the surface of the seed starting mix. Don’t bury them too deep 鈥?they need light to germinate.
3. Water Gently: Use a spray bottle to mist the soil thoroughly. You want to keep the soil consistently moist, but not soggy.
4. Provide Warmth: Celery seeds germinate best in warm temperatures (around 70-75掳F). A heat mat can be really helpful for this.
5. Cover and Wait: Cover the seed starting tray with a clear plastic dome or plastic wrap to create a humid environment. This will help the seeds germinate.
6. Monitor Germination: Check the seeds daily. Germination usually takes about 2-3 weeks. Once the seedlings emerge, remove the cover and move the tray to a sunny location or under grow lights.
7. Thin the Seedlings: Once the seedlings have a few true leaves, thin them out so that they’re spaced about 2 inches apart. This will give them room to grow.
8. Harden Off the Seedlings: Before transplanting the seedlings outdoors, you need to harden them off. This means gradually exposing them to outdoor conditions over a period of about a week. Start by placing them in a sheltered spot for a few hours each day, gradually increasing the amount of time they spend outdoors.
Preparing the Garden Bed
Celery needs rich, well-drained soil that’s high in organic matter. Before transplanting your seedlings, take the time to prepare the garden bed properly.
1. Choose a Sunny Location: Celery needs at least 6 hours of sunlight per day.
2. Amend the Soil: Dig in plenty of compost or well-rotted manure to improve the soil’s fertility and drainage. I usually add a few inches of compost to my garden bed.
3. Check the Soil pH: Celery prefers a slightly acidic soil pH (around 6.0-6.8). You can test your soil pH with a soil testing kit. If your soil is too alkaline, you can amend it with sulfur.
4. Create Raised Beds (Optional): Raised beds can improve drainage and make it easier to control the soil conditions.
Transplanting Celery Seedlings
Once your seedlings are hardened off and the danger of frost has passed, it’s time to transplant them into the garden.
1. Choose a Cloudy Day: Transplanting on a cloudy day will help reduce stress on the seedlings.
2. Space the Seedlings: Space the seedlings about 8-10 inches apart in rows that are 18-24 inches apart.
3. Plant Carefully: Dig a hole that’s large enough to accommodate the root ball of the seedling. Gently remove the seedling from its pot and place it in the hole. Backfill with soil and gently firm it around the base of the plant.
4. Water Thoroughly: Water the seedlings thoroughly after transplanting.
5. Mulch: Apply a layer of mulch around the plants to help retain moisture, suppress weeds, and regulate soil temperature. I like to use straw or shredded leaves.
Caring for Your Celery Plants
Celery needs consistent moisture and regular fertilization to thrive.
1. Water Regularly: Celery needs at least 1 inch of water per week. Water deeply and regularly, especially during hot, dry weather. I use a soaker hose to water my celery plants.
2. Fertilize: Fertilize your celery plants every 2-3 weeks with a balanced fertilizer. I like to use a liquid fertilizer that’s diluted according to the package directions.
3. Weed Regularly: Keep the garden bed free of weeds, which can compete with the celery plants for nutrients and water.
4. Blanching (Optional): Blanching celery stalks makes them milder and more tender. About 2-3 weeks before harvest, you can blanch the stalks by wrapping them with newspaper, cardboard, or soil. Leave the tops of the stalks exposed to sunlight.
5. Watch for Pests and Diseases: Celery can be susceptible to pests like aphids and celery leaf tiers, and diseases like celery blight. Inspect your plants regularly and take action if you see any signs of problems. I use insecticidal soap to control aphids and remove any infected leaves to prevent the spread of disease.
Harvesting Your Celery
You can start harvesting celery when the stalks are at least 6 inches long.
1. Harvest Individual Stalks: You can harvest individual stalks as needed by cutting them off at the base of the plant.
2. Harvest the Entire Plant: To harvest the entire plant, cut it off at the base with a sharp knife.
3. Store Properly: Store celery in the refrigerator in a plastic bag or container. It will keep for several weeks.
Troubleshooting Common Celery Growing Problems
Even with the best care, you might encounter some problems when growing celery. Here are a few common issues and how to address them:
* Bolting (Premature Flowering): Bolting can occur if celery plants are exposed to cold temperatures or stress. To prevent bolting, choose a bolt-resistant variety and provide consistent care.
* Pest Infestations: Aphids, celery leaf tiers, and other pests can damage celery plants. Inspect your plants regularly and take action if you see any signs of pests.
* Diseases: Celery blight and other diseases can cause leaf spots and other problems. Choose disease-resistant varieties and provide good air circulation to prevent disease.
* Stunted Growth: Stunted growth can be caused by poor soil, lack of nutrients, or pests and diseases. Amend the soil with compost, fertilize regularly, and control pests and diseases.
* Bitter Taste: A bitter taste can be caused by stress, lack of water, or bolting. Provide consistent care and water regularly to prevent a bitter taste.
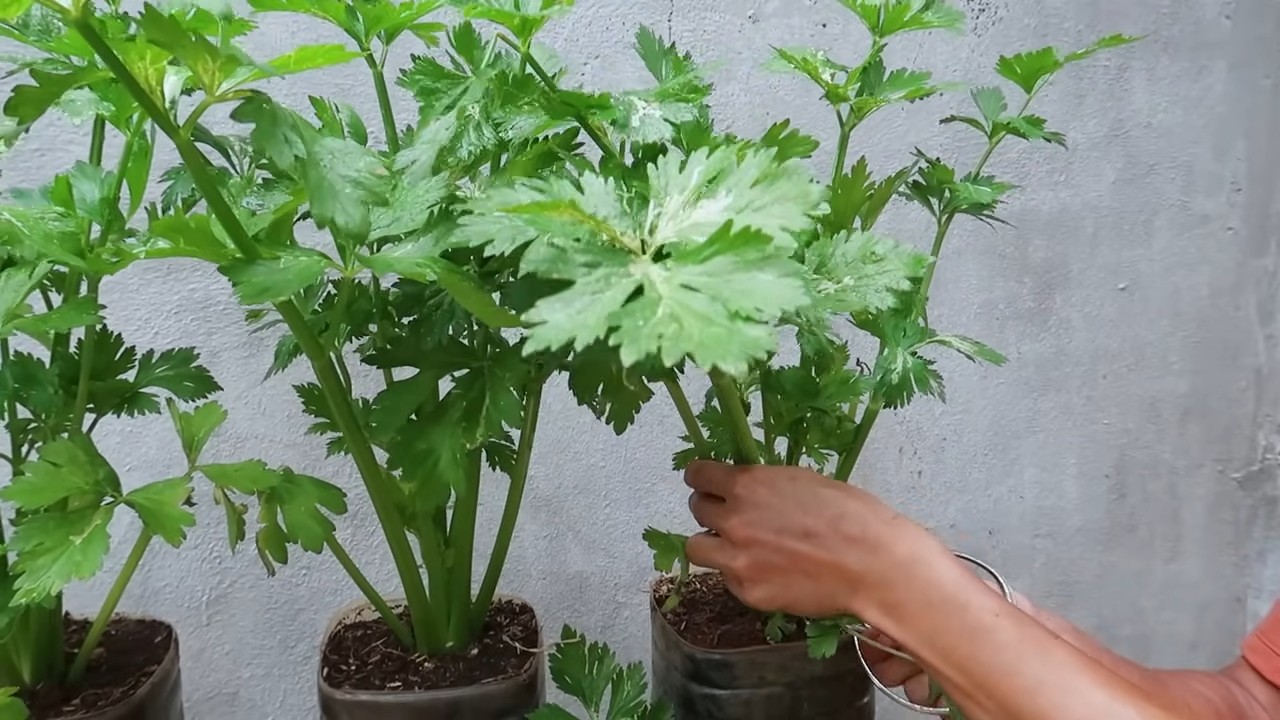
Celery from Celery Base
Did you know you can regrow celery from the base you usually throw away? It’s a fun and easy way to get a head start on your next celery harvest!
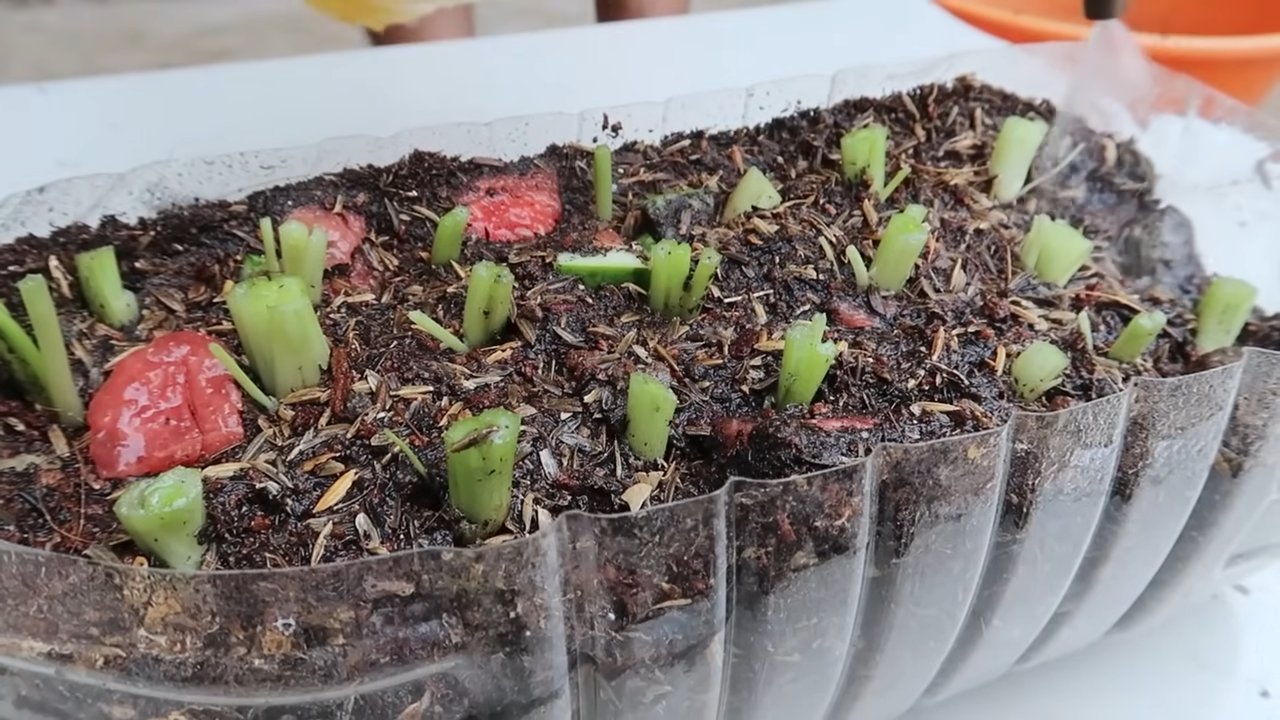
1. Save the Base: After using your celery, save the base (the part where the stalks are connected).
2. Place in Water: Put the celery base in a shallow dish of water, with the cut side facing up.
3. Sunlight and Water Changes: Place the dish in a sunny location and change the water every day or two.
4. Watch it Grow: After a few days, you should start to see new leaves sprouting from the center of the base.
5. Transplant to Soil: Once the new leaves are a few inches tall, you can transplant the celery base into a pot or directly into your garden. Follow the same planting instructions as for seedlings.
Enjoy Your Homegrown Celery!
Growing celery in your backyard is a rewarding experience. With a little bit of effort, you can enjoy fresh, flavorful celery all season long. I hope these tips have been helpful. Happy gardening!
Conclusion
So, there you have it! Mastering the art of backyard celery growing is not only achievable but also incredibly rewarding. We’ve walked you through the essential steps, from selecting the right variety to nurturing your plants for optimal growth. But why should you bother with this DIY endeavor? The answer is simple: freshness, flavor, and control. Store-bought celery, while convenient, often lacks the vibrant taste and crisp texture of homegrown produce. Plus, by growing your own, you eliminate the need for harmful pesticides and herbicides, ensuring a healthier and more sustainable source of this versatile vegetable.
This isn’t just about saving a few dollars at the grocery store; it’s about connecting with your food, understanding its origins, and enjoying the unparalleled satisfaction of harvesting something you’ve nurtured from seed (or stalk!). Imagine the crisp, refreshing crunch of celery sticks dipped in homemade hummus, the aromatic base it provides for your favorite soups and stews, or the vibrant addition it makes to a fresh green salad 鈥?all thanks to your own backyard garden.
But the beauty of backyard celery growing lies in its adaptability. Feel free to experiment with different varieties to discover your personal favorite. Try ‘Utah Tall’ for its classic flavor and sturdy stalks, or ‘Golden Self-Blanching’ for a milder, sweeter taste. Consider companion planting with onions, garlic, or marigolds to deter pests and enhance growth. You can even explore growing celery in containers if you have limited space, bringing the garden to your patio or balcony.
Don’t be afraid to get your hands dirty and embrace the learning process. Gardening is a journey, and every success (and even every setback) offers valuable lessons. The key is to be patient, observant, and willing to adapt your approach as needed. Remember to pay close attention to your plants’ needs, providing them with adequate water, sunlight, and nutrients. And don’t hesitate to seek out additional resources or connect with other gardeners for advice and support.
We are confident that with a little effort and dedication, you can successfully grow your own delicious and nutritious celery right in your backyard. So, grab your gardening gloves, prepare your soil, and embark on this exciting adventure. We encourage you to try these backyard celery growing tips and share your experiences with us! Let us know what varieties you’ve tried, what challenges you’ve faced, and what successes you’ve celebrated. Your insights can help other aspiring gardeners discover the joys of homegrown celery. Share your photos and stories on social media using #BackyardCelery and let’s build a community of thriving celery growers! Happy gardening!
Frequently Asked Questions (FAQ)
What is the best time of year to start growing celery in my backyard?
The ideal time to start growing celery depends on your climate. Celery is a cool-season crop, so it thrives in temperatures between 60掳F and 70掳F (15掳C and 21掳C). In most regions, this means starting seeds indoors 10-12 weeks before the last expected frost. You can then transplant the seedlings outdoors 2-3 weeks after the last frost, once the soil has warmed up. In warmer climates, you can start seeds in late summer or early fall for a winter harvest. Be sure to check your local frost dates and adjust your planting schedule accordingly.
How much sunlight does celery need to grow well?
Celery requires at least six hours of direct sunlight per day to thrive. Choose a location in your backyard that receives ample sunlight throughout the day. If you live in a particularly hot climate, providing some afternoon shade can help prevent the plants from bolting (going to seed prematurely).
What type of soil is best for growing celery?
Celery prefers rich, well-drained soil with a high organic matter content. Amend your soil with compost or well-rotted manure before planting to improve its fertility and drainage. The ideal soil pH for celery is between 6.0 and 6.8. You can test your soil pH using a home testing kit and adjust it as needed with lime (to raise the pH) or sulfur (to lower the pH).
How often should I water my celery plants?
Celery needs consistent moisture to grow properly. Water your plants deeply and regularly, especially during hot, dry weather. Aim to keep the soil consistently moist but not waterlogged. A good rule of thumb is to water when the top inch of soil feels dry to the touch. Mulching around your plants can help retain moisture and suppress weeds.
What are some common pests and diseases that affect celery, and how can I prevent them?
Celery can be susceptible to several pests and diseases, including aphids, celery leaf miners, and fungal diseases like early blight and late blight. To prevent these problems, practice good garden hygiene by removing any diseased or infested plant debris. Encourage beneficial insects like ladybugs and lacewings, which prey on aphids. Use row covers to protect your plants from pests. If you notice signs of disease, treat your plants with an appropriate fungicide. Crop rotation can also help prevent soilborne diseases from building up.
How do I blanch celery to make it milder and sweeter?
Blanching is the process of excluding light from the celery stalks to reduce their bitterness and make them more tender. You can blanch celery by mounding soil around the stalks, wrapping them with newspaper or cardboard, or using blanching collars. Start blanching about two weeks before harvest, and leave the stalks covered for about a week.
When is celery ready to harvest?
Celery is typically ready to harvest 80-120 days after planting, depending on the variety. The stalks should be at least 8 inches tall and firm to the touch. You can harvest individual stalks as needed or harvest the entire plant at once. To harvest, simply cut the stalks at the base of the plant with a sharp knife.
Can I grow celery from the base of a store-bought stalk?
Yes, you can regrow celery from the base of a store-bought stalk! Cut off the stalks about 2 inches from the base and place the base in a shallow dish of water. Place the dish in a sunny location and change the water every day. After a few days, you should see new roots and leaves emerging. Once the roots are well-developed, you can transplant the celery base into a pot or directly into your garden.
What are some creative ways to use homegrown celery?
Homegrown celery is incredibly versatile and can be used in a wide variety of dishes. Enjoy it raw as a crunchy snack with dips like hummus or peanut butter. Add it to salads, soups, stews, and stir-fries for flavor and texture. Use it as a base for stocks and broths. Juice it for a refreshing and nutritious beverage. You can even pickle celery for a tangy condiment. The possibilities are endless!
How can I store my harvested celery to keep it fresh?
To store harvested celery, wrap the stalks in a damp paper towel and place them in a plastic bag in the refrigerator. This will help keep them crisp and hydrated. Celery can typically be stored in the refrigerator for up to two weeks. You can also freeze celery for longer storage, but it will lose some of its crispness. To freeze celery, wash and chop it, then blanch it in boiling water for 2-3 minutes. Cool it quickly in ice water, drain it well, and then freeze it in a freezer-safe bag or container.
Leave a Comment