
Growing Malabar Spinach can seem intimidating, but trust me, it’s easier than you think! Have you ever dreamed of stepping into your backyard and harvesting vibrant, leafy greens for a delicious and nutritious meal? Imagine the satisfaction of knowing exactly where your food comes from, free from pesticides and bursting with flavor. That’s the magic of home gardening, and Malabar Spinach is a fantastic plant to start with.
While not a true spinach, this climbing vine has been cultivated for centuries in Asia and Africa, prized for its heat tolerance and nutritional benefits. It’s a staple in many cuisines, adding a slightly peppery and earthy flavor to stir-fries, soups, and salads. But beyond its culinary uses, growing Malabar Spinach offers a unique opportunity to connect with nature and cultivate a sustainable food source right in your own backyard.
In this article, I’m going to share some simple, DIY tricks and hacks that will help you successfully grow this amazing plant, even if you’re a complete beginner. We’ll cover everything from choosing the right location and soil to providing the necessary support for its climbing habit. So, grab your gardening gloves, and let’s get started on this exciting journey of growing your own delicious and healthy Malabar Spinach!
Growing Malabar Spinach: A Beginner’s Guide to This Delicious Climbing Green
Hey there, fellow gardening enthusiasts! I’m so excited to share my experience with growing Malabar spinach. This isn’t your typical spinach; it’s a heat-loving, climbing vine that produces delicious, slightly lemony leaves perfect for salads, stir-fries, and soups. If you’re looking for a spinach alternative that thrives in warm weather, Malabar spinach is your answer! Let’s dive into how you can grow your own bountiful supply.
What You’ll Need
Before we get started, let’s gather our supplies. This will make the whole process smoother and more enjoyable.
* Malabar Spinach Seeds or Cuttings: You can find seeds online or at your local garden center. Cuttings are another option if you know someone who already grows it.
* Seed Starting Tray or Small Pots: If you’re starting from seed, you’ll need these.
* Potting Mix: A good quality potting mix is essential for healthy seedlings.
* Garden Soil: For transplanting your seedlings or planting directly in the ground.
* Compost or Aged Manure: To enrich your soil and provide nutrients.
* Trellis or Support Structure: Malabar spinach is a vine, so it needs something to climb on.
* Watering Can or Hose: For keeping your plants hydrated.
* Gardening Gloves: To protect your hands.
* Optional: Heat Mat: To speed up germination if you live in a cooler climate.
Starting from Seed: A Step-by-Step Guide
Malabar spinach seeds have a tough outer shell, so they need a little encouragement to germinate. Here’s how I get them going:
1. Scarification (Optional but Recommended): To help the seeds germinate faster, you can gently scarify them. This involves lightly scratching the seed coat. I use a nail file or sandpaper to gently rub the seeds a few times. Be careful not to damage the inside of the seed! You can also soak the seeds in warm water for 24 hours. This softens the seed coat and helps with germination.
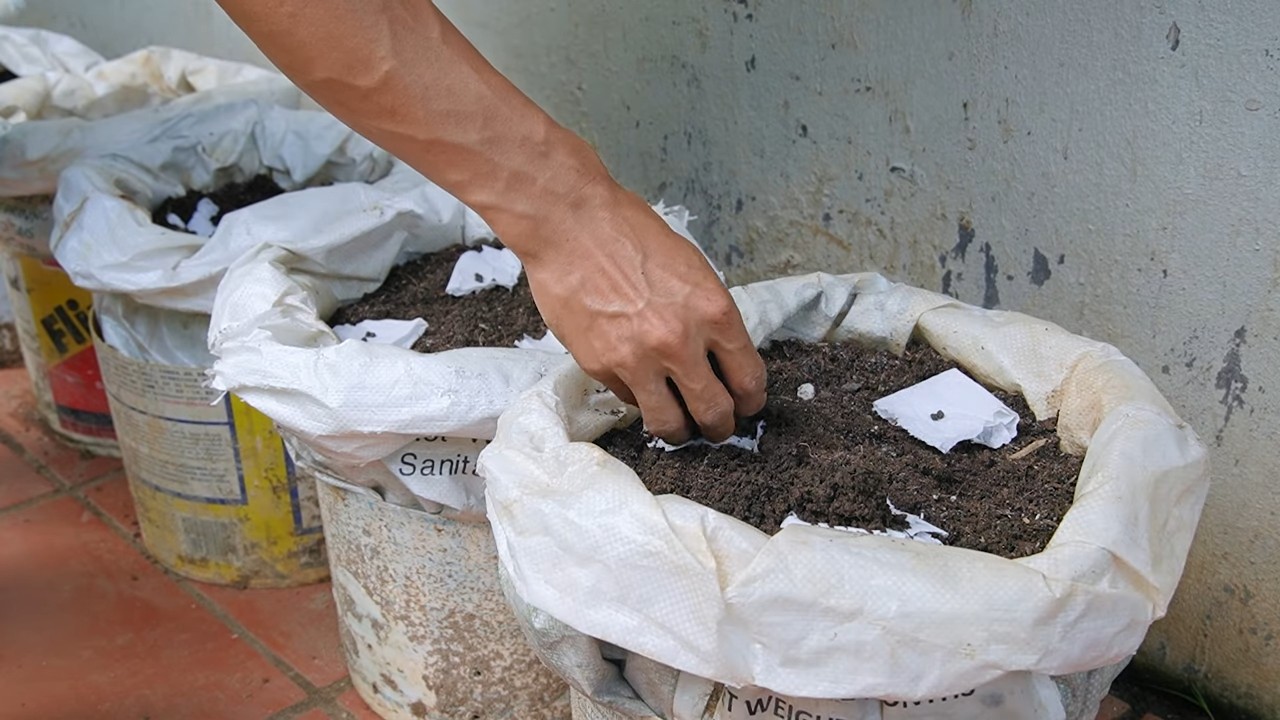
2. Sowing the Seeds: Fill your seed starting tray or small pots with potting mix. Moisten the soil thoroughly. Sow the seeds about 陆 inch deep and cover them lightly with soil. I usually plant 2-3 seeds per pot to increase my chances of success.
3. Providing Warmth and Moisture: Malabar spinach loves warmth! Place your seed starting tray or pots in a warm location, ideally between 70-80掳F (21-27掳C). A heat mat can be really helpful if you live in a cooler climate. Keep the soil consistently moist, but not soggy. I use a spray bottle to gently mist the soil.
4. Patience is Key: Germination can take anywhere from 1-3 weeks, so be patient! Once the seedlings emerge, provide them with plenty of light. A sunny windowsill or a grow light will work well.
5. Thinning (If Necessary): If you planted multiple seeds per pot and more than one germinates, thin them out by snipping off the weaker seedlings at the soil line. This will give the remaining seedling more room to grow.
Transplanting Your Seedlings
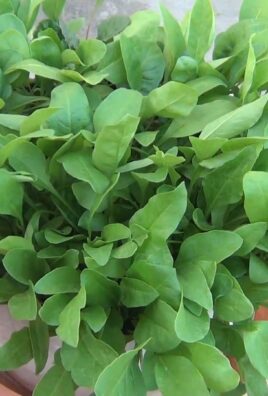
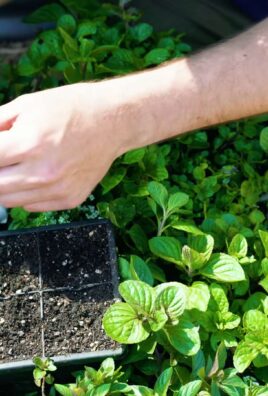
Once your seedlings have developed a few sets of true leaves (the leaves that look like miniature versions of the adult leaves), they’re ready to be transplanted into the garden.
1. Hardening Off: Before transplanting, you need to “harden off” your seedlings. This means gradually exposing them to outdoor conditions to help them adjust. Start by placing them outside in a sheltered location for an hour or two each day, gradually increasing the amount of time they spend outdoors over the course of a week.
2. Preparing the Garden Bed: Choose a sunny location in your garden with well-drained soil. Malabar spinach prefers slightly acidic to neutral soil. Amend the soil with compost or aged manure to improve its fertility and drainage.
3. Transplanting: Dig a hole that’s slightly larger than the root ball of your seedling. Gently remove the seedling from its pot and place it in the hole. Backfill with soil and gently firm it around the base of the plant. Space the plants about 12-18 inches apart.
4. Watering: Water the newly transplanted seedlings thoroughly.
5. Providing Support: Install a trellis or other support structure near your plants. Malabar spinach is a vine and needs something to climb on. A sturdy trellis, fence, or even a tomato cage will work well.
Growing from Cuttings: A Quick Start
If you have access to a mature Malabar spinach plant, you can easily propagate it from cuttings. This is a faster way to get started than growing from seed.
1. Taking Cuttings: Choose healthy stems that are about 4-6 inches long. Cut the stems just below a node (the point where a leaf grows from the stem). Remove the lower leaves from the cutting, leaving only a few leaves at the top.
2. Rooting the Cuttings: You can root the cuttings in water or directly in soil.
* Water Method: Place the cuttings in a glass of water, making sure that the lower nodes are submerged. Change the water every few days. Roots should start to develop in about a week or two. Once the roots are about an inch long, you can transplant the cuttings into pots filled with potting mix.
* Soil Method: Dip the cut end of the cutting in rooting hormone (optional but recommended). Plant the cutting in a pot filled with moist potting mix. Cover the pot with a plastic bag or humidity dome to create a humid environment. Keep the soil moist and place the pot in a warm, bright location. Roots should develop in about 2-3 weeks.
3. Transplanting: Once the cuttings have developed a good root system, you can transplant them into the garden, following the same steps as for seedlings.
Caring for Your Malabar Spinach
Once your Malabar spinach plants are established, they’re relatively easy to care for.
1. Watering: Water regularly, especially during hot, dry weather. Malabar spinach prefers consistently moist soil, but avoid overwatering, which can lead to root rot.
2. Fertilizing: Feed your plants every few weeks with a balanced fertilizer or compost tea. This will help them grow vigorously and produce plenty of leaves.
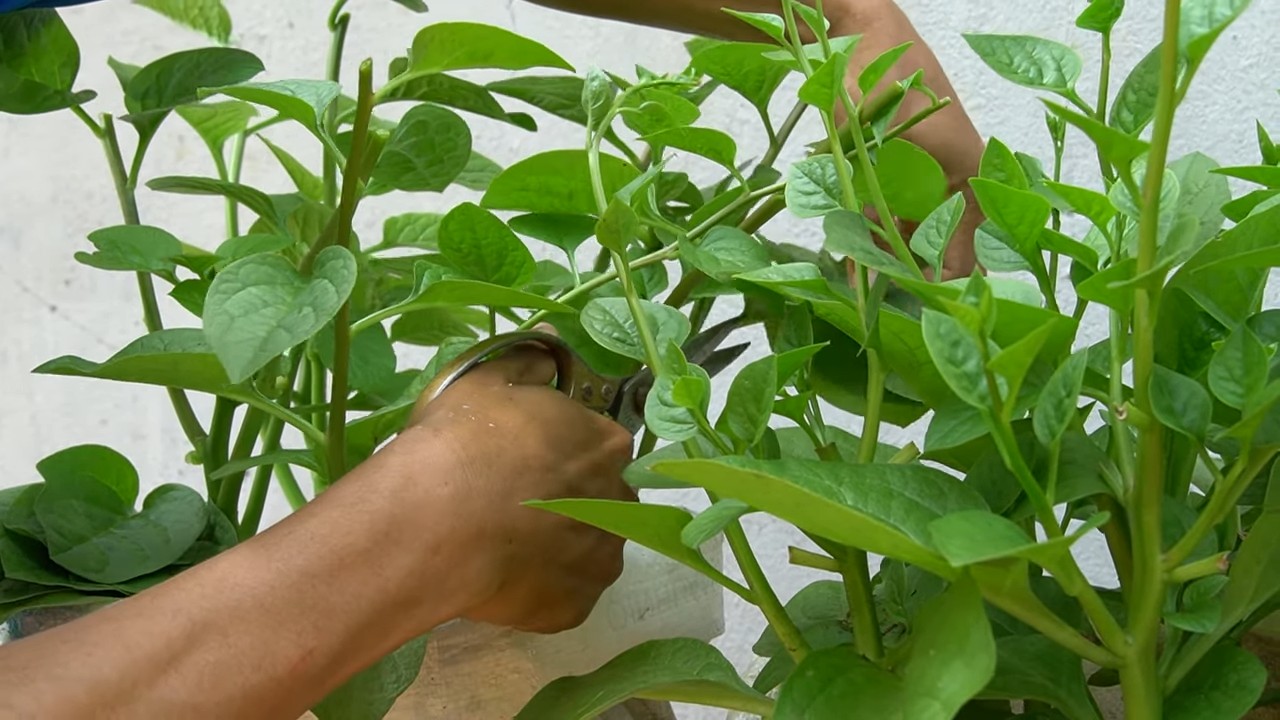
3. Pruning: Prune your plants regularly to encourage bushier growth and prevent them from becoming too leggy. You can simply pinch off the tips of the vines.
4. Pest and Disease Control: Malabar spinach is generally pest and disease resistant. However, keep an eye out for common garden pests like aphids and spider mites. If you notice any pests, you can treat them with insecticidal soap or neem oil.
Harvesting Your Bounty
The best part of growing Malabar spinach is harvesting your own fresh, delicious leaves!
1. When to Harvest: You can start harvesting leaves as soon as the plants are large enough, usually about 6-8 weeks after planting.
2. How to Harvest: Simply snip off the leaves or stems with scissors or pruning shears. You can harvest individual leaves or entire stems. Regular harvesting will encourage the plant to produce more leaves.
3. Storing Your Harvest: Freshly harvested Malabar spinach leaves can be stored in the refrigerator for several days. Wrap them in a damp paper towel and place them in a plastic bag.
Troubleshooting
Even with the best care, you might encounter a few challenges. Here are some common problems and how to address them:
* Slow Germination: If your seeds are taking a long time to germinate, make sure the soil is warm enough. Use a heat mat or place the seed starting tray in a warm location. Scarifying the seeds beforehand can also help.
* Yellowing Leaves: Yellowing leaves can indicate a nutrient deficiency. Feed your plants with a balanced fertilizer or compost tea.
* Pest Infestation: If you notice pests on your plants, treat them with insecticidal soap or neem oil.
* Lack of Growth: If your plants aren’t growing well, make sure they’re getting enough sunlight, water, and nutrients.
Enjoying Your Homegrown Malabar Spinach
Now that you’ve successfully grown your own Malabar spinach, it’s time to enjoy the fruits (or rather, leaves!) of your labor. Malabar spinach can be used in a variety of dishes, just like regular spinach. It’s delicious in salads, stir-fries, soups, and stews. Its slightly lemony flavor adds a unique twist to your favorite recipes.
I hope this guide has inspired you to try growing Malabar spinach. It’s a rewarding and delicious addition to any garden! Happy gardening!
Conclusion
So, there you have it! Growing Malabar Spinach at home is not just a gardening project; it’s an investment in fresh, nutritious, and delicious meals right from your backyard. We’ve walked you through the simple steps, from selecting the right seeds or cuttings to providing the ideal growing conditions. But why is this DIY trick a must-try?
Firstly, consider the unparalleled freshness. Store-bought spinach, even the organic varieties, can’t compare to the vibrant flavor and nutrient density of freshly harvested Malabar Spinach. You’re cutting it moments before you cook it, preserving all those vital vitamins and minerals. Secondly, think about the cost savings. Once established, your Malabar Spinach vine will provide a continuous supply of greens throughout the warm season, significantly reducing your grocery bills. And thirdly, there’s the sheer satisfaction of nurturing a plant from seed to table. It’s a rewarding experience that connects you to nature and empowers you to take control of your food source.
But the beauty of growing Malabar Spinach lies in its versatility. Feel free to experiment with different growing methods. Try growing it in containers on your balcony if you have limited space. Or, if you have a larger garden, train it up a trellis or fence for a stunning vertical display. You can even try different varieties of Malabar Spinach, such as the green-stemmed or red-stemmed types, to add visual interest to your garden and culinary creations.
Here are a few suggestions to take your Malabar Spinach growing to the next level:
* Companion Planting: Plant Malabar Spinach alongside basil, tomatoes, or peppers to create a mutually beneficial ecosystem.
* Succession Planting: Sow seeds every few weeks to ensure a continuous harvest throughout the growing season.
* Seed Saving: Allow some of your plants to go to seed and collect them for future planting. This is a great way to save money and preserve your favorite varieties.
* Culinary Creativity: Don’t limit yourself to just using Malabar Spinach in salads. Try adding it to soups, stews, stir-fries, or even smoothies for a nutritional boost.
We wholeheartedly encourage you to give this DIY trick a try. It’s easier than you might think, and the rewards are well worth the effort. Imagine stepping out into your garden and harvesting a handful of fresh, vibrant Malabar Spinach for your next meal. It’s a simple pleasure that can transform your cooking and connect you to the natural world.
Once you’ve embarked on your Malabar Spinach growing journey, we’d love to hear about your experience! Share your tips, tricks, and culinary creations with us in the comments below. Let’s build a community of Malabar Spinach enthusiasts and inspire others to grow their own food. Happy growing!
Frequently Asked Questions (FAQ)
What exactly is Malabar Spinach, and how is it different from regular spinach?
Malabar Spinach (Basella alba or Basella rubra) isn’t actually a true spinach, although it shares a similar flavor profile, especially when cooked. It’s a fast-growing, heat-loving vine native to tropical Asia. Unlike regular spinach, which thrives in cooler temperatures, Malabar Spinach flourishes in hot, humid climates. It’s also more mucilaginous, meaning it has a slightly thicker, almost slimy texture when cooked, similar to okra. This makes it a great thickening agent for soups and stews. Nutritionally, it’s packed with vitamins A and C, iron, and calcium. The leaves are thicker and more succulent than regular spinach, and the plant itself is a beautiful ornamental vine.
How long does it take for Malabar Spinach to grow from seed to harvest?
The time it takes for Malabar Spinach to grow from seed to harvest can vary depending on your climate and growing conditions. Generally, you can expect to start harvesting leaves about 60-70 days after sowing seeds. However, if you start with cuttings, you can significantly reduce this timeframe. Cuttings typically root within a week or two and can be ready for harvest in as little as 30-40 days. Remember to provide consistent moisture and warmth to encourage rapid growth.
What are the best growing conditions for Malabar Spinach?
Malabar Spinach thrives in warm, humid conditions with plenty of sunlight. It prefers well-drained soil that is rich in organic matter. Aim for at least 6-8 hours of direct sunlight per day. The ideal soil pH is between 6.0 and 7.5. Consistent watering is crucial, especially during hot, dry periods. Mulching around the base of the plant can help retain moisture and suppress weeds. Because it’s a vine, it needs a trellis, fence, or other support structure to climb on.
Can I grow Malabar Spinach in containers?
Yes, you can absolutely grow Malabar Spinach in containers! This is a great option for those with limited garden space. Choose a large container, at least 12 inches in diameter, to allow for adequate root growth. Use a high-quality potting mix that drains well. Provide a trellis or other support structure for the vine to climb on. Water regularly and fertilize every few weeks with a balanced fertilizer. Place the container in a sunny location that receives at least 6-8 hours of direct sunlight per day.
How do I harvest Malabar Spinach?
Harvesting Malabar Spinach is easy. Simply snip off the leaves and tender stems as needed. You can harvest individual leaves or entire stems. Regular harvesting encourages the plant to produce more leaves. Avoid harvesting more than one-third of the plant at a time to allow it to continue growing vigorously. The younger leaves are more tender and have a milder flavor than the older leaves.
What are some common pests and diseases that affect Malabar Spinach, and how can I prevent them?
Malabar Spinach is generally resistant to pests and diseases, but it can occasionally be affected by aphids, spider mites, or fungal diseases. To prevent pest infestations, inspect your plants regularly and remove any pests by hand or with a strong spray of water. Encourage beneficial insects, such as ladybugs, which prey on aphids and other pests. To prevent fungal diseases, ensure good air circulation around the plants and avoid overwatering. If you notice any signs of disease, remove the affected leaves immediately.
How do I save seeds from Malabar Spinach?
Saving seeds from Malabar Spinach is a straightforwa
So, there you have it! Growing Malabar Spinach at home is not just a gardening project; it’s an investment in fresh, nutritious, and delicious meals right from your backyard. We’ve walked you through the simple steps, from selecting the right seeds or cuttings to providing the ideal growing conditions. But why is this DIY trick a must-try?
Firstly, consider the unparalleled freshness. Store-bought spinach, even the organic varieties, can’t compare to the vibrant flavor and nutrient density of freshly harvested Malabar Spinach. You’re cutting it moments before you cook it, preserving all those vital vitamins and minerals. Secondly, think about the cost savings. Once established, your Malabar Spinach vine will provide a continuous supply of greens throughout the warm season, significantly reducing your grocery bills. And thirdly, there’s the sheer satisfaction of nurturing a plant from seed to table. It’s a rewarding experience that connects you to nature and empowers you to take control of your food source.
But the beauty of growing Malabar Spinach lies in its versatility. Feel free to experiment with different growing methods. Try growing it in containers on your balcony if you have limited space. Or, if you have a larger garden, train it up a trellis or fence for a stunning vertical display. You can even try different varieties of Malabar Spinach, such as the green-stemmed or red-stemmed types, to add visual interest to your garden and culinary creations.
Here are a few suggestions to take your Malabar Spinach growing to the next level:
* Companion Planting: Plant Malabar Spinach alongside basil, tomatoes, or peppers to create a mutually beneficial ecosystem.
* Succession Planting: Sow seeds every few weeks to ensure a continuous harvest throughout the growing season.
* Seed Saving: Allow some of your plants to go to seed and collect them for future planting. This is a great way to save money and preserve your favorite varieties.
* Culinary Creativity: Don’t limit yourself to just using Malabar Spinach in salads. Try adding it to soups, stews, stir-fries, or even smoothies for a nutritional boost.
We wholeheartedly encourage you to give this DIY trick a try. It’s easier than you might think, and the rewards are well worth the effort. Imagine stepping out into your garden and harvesting a handful of fresh, vibrant Malabar Spinach for your next meal. It’s a simple pleasure that can transform your cooking and connect you to the natural world.
Once you’ve embarked on your Malabar Spinach growing journey, we’d love to hear about your experience! Share your tips, tricks, and culinary creations with us in the comments below. Let’s build a community of Malabar Spinach enthusiasts and inspire others to grow their own food. Happy growing!
Frequently Asked Questions (FAQ)
What exactly is Malabar Spinach, and how is it different from regular spinach?
Malabar Spinach (Basella alba or Basella rubra) isn’t actually a true spinach, although it shares a similar flavor profile, especially when cooked. It’s a fast-growing, heat-loving vine native to tropical Asia. Unlike regular spinach, which thrives in cooler temperatures, Malabar Spinach flourishes in hot, humid climates. It’s also more mucilaginous, meaning it has a slightly thicker, almost slimy texture when cooked, similar to okra. This makes it a great thickening agent for soups and stews. Nutritionally, it’s packed with vitamins A and C, iron, and calcium. The leaves are thicker and more succulent than regular spinach, and the plant itself is a beautiful ornamental vine.
How long does it take for Malabar Spinach to grow from seed to harvest?
The time it takes for Malabar Spinach to grow from seed to harvest can vary depending on your climate and growing conditions. Generally, you can expect to start harvesting leaves about 60-70 days after sowing seeds. However, if you start with cuttings, you can significantly reduce this timeframe. Cuttings typically root within a week or two and can be ready for harvest in as little as 30-40 days. Remember to provide consistent moisture and warmth to encourage rapid growth.
What are the best growing conditions for Malabar Spinach?
Malabar Spinach thrives in warm, humid conditions with plenty of sunlight. It prefers well-drained soil that is rich in organic matter. Aim for at least 6-8 hours of direct sunlight per day. The ideal soil pH is between 6.0 and 7.5. Consistent watering is crucial, especially during hot, dry periods. Mulching around the base of the plant can help retain moisture and suppress weeds. Because it’s a vine, it needs a trellis, fence, or other support structure to climb on.
Can I grow Malabar Spinach in containers?
Yes, you can absolutely grow Malabar Spinach in containers! This is a great option for those with limited garden space. Choose a large container, at least 12 inches in diameter, to allow for adequate root growth. Use a high-quality potting mix that drains well. Provide a trellis or other support structure for the vine to climb on. Water regularly and fertilize every few weeks with a balanced fertilizer. Place the container in a sunny location that receives at least 6-8 hours of direct sunlight per day.
How do I harvest Malabar Spinach?
Harvesting Malabar Spinach is easy. Simply snip off the leaves and tender stems as needed. You can harvest individual leaves or entire stems. Regular harvesting encourages the plant to produce more leaves. Avoid harvesting more than one-third of the plant at a time to allow it to continue growing vigorously. The younger leaves are more tender and have a milder flavor than the older leaves.
What are some common pests and diseases that affect Malabar Spinach, and how can I prevent them?
Malabar Spinach is generally resistant to pests and diseases, but it can occasionally be affected by aphids, spider mites, or fungal diseases. To prevent pest infestations, inspect your plants regularly and remove any pests by hand or with a strong spray of water. Encourage beneficial insects, such as ladybugs, which prey on aphids and other pests. To prevent fungal diseases, ensure good air circulation around the plants and avoid overwatering. If you notice any signs of disease, remove the affected leaves immediately.
How do I save seeds from Malabar Spinach?
Saving seeds from Malabar Spinach is a straightforward process. Allow some of your plants to flower and produce seeds. The seeds will develop inside small, dark berries. Once the berries are fully ripe and have turned dark purple or black, harvest them and allow them to dry completely. You can then extract the seeds from the dried berries. Store the seeds in a cool, dry place in an airtight container. They should remain viable for several years.
Is Malabar Spinach safe to eat raw?
While Malabar Spinach is generally safe to eat raw, it’s best consumed in moderation. The raw leaves have a slightly mucilaginous texture and a mild, earthy flavor. Some people may find the texture unappealing. Cooking the leaves reduces the mucilaginous texture and enhances the flavor. If you choose to eat it raw, wash the leaves thoroughly and use them in salads or sandwiches.
Can I freeze Malabar Spinach for later use?
Yes, you can freeze Malabar Spinach for later use. Blanch the leaves in boiling water for 2-3 minutes, then immediately transfer them to an ice bath to stop the cooking process. Drain the leaves thoroughly and squeeze out any excess water. Pack the blanched leaves into freezer bags or containers and freeze them for up to 6 months.
What are some creative ways to use Malabar Spinach in cooking?
Malabar Spinach is a versatile ingredient that can be used in a variety of dishes. It can be used as a substitute for regular spinach in salads, soups, stews, stir-fries, and omelets. It’s also a great addition to smoothies and juices. In Indian cuisine, it’s often used in curries and dals. The mucilaginous texture makes it a great thickening agent for soups and stews. You can also use it to make pesto or saut茅 it with garlic and olive oil. Don’t be afraid to experiment and find your own favorite ways to use this delicious and nutritious green!

Leave a Comment