
Bitter Gourd Growing Setup: Ever dreamt of harvesting your own vibrant, bumpy bitter gourds right from your backyard? Imagine the satisfaction of serving up a dish made with ingredients you nurtured yourself! Well, stop dreaming and start doing! This DIY guide will unlock the secrets to creating the perfect bitter gourd growing setup, even if you’re a complete beginner.
Bitter gourd, also known as karela, isn’t just a vegetable; it’s a cultural icon in many Asian countries, deeply rooted in traditional medicine and cuisine for centuries. From India to China, it’s been celebrated for its health benefits and unique flavor. But let’s be honest, growing it can seem intimidating. That’s where this guide comes in!
Why do you need this DIY trick? Because store-bought bitter gourds often lack the freshness and flavor of homegrown ones. Plus, knowing exactly what goes into your food is a huge peace of mind. I’m going to show you how to build a simple, effective, and affordable bitter gourd growing setup that will have you harvesting delicious gourds in no time. Forget complicated gardening jargon; we’re keeping it simple, practical, and fun. Let’s get growing!
DIY Bitter Gourd Trellis: From Seed to Table!
Hey there, fellow gardeners! I’m so excited to share my tried-and-true method for growing bitter gourd (also known as karela) right in your backyard. Bitter gourd can be a bit finicky, but with the right setup, you’ll be harvesting these nutritious veggies in no time. The key? A sturdy and well-designed trellis. So, let’s dive into building a DIY bitter gourd trellis and getting those seeds sprouting!
Materials You’ll Need
Before we get started, let’s gather all the necessary materials. This will save you time and frustration later on.
* Wooden Posts: Four 8-foot wooden posts (4×4 inches is ideal for strength). These will be the main supports for your trellis.
* Chicken Wire or Garden Netting: A roll of chicken wire (1-inch mesh) or sturdy garden netting. I prefer chicken wire for its durability, but netting works well too. You’ll need enough to cover the area between your posts.
* Heavy-Duty Staples or Zip Ties: For attaching the chicken wire or netting to the wooden posts. Staples are more permanent, while zip ties offer more flexibility.
* Measuring Tape: Essential for accurate measurements.
* Level: To ensure your posts are perfectly vertical.
* Shovel or Post Hole Digger: For digging the holes for your posts. A post hole digger makes the job much easier!
* Concrete Mix (Optional): For setting the posts in concrete for extra stability, especially in windy areas.
* Gloves: To protect your hands.
* Safety Glasses: To protect your eyes, especially when using power tools.
* Hammer or Staple Gun: For attaching the chicken wire or netting. A staple gun is much faster and easier.
* Wire Cutters: For trimming the chicken wire or netting.
* Bitter Gourd Seeds: Of course! Choose a variety that suits your climate.
* Seed Starting Tray (Optional): For starting seeds indoors.
* Potting Mix: For starting seeds or transplanting seedlings.
* Gardening Soil: For planting the bitter gourd in the ground.
* Compost or Organic Fertilizer: To enrich the soil.
* Watering Can or Hose: For watering your plants.
Building the Trellis: Step-by-Step
This is where the fun begins! Follow these steps carefully to create a strong and functional trellis for your bitter gourd.
1. Planning and Measuring:
* First, decide where you want to place your trellis. Choose a sunny spot that gets at least 6-8 hours of direct sunlight per day.
* Measure the area where you want to build the trellis. I recommend a rectangular shape, about 6 feet long and 4 feet wide. This provides ample space for the bitter gourd vines to climb.
* Mark the four corners of your rectangle with stakes or flags.
2. Digging the Post Holes:
* Using your shovel or post hole digger, dig holes at each of the four marked corners.
* The holes should be at least 2 feet deep. This ensures that the posts are securely anchored in the ground.
* The width of the holes should be slightly wider than the posts to allow for easy placement and adjustment.
3. Setting the Posts:
* Place one wooden post into each hole.
* Use your level to ensure that each post is perfectly vertical. This is crucial for the stability of the trellis.
* If you’re using concrete, mix the concrete according to the manufacturer’s instructions. Pour the concrete into the holes around the posts, filling them to ground level.
* If you’re not using concrete, backfill the holes with soil, tamping it down firmly around the posts.
* Allow the concrete to cure for at least 24-48 hours before proceeding to the next step. This will give it time to harden and provide a solid foundation for the trellis.
4. Attaching the Chicken Wire or Netting:
* Once the posts are securely in place, it’s time to attach the chicken wire or netting.
* Start at one corner of the trellis and unroll the chicken wire or netting along the length of the posts.
* Use heavy-duty staples or zip ties to attach the chicken wire or netting to the posts.
* Make sure the chicken wire or netting is taut and secure. You don’t want it to sag or come loose.
* Continue attaching the chicken wire or netting to all four sides of the trellis, creating a complete enclosure.
* Use wire cutters to trim any excess chicken wire or netting.
5. Reinforcing the Trellis (Optional):
* For added stability, you can add horizontal supports to the trellis.
* Cut additional pieces of wood to fit between the posts, creating a frame around the top of the trellis.
* Attach these horizontal supports to the posts using screws or nails.
* This will help to prevent the trellis from swaying or collapsing in strong winds.
Planting Your Bitter Gourd
Now that your trellis is built, it’s time to plant your bitter gourd seeds or seedlings.
1. Starting Seeds (Optional):
* If you want to get a head start on the growing season, you can start your bitter gourd seeds indoors.
* Fill a seed starting tray with potting mix.
* Sow the seeds about 1/2 inch deep.
* Water gently and keep the soil moist.
* Place the tray in a warm, sunny location.
* The seeds should germinate in about 7-14 days.
2. Preparing the Soil:
* Whether you’re transplanting seedlings or planting seeds directly in the ground, it’s important to prepare the soil properly.
* Dig a hole at the base of the trellis for each plant.
* Amend the soil with compost or organic fertilizer to improve its fertility and drainage.
* Bitter gourd prefers well-drained soil that is rich in organic matter.
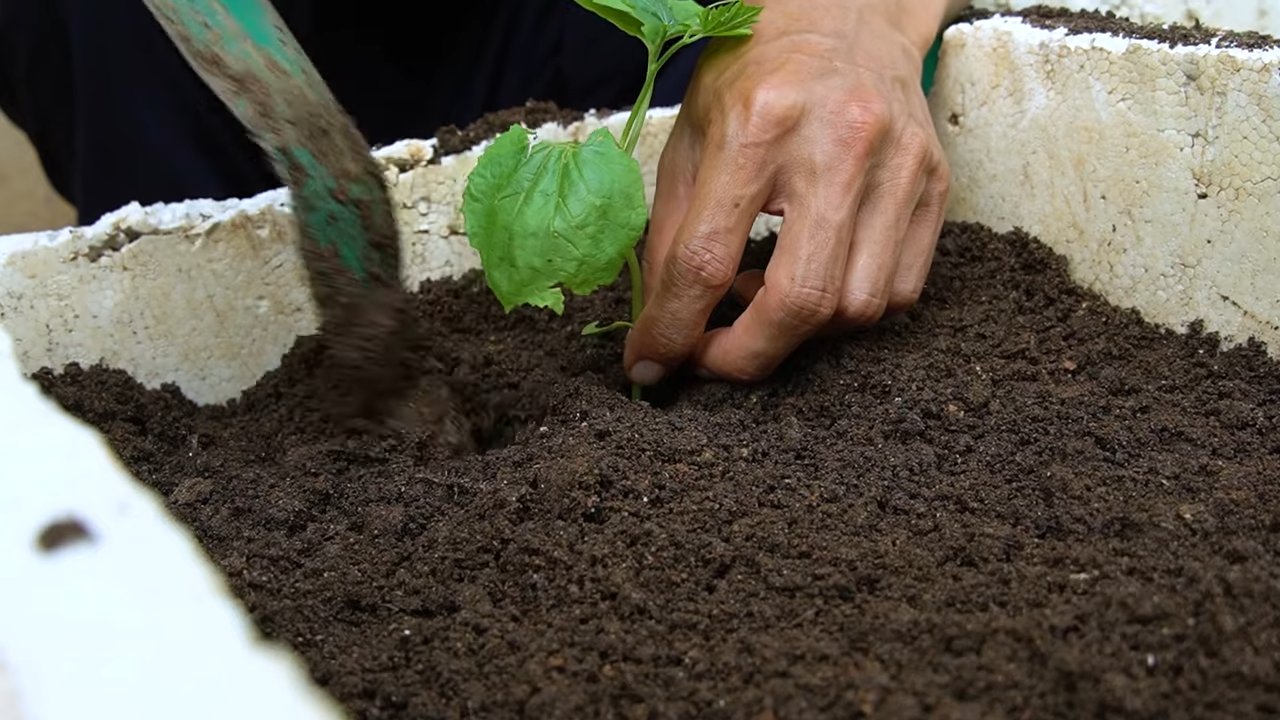
3. Planting the Seeds or Seedlings:
* If you’re transplanting seedlings, gently remove them from the seed starting tray and plant them in the prepared holes.
* If you’re planting seeds directly in the ground, sow them about 1/2 inch deep.
* Space the plants about 12-18 inches apart.
* Water the plants thoroughly after planting.
4. Training the Vines:
* As the bitter gourd vines grow, you’ll need to train them to climb the trellis.
* Gently guide the vines towards the chicken wire or netting and encourage them to wrap around it.
* You can use soft plant ties to secure the vines to the trellis if needed.
* Regularly check the vines and adjust them as they grow to ensure that they are properly supported.
Caring for Your Bitter Gourd
With the trellis built and the plants in the ground, it’s time to focus on providing the care they need to thrive.
1. Watering:
* Bitter gourd needs consistent watering, especially during hot, dry weather.
* Water deeply and regularly, ensuring that the soil stays moist but not waterlogged.
* Avoid overhead watering, as this can promote fungal diseases.
* Water early in the morning to allow the foliage to dry before nightfall.
2. Fertilizing:
* Feed your bitter gourd plants regularly with a balanced organic fertilizer.
* Apply the fertilizer according to the manufacturer’s instructions.
* You can also side-dress the plants with compost or well-rotted manure.
* Avoid over-fertilizing, as this can lead to excessive vegetative growth and reduced fruit production.
3. Pest and Disease Control:
* Keep an eye out for common pests such as aphids, spider mites, and squash bugs.
* Use organic pest control methods such as insecticidal soap or neem oil to control these pests.
* Prevent fungal diseases by providing good air circulation and avoiding overhead watering.
* Remove any diseased leaves or fruits promptly to prevent the spread of infection.
4. Pruning:
* Pruning can help to improve air circulation and promote fruit production.
* Remove any yellowing or dead leaves.
* Pinch off the tips of the vines to encourage branching.
* You can also remove some of the side shoots to direct more energy into fruit production.
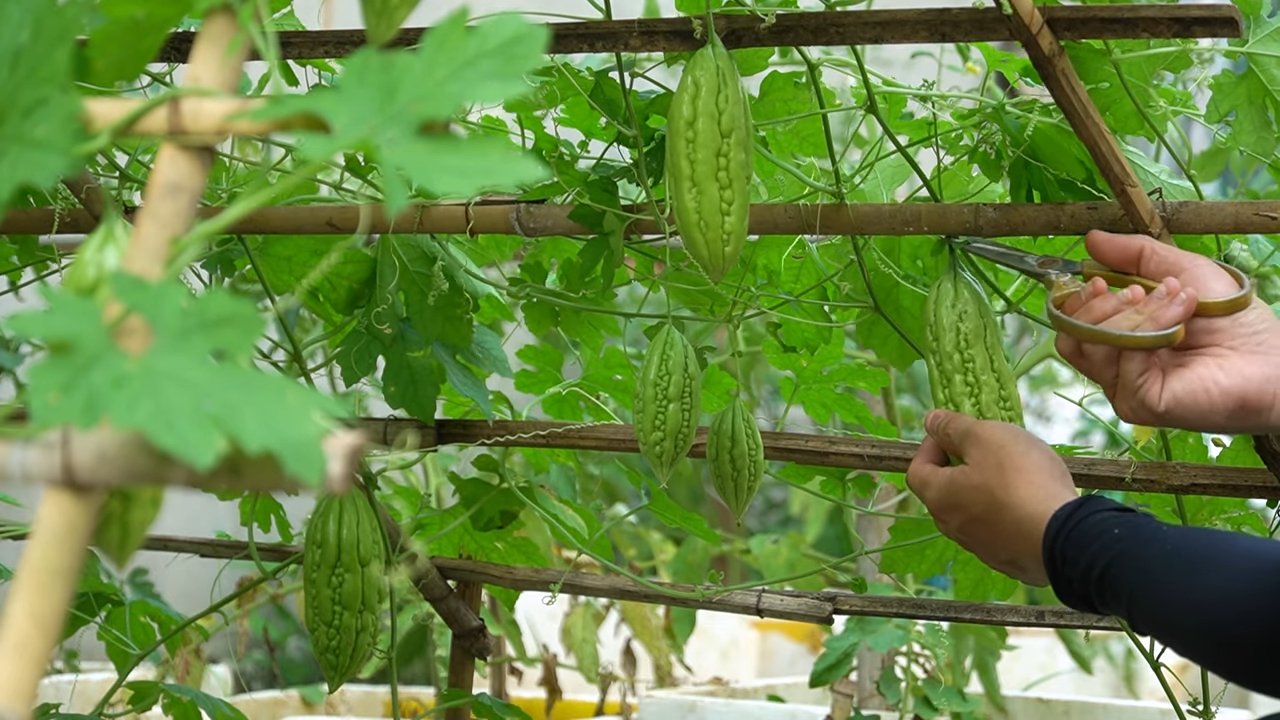
Harvesting Your Bitter Gourd
After all your hard work, it’s finally time to harvest your bitter gourd!
1. When to Harvest:
*
Conclusion
So, there you have it! Creating your own bitter gourd growing setup is not just a cost-effective alternative to store-bought options; it’s an empowering journey into understanding the needs of your plants and fostering a deeper connection with the food you grow. We’ve walked through the essential steps, from selecting the right location and materials to constructing a sturdy trellis that will support your bitter gourd vines as they reach for the sun.
But why is this DIY approach a must-try? Firstly, it allows for complete customization. You can tailor the size and design of your setup to perfectly fit your available space, whether you have a sprawling garden or a small balcony. This is particularly crucial for bitter gourd, a vigorous climber that demands ample vertical space to thrive. Secondly, you gain complete control over the materials used. Opting for sustainable and recycled materials not only reduces your environmental impact but also ensures that your plants are growing in a safe and healthy environment, free from harmful chemicals often found in mass-produced products.
Furthermore, the satisfaction of building something with your own hands is immeasurable. Watching your bitter gourd vines climb the trellis you painstakingly constructed, knowing that you played an integral role in their growth, is a reward in itself. It transforms gardening from a passive activity into an active and engaging experience.
Don’t be afraid to experiment with variations! Consider incorporating different trellis designs, such as A-frames or arches, to add visual interest to your garden. You could also explore companion planting, strategically placing herbs and flowers around your bitter gourd to deter pests and attract beneficial insects. For example, marigolds are known to repel nematodes, while basil can help ward off aphids.
Ready to embark on your bitter gourd growing adventure? We wholeheartedly encourage you to give this DIY trick a try. It’s a rewarding project that will not only provide you with a bountiful harvest of fresh, homegrown bitter gourd but also deepen your appreciation for the natural world.
And most importantly, we want to hear about your experiences! Share your photos, tips, and challenges in the comments below. Let’s build a community of passionate gardeners who are committed to growing their own food sustainably and creatively. Your insights could inspire others to take the plunge and discover the joys of DIY gardening. Remember, every successful garden starts with a single seed and a little bit of ingenuity. So, grab your tools, get your hands dirty, and let’s grow some bitter gourd!
Frequently Asked Questions (FAQ)
What type of trellis is best for bitter gourd?
The best type of trellis for bitter gourd is one that provides ample vertical space and sturdy support. Bitter gourd vines are vigorous climbers and can become quite heavy, so a strong and durable structure is essential. Popular options include:
* **A-frame trellis:** This type of trellis is easy to build and provides excellent support for heavy vines. It also allows for good air circulation, which can help prevent fungal diseases.
* **Arched trellis:** An arched trellis adds a decorative touch to your garden while providing ample climbing space for bitter gourd.
* **Vertical netting:** This is a simple and cost-effective option, especially for smaller gardens. Attach netting to sturdy posts or a fence to create a vertical climbing surface.
* **Bamboo trellis:** Bamboo is a sustainable and readily available material that can be used to create a variety of trellis designs.
Ultimately, the best trellis for you will depend on your available space, budget, and aesthetic preferences.
How much sunlight does bitter gourd need?
Bitter gourd requires at least 6-8 hours of direct sunlight per day to thrive. Choose a location in your garden that receives full sun exposure for optimal growth and fruit production. If you live in a particularly hot climate, providing some afternoon shade can help prevent the leaves from scorching.
What kind of soil is best for bitter gourd?
Bitter gourd prefers well-drained, fertile soil that is rich in organic matter. Amend your soil with compost or aged manure before planting to improve its drainage and nutrient content. A slightly acidic to neutral soil pH (6.0-7.0) is ideal.
How often should I water bitter gourd?
Water bitter gourd regularly, especially during hot and dry weather. Keep the soil consistently moist but not waterlogged. Water deeply at the base of the plant to encourage strong root growth. Avoid overhead watering, as this can increase the risk of fungal diseases.
How do I fertilize bitter gourd?
Fertilize bitter gourd every 2-3 weeks with a balanced fertilizer or a fertilizer specifically formulated for vegetables. Follow the instructions on the fertilizer package carefully. You can also supplement with organic fertilizers such as compost tea or fish emulsion.
When should I harvest bitter gourd?
Harvest bitter gourd when the fruits are still young and tender, typically about 2-3 weeks after flowering. The fruits should be firm and have a bright green color. Overripe fruits will become bitter and tough. Use a sharp knife or pruning shears to cut the fruits from the vine, leaving a small stem attached.
How can I prevent pests and diseases in my bitter gourd plants?
To prevent pests and diseases in your bitter gourd plants, practice good garden hygiene. Remove any dead or diseased leaves and debris from around the plants. Provide good air circulation to prevent fungal diseases. Monitor your plants regularly for signs of pests such as aphids, spider mites, and squash bugs. Use organic pest control methods such as insecticidal soap or neem oil to control infestations. Companion planting with herbs and flowers can also help deter pests and attract beneficial insects.
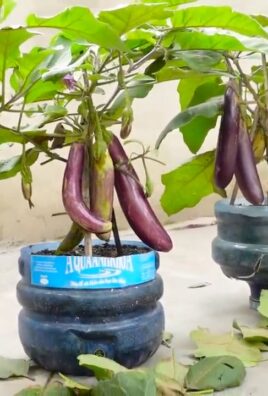
Can I grow bitter gourd in containers?
Yes, you can grow bitter gourd in containers, but you will need a large container (at least 15-20 gallons) to accommodate the plant’s extensive root system. Choose a container with good drainage holes and use a well-draining potting mix. Provide a sturdy trellis for the vines to climb on. Water and fertilize regularly, as container-grown plants tend to dry out and deplete nutrients more quickly than those grown in the ground.
What are some common problems when growing bitter gourd?
Some common problems when growing bitter gourd include:
* **Poor germination:** Ensure that you are using fresh seeds and that the soil temperature is warm enough for germination.
* **Lack of fruit production:** This can be caused by insufficient sunlight, poor pollination, or nutrient deficiencies.
* **Pest infestations:** Monitor your plants regularly for pests and take action promptly to control infestations.
* **Fungal diseases:** Provide good air circulation and avoid overhead watering to prevent fungal diseases.
By addressing these common problems, you can increase your chances of a successful bitter gourd harvest.
How do I save seeds from my bitter gourd plants?
To save seeds from your bitter gourd plants, allow a few fruits to mature fully on the vine. The fruits will turn orange or yellow and become soft. Remove the seeds from the fruits and wash them thoroughly to remove any pulp. Spread the seeds out on a paper towel to dry completely. Store the dried seeds in an airtight container in a cool, dark, and dry place.
Leave a Comment