
Easy Collard Greens Growing – that’s what we’re all about today! Have you ever dreamed of stepping outside your back door and harvesting fresh, vibrant collard greens for a delicious, healthy meal? I know I have! It’s more attainable than you might think, and this guide is packed with simple DIY tricks to make it a reality, even if you don’t have a sprawling garden.
Collard greens have a rich history, deeply rooted in Southern American cuisine and culture. They’re more than just a vegetable; they’re a symbol of resilience, resourcefulness, and community. For generations, families have relied on collard greens for their nutritional value and comforting flavor. But you don’t have to be a seasoned gardener to enjoy them.
In today’s fast-paced world, knowing how to grow your own food, especially something as nutritious and versatile as collard greens, is incredibly empowering. Not only does it save you money at the grocery store, but it also connects you to the earth and provides you with the freshest, most flavorful ingredients imaginable. Plus, let’s be honest, there’s a certain satisfaction that comes from nurturing a plant from seed to table. So, if you’re looking for a rewarding and practical DIY project, learning easy collard greens growing techniques is the perfect place to start. Let’s dive in and unlock the secrets to a bountiful harvest!
Growing Collard Greens: A Beginner’s Guide to Delicious, Homegrown Greens
Hey there, fellow gardening enthusiasts! I’m so excited to share my experience with growing collard greens. These leafy greens are not only packed with nutrients but are also surprisingly easy to cultivate, even if you’re a complete beginner like I was! Get ready to enjoy fresh, homegrown collard greens in your favorite Southern dishes.
Choosing Your Collard Green Variety
Before we dive into the nitty-gritty, let’s talk about choosing the right collard green variety for your garden. There are several options available, each with its own unique characteristics. Here are a few popular choices:
* Georgia Southern: This is a classic variety known for its large, smooth leaves and excellent flavor. It’s also quite heat-tolerant, making it a great choice for warmer climates.
* Vates: Vates is a compact variety that’s perfect for smaller gardens. It produces dark green, slightly crumpled leaves with a mild flavor.
* Champion: If you’re looking for a fast-growing variety, Champion is a great option. It matures quickly and produces tender, flavorful leaves.
* Top Bunch: This variety is known for its upright growth habit, making it easy to harvest. It produces large, dark green leaves with a slightly sweet flavor.
* Blue Max: This is a hybrid variety known for its disease resistance and high yields. It produces blue-green leaves with a mild, slightly nutty flavor.
I personally love growing Georgia Southern because of its classic flavor and heat tolerance, but feel free to experiment and find the variety that works best for you!
Preparing Your Garden Bed
Collard greens thrive in well-drained soil that’s rich in organic matter. Here’s how I prepare my garden bed for planting:
* Choose a sunny location: Collard greens need at least 6 hours of sunlight per day.
* Test your soil: A soil test will help you determine the pH level and nutrient content of your soil. Collard greens prefer a soil pH between 6.0 and 7.0. You can purchase a soil test kit at most garden centers or send a sample to your local agricultural extension office.
* Amend your soil: Based on your soil test results, amend your soil with compost, aged manure, or other organic matter to improve its fertility and drainage. I usually add a generous amount of compost to my garden bed before planting.
* Till or dig the soil: Loosen the soil to a depth of at least 12 inches to allow for good root development. Remove any rocks, weeds, or debris.
* Create raised beds (optional): Raised beds can improve drainage and warm up the soil more quickly in the spring. If you live in an area with heavy clay soil, raised beds are highly recommended.
Planting Your Collard Greens
You can start collard greens from seed or purchase transplants from a garden center. I’ve done both, and I find that starting from seed is more economical, but transplants give you a head start.
Starting from Seed
* Sow seeds indoors (optional): If you want to get a head start on the growing season, you can sow seeds indoors 6-8 weeks before the last expected frost. Use seed-starting trays or small pots filled with seed-starting mix. Keep the soil moist and warm (around 70-75°F) until the seeds germinate.
* Direct sow seeds outdoors: Once the soil has warmed up to at least 60°F, you can direct sow seeds outdoors. Plant seeds ½ inch deep and 1-2 inches apart in rows that are 18-24 inches apart.
* Thin seedlings: Once the seedlings have emerged and have a few true leaves, thin them to 12-18 inches apart. This will give them enough space to grow and mature.
Planting Transplants
* Harden off transplants: If you purchased transplants from a garden center, it’s important to harden them off before planting them in your garden. This means gradually exposing them to outdoor conditions over a period of 7-10 days. Start by placing them in a sheltered location for a few hours each day, gradually increasing the amount of time they spend outdoors.
* Plant transplants: Dig holes that are slightly larger than the root balls of the transplants. Gently remove the transplants from their containers and place them in the holes. Backfill with soil and water thoroughly. Space transplants 12-18 inches apart in rows that are 18-24 inches apart.
Caring for Your Collard Greens
Collard greens are relatively low-maintenance plants, but they do require some basic care to thrive.
* Watering: Water your collard greens regularly, especially during dry periods. Aim to keep the soil consistently moist but not waterlogged. I usually water deeply once or twice a week, depending on the weather.
* Fertilizing: Collard greens are heavy feeders, so they benefit from regular fertilization. Apply a balanced fertilizer (such as 10-10-10) every 4-6 weeks. You can also side-dress your plants with compost or aged manure.
* Weeding: Keep your garden bed free of weeds, as they can compete with your collard greens for nutrients and water. Hand-pull weeds regularly or use a hoe to cultivate the soil.
* Pest control: Collard greens can be susceptible to a few common pests, such as cabbage worms, aphids, and flea beetles. Inspect your plants regularly for signs of pests and take action if necessary. I prefer to use organic pest control methods, such as insecticidal soap or neem oil. You can also cover your plants with row covers to prevent pests from reaching them.
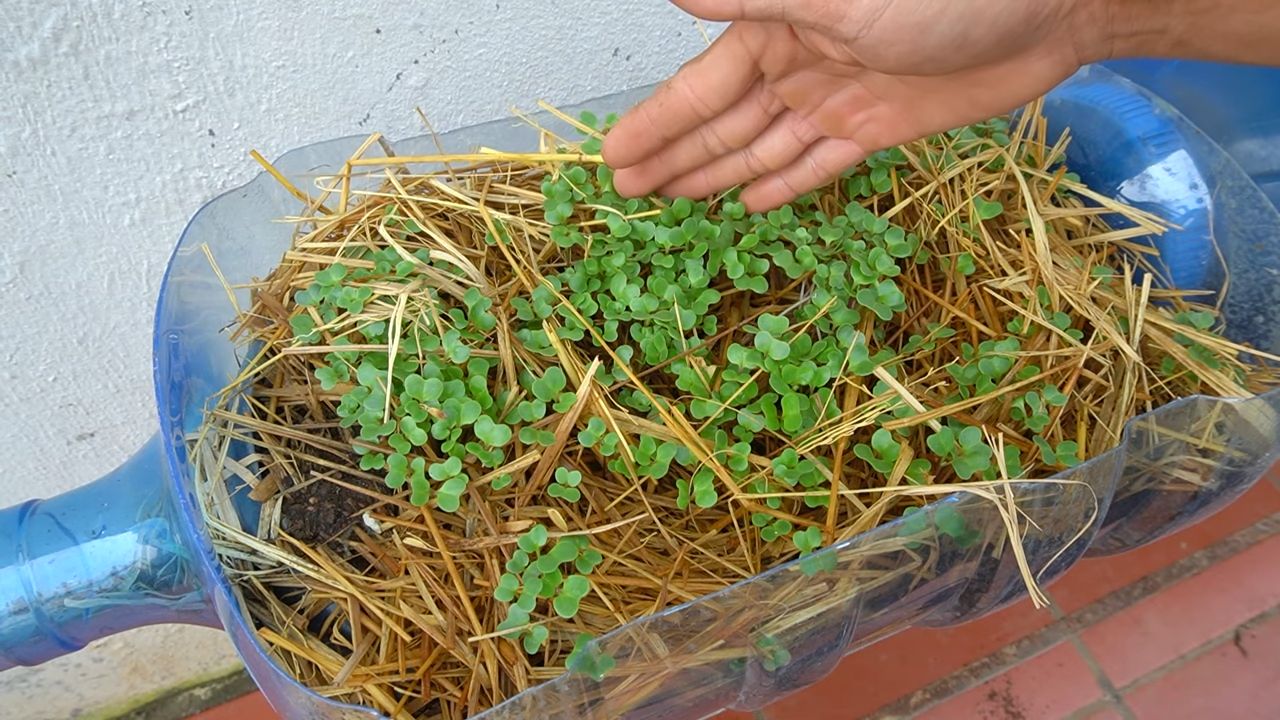
* Mulching: Apply a layer of mulch around your collard greens to help retain moisture, suppress weeds, and regulate soil temperature. I like to use straw, shredded leaves, or wood chips as mulch.
Harvesting Your Collard Greens
You can start harvesting collard greens once the leaves are large enough to eat, usually about 6-8 weeks after planting.
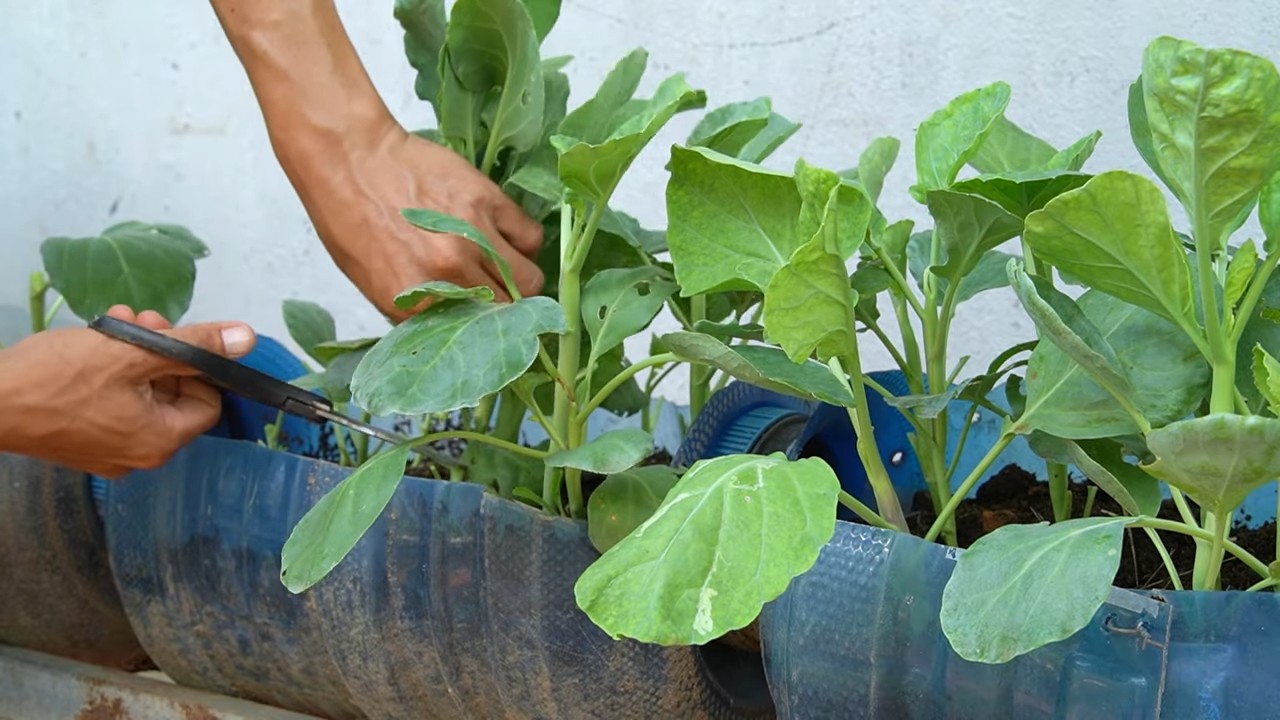
* Harvest outer leaves: Harvest the outer leaves first, as they are the oldest and most mature. Leave the inner leaves to continue growing.
* Use a sharp knife or scissors: Cut the leaves off at the base of the plant, being careful not to damage the stem.
* Harvest regularly: Harvesting regularly will encourage the plant to produce more leaves.
* Store harvested leaves: Store harvested collard greens in the refrigerator for up to a week. Wash and dry the leaves thoroughly before storing them. I like to wrap them in a damp paper towel and place them in a plastic bag.
Dealing with Common Problems
Even with the best care, you might encounter some problems while growing collard greens. Here are a few common issues and how to address them:
* Yellowing leaves: Yellowing leaves can be a sign of nutrient deficiency, overwatering, or disease. Check your soil pH and nutrient levels, and adjust your watering schedule accordingly. If you suspect a disease, consult your local agricultural extension office for advice.
* Holes in leaves: Holes in leaves are usually caused by pests, such as cabbage worms or flea beetles. Inspect your plants regularly for signs of pests and take action if necessary.
* Bolting: Bolting occurs when the plant prematurely flowers and goes to seed. This can happen if the plant is stressed by heat, drought, or lack of nutrients. To prevent bolting, provide your plants with adequate water and fertilizer, and choose heat-tolerant varieties.
* Clubroot: Clubroot is a soilborne disease that can cause swollen, distorted roots. To prevent clubroot, rotate your crops regularly and avoid planting collard greens in the same location year after year. You can also amend your soil with lime to raise the pH to 7.0 or higher.
Enjoying Your Homegrown Collard Greens
Now for the best part: enjoying the fruits (or rather, leaves) of your labor! Collard greens are incredibly versatile and can be used in a variety of dishes. Here are a few of my favorite ways to prepare them:
* Southern-style collard greens: This is a classic dish that’s made by simmering collard greens with ham hocks or bacon.
* Sautéed collard greens: Sauté collard greens with garlic, olive oil, and a pinch of red pepper flakes for a quick and easy side dish.
* Collard green wraps: Use large collard green leaves as wraps for your favorite fillings, such as rice, beans, and vegetables.
* Collard green chips: Bake collard green leaves in the oven for a healthy and delicious snack.
* Collard greens in smoothies: Add a handful of collard greens to your smoothies for a boost of nutrients.
Growing collard greens is a rewarding experience that allows you to enjoy fresh, healthy greens right from your own backyard. With a little bit of planning and care, you can have a bount
Conclusion
So, there you have it! Growing your own collard greens is not only easier than you might think, but it’s also incredibly rewarding. Imagine stepping out into your backyard and harvesting fresh, vibrant greens for a delicious and nutritious meal. Forget the wilted, overpriced bunches at the grocery store; with a little effort, you can have a constant supply of these Southern staples right at your fingertips.
This DIY trick for **easy collard greens growing** truly is a game-changer. It simplifies the process, making it accessible to even the most novice gardener. The satisfaction of nurturing your own food from seed to table is unparalleled, and the flavor of homegrown collard greens is simply unmatched. They’re sweeter, more tender, and bursting with freshness that you just can’t find in store-bought varieties.
But don’t just take our word for it! We encourage you to give this method a try. Experiment with different varieties of collard greens to find your favorite. Some popular choices include ‘Georgia Southern,’ known for its heat tolerance, ‘Champion,’ which boasts excellent disease resistance, and ‘Vates,’ a compact variety perfect for smaller gardens. You can also adjust the spacing between plants to suit your garden’s layout and your personal preferences. Consider companion planting with herbs like rosemary or thyme to deter pests naturally.
Furthermore, think about succession planting. By sowing seeds every few weeks, you can ensure a continuous harvest throughout the growing season. This is especially useful if you enjoy collard greens regularly and want to avoid a glut of produce all at once. You can also explore different methods of preserving your harvest, such as freezing, canning, or even dehydrating the leaves for later use in soups and stews.
The possibilities are endless! The key is to start small, be patient, and learn from your experiences. Don’t be afraid to experiment and adapt the techniques to suit your specific climate and growing conditions. Remember, gardening is a journey, not a destination.
We’re confident that once you taste the difference between homegrown and store-bought collard greens, you’ll be hooked. So, grab your seeds, prepare your soil, and get ready to embark on a rewarding gardening adventure.
And most importantly, we want to hear about your experiences! Share your tips, tricks, and triumphs in the comments below. Let us know what varieties you’ve tried, what challenges you’ve faced, and what delicious dishes you’ve created with your homegrown collard greens. Your feedback will not only help other readers but also inspire us to continue sharing valuable gardening information. Let’s build a community of passionate gardeners who are dedicated to growing their own fresh, healthy food. Happy gardening!
Frequently Asked Questions (FAQ)
What is the best time of year to plant collard greens?
The ideal time to plant collard greens depends on your climate. In warmer regions with mild winters, you can plant them in the fall for a winter harvest. In colder regions, plant them in the spring after the last frost for a summer or fall harvest. Collard greens can tolerate light frosts, which can actually improve their flavor. For a continuous harvest, consider succession planting, sowing seeds every few weeks.
How much sunlight do collard greens need?
Collard greens thrive in full sun, requiring at least 6 hours of direct sunlight per day. However, they can tolerate partial shade, especially in hotter climates. If you’re growing them in a container, make sure to place it in a sunny location. Insufficient sunlight can result in leggy plants with poor leaf development.
What type of soil is best for growing collard greens?
Collard greens prefer well-drained, fertile soil with a pH between 6.0 and 7.5. Amend the soil with compost or other organic matter to improve its structure and fertility. Avoid heavy clay soils, as they can become waterlogged and hinder root growth. A soil test can help you determine the pH and nutrient levels of your soil.
How often should I water collard greens?
Water collard greens regularly, especially during dry periods. Aim to keep the soil consistently moist but not waterlogged. Water deeply at the base of the plants, avoiding wetting the leaves, which can promote fungal diseases. Mulching around the plants can help retain moisture and suppress weeds.
What are some common pests and diseases that affect collard greens?
Common pests that affect collard greens include aphids, cabbage worms, flea beetles, and slugs. Diseases include black rot, downy mildew, and clubroot. Regularly inspect your plants for signs of pests or diseases. Use organic pest control methods, such as insecticidal soap or neem oil, to control pests. Ensure good air circulation and avoid overhead watering to prevent diseases. Crop rotation can also help reduce the risk of soilborne diseases.
How do I harvest collard greens?
You can begin harvesting collard greens when the leaves are about 6-8 inches long. Harvest the outer leaves first, leaving the inner leaves to continue growing. This allows you to harvest continuously over a longer period. Use a sharp knife or scissors to cut the leaves close to the stem.
Can I grow collard greens in containers?
Yes, collard greens can be successfully grown in containers. Choose a large container, at least 12 inches in diameter, with drainage holes. Use a high-quality potting mix and provide regular watering and fertilization. Container-grown collard greens may require more frequent watering than those grown in the ground.
How do I fertilize collard greens?
Collard greens are heavy feeders and benefit from regular fertilization. Apply a balanced fertilizer, such as 10-10-10, at planting time and then side-dress with nitrogen fertilizer every few weeks during the growing season. Alternatively, you can use organic fertilizers, such as compost tea or fish emulsion.
Are collard greens nutritious?
Yes, collard greens are incredibly nutritious. They are an excellent source of vitamins A, C, and K, as well as folate, calcium, and fiber. They are also rich in antioxidants, which can help protect against chronic diseases.
How do I store collard greens after harvesting?
Store collard greens in the refrigerator in a plastic bag or container. They will keep for about a week. Wash the leaves just before using them. You can also freeze collard greens for longer storage. Blanch the leaves in boiling water for a few minutes, then cool them in ice water before freezing.
Can I eat the stems of collard greens?
Yes, the stems of collard greens are edible, but they can be tough. Remove the tough outer layer of the stems before cooking. You can chop the stems and add them to soups, stews, or stir-fries.
What are some different ways to cook collard greens?
Collard greens can be cooked in a variety of ways. They are often braised with ham hocks or bacon for a traditional Southern dish. They can also be steamed, sautéed, or added to soups and stews. Collard greens can also be eaten raw in salads, but they may be slightly bitter.
How can I reduce the bitterness of collard greens?
Some people find collard greens to be slightly bitter. To reduce the bitterness, you can blanch the leaves in boiling water for a few minutes before cooking. You can also add an acid, such as vinegar or lemon juice, to the cooking water.
What are some good companion plants for collard greens?
Good companion plants for collard greens include herbs like rosemary, thyme, and sage, which can help deter pests. Other beneficial companion plants include onions, garlic, and marigolds. Avoid planting collard greens near other members of the brassica family, such as cabbage, broccoli, and cauliflower, as they can attract the same pests and diseases.


Leave a Comment